How Long to Cook a 20-Pound Turkey: Timing, Temps, and Tips
Learn precise roasting times, temperatures, and doneness tests for a 20-pound turkey. This guide from Cooking Tips covers safe temps, resting, stuffing considerations, and practical tips to ensure a juicy, safely cooked holiday bird.

To cook a 20-pound turkey, roast at 325°F for roughly 4 to 4.5 hours, starting breast-side up, then rest 20–30 minutes before carving. Check that the breast reaches 165°F and the thigh 175°F for safe, juicy meat. Guidance varies by oven and stuffing, so use a thermometer and account for 15–30 minutes residual cooking time.
Why size matters for roasting a 20-pound turkey
The size of your bird influences roasting time, heat distribution, and how you manage browning. A 20-pound turkey will take longer to reach safe internal temperatures than a smaller bird, and hotter spots in the oven can lead to uneven cooking. According to Cooking Tips, larger birds require patience with consistent oven temperature and careful monitoring. Planning for a bit of extra resting time helps the meat reabsorb juices and stay moist. In practice, you’ll benefit from using a rack inside a sturdy roasting pan to promote air flow around the entire bird and to prevent the bottom from drying out. This setup also makes basting more effective without overhandling the meat.
Choosing the right size is about planning for servings and oven capability. If your oven runs small or you’re cooking multiple dishes, consider a 12–14 pound turkey as an alternative to keep timing predictable. For very large gatherings, a two-turkey plan (one 12–14 lb and one 6–8 lb) can simplify timing while still delivering safety and flavor. The Cooking Tips team recommends mapping your oven space and any warming tactics in advance to avoid last-minute scrambling.
Safe temperatures and doneness targets
Food safety guides consistently call for a final internal temperature of 165°F in the breast and 175°F in the thigh. For a 20-pound bird, these targets ensure pathogens are neutralized without drying out the meat. If you stuff the cavity, the center of the stuffing should also reach 165°F, which typically lengthens total cooking time. Remember that carryover cooking can raise temperatures by 5–10°F once you remove the turkey from the oven, so you may pull it from heat slightly early and let carryover finish the job. Maintaining steady oven heat helps keep these targets from drifting.
Temperature milestones and how to measure
Accuracy matters, so use a reliable digital probe thermometer inserted into the thickest part of the breast (center, not touching bone) and another probe into the thigh. Do not rely on the wing tip or wing joint for doneness. Check temperatures at the 2- to 3-hour mark and again every 30–45 minutes thereafter as the bird approaches the target range. If you notice uneven browning or an overly dark breast early in the roast, tent loosely with aluminum foil to shield the breast while the rest of the turkey finishes.
Roasting methods: oven-only vs covered pans
Roasting without a lid gives you a crisp, brown skin, which many home cooks prefer. A rack helps air circulate and prevents the bottom from steaming. If your turkey is browning too quickly, you can cover the breast with foil or switch to a tented cover for the final 30–60 minutes. For very large birds, some cooks choose a two-zone approach: start uncovered in a hotter part of the oven for browning, then move to a cooler zone to finish. If you’re using a Dutch oven or a large roasting pan with a tight lid, you’ll retain more moisture, but you’ll trade some of that browning for juiciness.
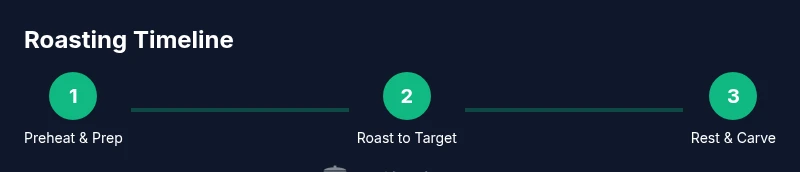
Step-by-step timing chart for a 20-pound turkey
Phase 1 (0–60 minutes): Preheat to 325°F and place the turkey breast-side up on a rack in the roasting pan. The goal is starting heat to wake up the meat and begin browning. Phase 2 (60–210 minutes): Maintain 325°F, rotate the pan if your oven has hot spots, and begin checking the breast and thigh temperatures. Phase 3 (210–300 minutes): At this stage, the temperature should be nearing the target. If the breast is reaching 160–162°F, start tenting to protect the breast color while allowing the thigh to rise toward 175°F. Phase 4 (final 30–60 minutes): Finish until both sites hit the target temperatures and the juices run clear on the fork. Phase 5 (resting): Remove from oven and let rest, tented loosely, for 20–30 minutes before carving.
Resting and carving for maximum juiciness
Resting is where the magic happens: juices redistribute, making every slice tender and flavorful. Cover the turkey loosely with foil for 20–30 minutes after removing it from the oven. Carve breast meat against the grain for tenderness, and slice the thighs with a clean, steady stroke. A well-rested turkey is easier to portion and serves more evenly across plates.
Common mistakes and how to avoid them
Common errors include removing the turkey too early, overbasting, or not letting the meat rest. To avoid dryness, aim for accurate thermometer readings instead of relying on time alone. Don’t stuff the bird if you’re unsure of proper thermometer placement in stuffing; stuffing requires its own safe internal temperature. Always use fresh or fully thawed meat—frozen turkey should be fully defrosted in the fridge before roasting to ensure even heat distribution.
Tips for juices, stuffing, and skin color
Butter or oil the skin for browning and add aromatics under the skin to boost flavor. If you’re stuffing, cook the stuffing separately or stuff lightly to reduce cooking time variability. For crisp skin, dry the skin inside and out before applying fat, then roast uncovered for the majority of the time. If your skin browns too rapidly, loosely cover with foil to prevent scorching while the rest of the heat finishes the bird.
Food safety and make-ahead options
Plan for leftovers by cooling the turkey safely within two hours and refrigerating promptly in shallow containers. Slice or portion meat to freeze for longer storage. If timing is tight, you can roast the bird to 160–162°F in the breast and finish it in a warm oven or on the counter using carryover cooking for a few extra minutes. Remember to label and date leftovers for safe storage.
Quick-start checklist for meal planning
- Confirm turkey size and thaw status; allow 24 hours for every 4–5 pounds in the fridge (adjust for real-time readiness).
- Preheat to 325°F and prepare a rack for even heat distribution.
- Gather a digital thermometer(s) and timer; plan to check temperatures after the first hour.
- Prepare stuffing separately if possible or avoid overstuffing the cavity.
- Allow a 20–30 minute rest before carving for juicier meat.
Troubleshooting guide
If the turkey finishes early, tent with foil and place in a warmed oven or on a covered platter to maintain temperature without overcooking. If the breast is pale or underdone while the thighs are done, give the breast more time in a cooler zone and consider tenting. If the tray juices are too thin, a splash of stock or wine during carving can rescue moisture without cooling the meat too much.
Tools & Materials
- Roasting pan with rack(Heavy-duty metal; ensure it fits your oven and bird comfortably)
- Digital meat thermometer(Probe-style that can stay in the turkey while roasting)
- Aluminum foil(Loosely tent the breast if it browns too quickly)
- Carving knife or sharp chef's knife(Long blade; keep it sharp for clean slices)
- Kitchen timer(Helps track phases and resting period)
- Meat thermometer (instant-read)(Useful for quick checks away from the main probe)
Steps
Estimated time: Total active time: ~3.5–4 hours; resting time: 20–30 minutes; overall plan: ~4.5–5 hours
- 1
Thaw and pat dry
If the turkey isn’t already thawed, place it in the fridge well ahead of time (roughly 24 hours for every 4–5 pounds). Remove the neck and giblets, then pat the bird dry with paper towels to promote browning. A dry skin surface contributes to a crisper finish.
Tip: Pat the skin dry again just before applying fat or seasoning to maximize browning. - 2
Season and prepare
Rub the skin with melted butter or oil and season generously with salt and spices. If you’re using aromatics, tuck them under the skin for even flavor distribution. A light coating helps the skin render and color evenly.
Tip: Under-skin butter or oil improves flavor delivery into the breast meat. - 3
Rack and pan setup
Place the turkey breast-side up on a rack inside a sturdy roasting pan. The rack keeps heat circulating around the bird and prevents soggy skin on the bottom. Check that the thermometer probe can reach the breast without hitting bone.
Tip: Elevate the turkey to promote even browning all around. - 4
Preheat and position
Preheat the oven to 325°F (165°C). Position the rack in the middle of the oven for an even heat profile. If your oven has hot spots, rotate the pan halfway through cooking.
Tip: A consistent oven temperature reduces the risk of overcooking the breast before the thighs are done. - 5
Roast and monitor
Roast with the breast up and avoid opening the oven frequently. Begin checking temperatures around the 2-hour mark and again every 30–45 minutes as it nears completion. If the breast nears 160–162°F early, you can tent the breast to slow browning.
Tip: Keep the thigh temperature in view; don’t rely on the breast alone. - 6
Finish and rest
When the breast hits about 165°F and the thigh 175°F, remove the turkey and let it rest for 20–30 minutes. Resting lets juices redistribute for easier carving and juicier slices.
Tip: Tenting loosely prevents moisture loss while cooling. - 7
Carve and serve
Carve breast against the grain in thin slices and separate thighs with a clean cut. Arrange slices on a warm platter and serve promptly to preserve texture and moisture.
Tip: Keep carved portions warm by covering with foil while you finish carving the rest. - 8
Handle leftovers safely
Cool leftovers quickly in shallow containers within two hours and refrigerate. Leftover turkey freezes well for 2–6 months depending on storage conditions.
Tip: Label containers with date for easy rotation in future meals.
Quick Answers
What is the recommended oven temperature for a 20-pound turkey?
The standard temperature is 325°F (165°C). This provides a balanced cook that yields safe doneness without drying the meat. If you’re using a different cooking method or an electric roaster, adjust accordingly and monitor with a thermometer.
Set your oven to 325°F and check temperatures with a probe thermometer to stay on target.
How long does it take to cook a 20-pound turkey at 325°F?
A general guideline is about 4 to 4.5 hours for an unstuffed 20-pound turkey. Stuffing can add 20–40 minutes or more. Always confirm doneness with a thermometer for safety.
Plan for roughly four to four and a half hours, then verify with a thermometer.
Can I brine a 20-pound turkey?
Yes, brining can help retain moisture. If you brine, rinse and dry the turkey before roasting to avoid overly salty meat, and adjust the seasoning on the skin accordingly.
Brining can improve moisture; rinse well after brining and pat dry before roasting.
Should I stuff the turkey, and how does it affect timing?
Stuffing inside the cavity increases cooking time and can lead to uneven doneness. If you stuff, ensure the center of the stuffing reaches 165°F and consider cooking stuffing separately to control timing.
Stuffing can extend cooking time; cook stuffing separately if possible.
What if the turkey browns too quickly?
Tent the breast with foil to slow browning while the rest of the bird finishes cooking. Remove the foil near the end to regain color if needed.
If browning is too fast, loosely tent with foil.
How can I tell the turkey is done without a thermometer?
Juices should run clear when the thickest part of the thigh is pierced, and the meat should be opaque. However, a thermometer provides a precise check and is recommended for safety.
Rely on a thermometer for best accuracy; juices should run clear only as a backup check.
Watch Video
Top Takeaways
- Roast a 20-pound turkey at 325°F for best results.
- Aim for 165°F breast and 175°F thigh for safety and juiciness.
- Rest 20–30 minutes before carving for juicy slices.
- Use a rack and thermometer for even cooking.
- Prepare a plan to manage stuffing, browning, and leftovers.