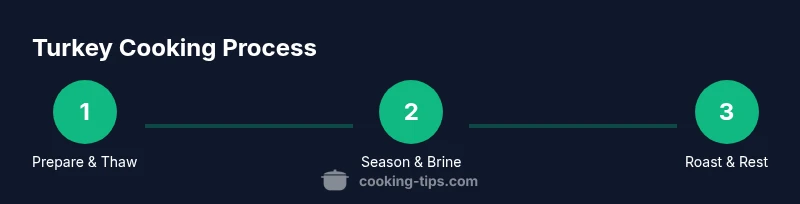
How to Cook Turkey: A Step-by-Step Guide
Learn safe, reliable methods to cook turkey at home with this step-by-step guide from Cooking Tips. From thawing to roasting, get expert tips.

If you ask how can i cook turkey, use a safe, reliable plan. Thaw completely, choose a method (roast, brine, or slow-cook), and cook to 165°F (74°C) in the thickest part. Pat dry, season well, and let the meat rest 15–20 minutes before carving. According to Cooking Tips, plan about 13–15 minutes per pound when roasting.
Why Proper Turkey Cooking Matters
Cooking a turkey is more than just serving a holiday centerpiece; it’s about safety, texture, and flavor. Improper handling can lead to foodborne illness, while overcooking dries the meat and robs you of juiciness. The two main safety concerns are preventing cross-contamination and reaching a safe internal temperature throughout the bird. The Cooking Tips team emphasizes planning ahead—thawing, brining (optional), and resting—because good prep yields a evenly browned, moist turkey that slices cleanly. In addition, using a reliable thermometer, robust roasting pan, and proper rack helps heat circulate and prevents the bottom from drying out. Finally, remove giblets and wash hands after handling raw poultry. According to Cooking Tips analysis, pre-planning your warming sequence reduces last-minute stress.
Essential Techniques: Thawing, Brining, and Flavoring
Thawing is the foundation of even cooking. Do not cook a frozen bird. In the refrigerator, allow about 24 hours for every 4-5 pounds, or use a cold-water method if you’re short on time, changing the water every 30 minutes. A properly thawed turkey heats more evenly and browns better. Brining can boost moisture; a dry brine relies on salt and seasonings to penetrate the skin and muscle, helping retain juiciness. Flavoring happens in multiple layers: rub under the skin, season the exterior, and consider adding aromatics (garlic, citrus, herbs) inside the cavity. If you brine, reduce added salt elsewhere in the recipe. The Cooking Tips analysis shows moisture retention improves with brining without extending cooking time.
Roasting Methods: Dry Heat, Brined, and Spatchcock options
Dry roasting at 325–350°F (165–175°C) with the bird on a rack yields even browning and a crisp skin. Start breast-side up and monitor the internal temperature with a probe. If the skin browns too fast, tent with foil to prevent scorching. Spatchcock (butterfly) roasting removes the backbone and flattens the bird; this method cooks faster and distributes heat more evenly, reducing the risk of underdone thighs. Brined birds may need slightly shorter times, so rely on a thermometer rather than the clock. Rotate the pan halfway to promote uniform browning and avoid hot spots.
Resting, Carving, and Storage
Resting is essential. After you pull the turkey from the oven, tent loosely with foil and let it rest 15–20 minutes. Resting allows juices to redistribute, resulting in juicier slices. Carve along the breastbone, then slice against the grain for tender portions. Refrigerate leftovers promptly within two hours of cooking, and store in shallow containers to cool evenly. If you plan ahead, you can portion and freeze for later meals.
AUTHORITY SOURCES
- https://www.fsis.usda.gov/food-safety/safe-food-handling-and-preparation/meat/turkey-cooking-tips
- https://nchfp.uga.edu/how/cook_turkey.html
- https://www.cdc.gov/foodsafety/keep-food-safe.html
The Cooking Tips Perspective
From the Cooking Tips perspective, the recommended approach is to plan ahead, choose a method that matches your equipment and time, and prioritize a safe internal temperature. A well-prepped turkey is achievable with straightforward steps, clear temperature targets, and a sensible resting period. If you’re unsure, start with a simple roast and build from there—your future self will thank you for it.
Tools & Materials
- Roasting pan with rack(Large enough for your turkey; supports even heat distribution.)
- Meat thermometer (instant-read)(Probe into the thickest part, avoiding bone.)
- Aluminum foil(For tenting if skin browns too quickly.)
- Kitchen twine(Optional for trussing legs for even cooking.)
- Carving knife and board(Sharp knife makes clean slices.)
- Basting brush(Optional for applying butter or oil.)
- Oven mitts(Heat-resistant protection.)
Steps
Estimated time: 3-4 hours active time, plus thawing time as needed
- 1
Thaw and prep
Ensure the turkey is fully thawed and giblets removed. Rinse quickly if desired, then pat dry with paper towels to remove surface moisture that can steam the skin. This prepares the surface for even browning.
Tip: Pat dry thoroughly; moisture on the skin thwarts browning. - 2
Choose a brine or dry-brine option
Decide whether to brine (wet or dry) before roasting. Brining improves moisture retention, while a dry-brine uses salt and seasonings to flavor and tenderize overnight. Do not mix both methods in the same bird.
Tip: If using a wet brine, keep the turkey refrigerated and follow recommended salt ratios. - 3
Season and truss
Season the outside generously and rub butter or oil under the skin where possible. If you truss the legs, it helps the bird cook evenly and keeps the cavity flavors in.
Tip: Seasoning under the skin delivers flavor without over-salting the surface. - 4
Preheat and position
Preheat the oven to 325–350°F (165–175°C). Place the turkey breast-side up on a rack in a roasting pan to ensure heat circulation. Keep the cavity open to let heat penetrate evenly.
Tip: Position the breast higher for faster browning, or lower the rack for gentler heat if the skin darkens quickly. - 5
Roast with thermometer monitoring
Roast until the thermometer in the thickest part reads 165°F (74°C). Pause to baste if you like, but avoid over-basting which can slow browning. Rotate the pan halfway for even cooking.
Tip: Rely on internal temperature, not time, to avoid under- or over-cooking. - 6
Rest and carve
Remove from the oven and tent with foil, resting 15–20 minutes before carving. Slice across the grain for tender portions and serve.
Tip: Resting redistributes juices; slicing too soon leads to dry slices. - 7
Store leftovers
Carve any leftovers and refrigerate in shallow containers within two hours. For longer storage, freeze in labeled portions for future meals.
Tip: Label and date containers to track freshness.
Quick Answers
What is the safest internal temperature for turkey?
The USDA recommends 165°F (74°C) in the thickest part of the breast or thigh. Use a food thermometer to verify; color alone isn’t reliable. Allow the juices to run clear without pink, and rest before carving.
Safe temperature is 165 degrees, checked with a thermometer; rest before carving.
Do I need to thaw the turkey in the fridge?
Thawing in the refrigerator is safest and most predictable. Plan about 24 hours per 4-5 pounds. If you’re in a hurry, use the cold-water method with fresh water changing every 30 minutes.
Yes, thaw in the fridge if possible; cold water is a faster option.
Should I brine a turkey?
Brining can increase moisture and flavor. It’s optional but helpful for large birds or lean breeds. If you brine, adjust salt to avoid over-salting.
Brining is optional but helpful for moisture; adjust salt amounts if you brine.
Can I stuff the turkey?
Stuffing the turkey adds safety considerations and can extend cooking time, risking undercooked stuffing. It’s safer to cook stuffing separately and let the turkey rest before serving.
Stuffing inside the turkey is possible but safer to cook separately.
How long should I rest the turkey after cooking?
Let the turkey rest 15-20 minutes after roasting. Resting allows the juices to redistribute, making slicing easier and the meat juicier.
Rest for 15-20 minutes for juicier slices.
Can I roast turkey at a higher temperature?
Roasting at very high heat can brown the skin quickly but risks overcooking the breast. If you start high for browning, reduce heat afterward and monitor with a thermometer.
You can brown the skin fast, but monitor temps to avoid drying out the meat.
Watch Video
Top Takeaways
- Plan thawing well in advance to ensure even cooking
- Cook to 165°F in the thickest part for safety
- Rest 15-20 minutes before carving for juicier slices
- Use a rack and thermometer for even heat and accuracy
- Brining is optional but can improve moisture