How to Cook Prime Rib In: Complete Home Oven Guide
Learn how to cook prime rib in a home oven with expert guidance from Cooking Tips. This step-by-step guide covers selecting the cut, seasoning, searing, roasting temperatures, resting, carving, and serving.

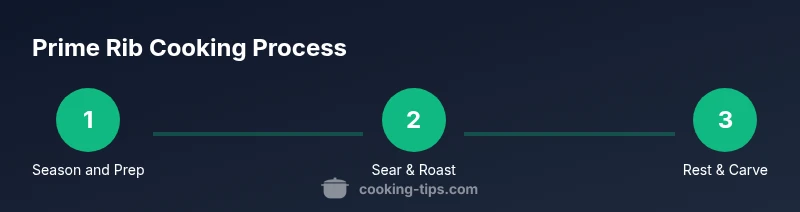
This guide shows you how to cook prime rib in a home oven using a two-stage method: sear to develop a crust, then roast to finish at a lower temperature. You'll learn selecting the right cut, timing for target doneness, how long to rest, and carving for perfect slices every time.
What makes prime rib roast a classic centerpiece
Prime rib is a richly marbled cut that delivers deep beefy flavor and a tender, juicy center when cooked properly. If you're wondering what cook prime rib in, the answer is a two-stage approach: crisp browning at the start, followed by a controlled roast to the desired doneness. According to Cooking Tips, the goal is even browning and a uniformly rosy interior, achieved by smart heat management and careful resting. This combination lets you enjoy a dramatic crust while preserving moisture in the core. The technique also accommodates bone-in versus boneless roasts, with bone-in often delivering extra flavor and a more forgiving cook due to heat distribution from the bone. Throughout this guide, you’ll see practical steps, timing guidelines, and common-sense tips to help home cooks produce a restaurant-worthy slice at home.
Selecting the Right Cut and Size
Choosing the right roast matters as much as the technique. Bone-in prime rib tends to yield richer flavor and better juiciness thanks to the bone’s insulating effect and marrow notes. Boneless roasts cook a bit more quickly but can be easier to portion. For most households, plan on 1 to 1.25 pounds per person for a bone-in roast, slightly less for boneless depending on appetite and leftovers. Always select a roast with generous marbling and a bright red color. If possible, request center-cut portions for more even cooking. Finally, prioritize freshness over age; a well-rested, properly stored roast will yield the best texture and flavor when roasted.
Preparing the Roast: Dry Brine, Seasoning, Aromatics
A successful prime rib starts with drying and seasoning. Pat the roast dry with paper towels to remove surface moisture, then apply a liberal dry brine of kosher salt (and optional sugar) at least 1 hour before cooking, preferably up to 24 hours if your schedule allows. Dry brining helps the surface proteins attract moisture and creates a flavorful crust. Add cracked black pepper, garlic, rosemary, and thyme to taste. Aromatics like crushed garlic cloves, shallots, and fresh herbs can perfume the roast as it cooks. The goal is to create a robust, balanced seasoning that complements the beef’s natural flavor without masking it. A light brushing of olive oil will help the crust adhere to the surface and improve browning.
Searing: The Browning Step
Searing creates the signature crust that locks in juices and adds color. You can sear in a hot cast-iron skillet on the stove or use a very hot oven method (roasting at a high heat first). The key is a quick, even sear on all exposed surfaces. If you’re using a skillet, transfer the seared roast to a rack in a roasting pan to promote air circulation around the meat. Searing time is typically 4–8 minutes per side, just until the surface develops a deep brown crust. The result is a caramelized exterior that contrasts beautifully with a tender interior.
Roasting Method: Temperature Strategy
After searing, reduce the oven to a moderate temperature to finish cooking gently. A common approach is a two-stage roast: maintain oven heat around 325–350°F (165–175°C) and cook until the center reaches the target doneness. A probe thermometer is essential here; it allows you to monitor internal temperature without opening the oven door. For best results, start checking about 45 minutes before the expected finish, then monitor every 10–15 minutes. The roast should rest before carving to let juices redistribute; cutting too soon invites loss of moisture. Depending on roast size, total oven time from start to finish typically ranges from 1.5 to 2.5 hours.
Doneness Targets and Internal Temperature
Doneness levels guide your finish: Rare is about 120–125°F (49–52°C), medium-rare about 130–135°F (54–57°C), and medium about 140–145°F (60–63°C). Remember that roast temperature continues to rise during resting, so pull the meat from heat about 5–15°F below your target. Carryover cooking is most pronounced with a thick roast. For a reliably rosy center, aim for a final internal temperature that accounts for resting. If you’re cooking for guests, you can prepare a quick example plate by slicing a few sample pieces to verify color and texture before serving.
Resting, Carving, and Serving
Resting is as important as roasting. Tent the roast loosely with foil after removing it from the heat and let it rest for 20–30 minutes. Resting allows juices to redistribute, resulting in easier carving and more succulent slices. When ready to carve, cut across the grain into thick or thin slices, depending on preference. For presentation, arrange slices on a warmed platter and spoon a little pan jus over the top. Serve with classic accompaniments like roasted vegetables, horseradish sauce, and a light red wine reduction to complement the beef’s richness.
Troubleshooting Common Issues
If the exterior finishes with a crust that’s too dark before the center is done, temporarily reduce the oven temperature and shield the crust with foil to prevent scorching. If the roast seems pale and under-seasoned, you can apply another light layer of salt during resting or re-season lightly after resting. Inconsistent doneness could indicate uneven roast size or a crowded oven; ensure the meat is well spaced from the walls and not touching other pans. Using a reliable thermometer eliminates guesswork and helps prevent overcooking.
Variations and Finishing Touches
Experiment with flavor profiles by adjusting rubs. Try a peppercorn crust, a surface rubbed with garlic and rosemary, or a blue-cheese butter compound brushed on during resting. For a bright contrast, serve with a horseradish cream or chimichurri. If you’d like extra depth, finish with a splash of robust red wine jus made from the roaster drippings. These variations let you customize the roast to your family’s tastes without altering the core technique.
Tools & Materials
- Roasting pan with rack(Promotes air circulation and even browning)
- Cast-iron skillet or heavy pan for searing(For a quick, even crust)
- Meat thermometer (instant-read or probe)(Monitor internal temperature accurately)
- Sharp carving knife(For clean slices)
- Carving board with juice groove(Catch juices for jus)
- Kitchen twine(If tying roast for even cooking)
- Paper towels(Pat dry before seasoning)
- Olive oil or neutral oil(Light coating to aid browning)
- Kosher salt(Dry brine essential for crust)
- Freshly ground black pepper(Seasoning depth)
- Fresh herbs (rosemary, thyme)(Optional aromatics)
Steps
Estimated time: Total time: 2 hours 30 minutes
- 1
Bring to room temperature
Remove roast from fridge and let sit uncovered at room temperature for 1–2 hours so the center cooks evenly. This reduces temperature differentials that can cause uneven doneness.
Tip: A colder center can lead to undercooked middle and overcooked edges. - 2
Pat dry and salt
Pat roast dry with paper towels and apply a generous dry brine of kosher salt all over. Salt helps flavor penetration and crust formation.
Tip: Dry the surface thoroughly; moisture slows browning. - 3
Preheat and prepare searing setup
Preheat oven to high heat (for sear) or heat a heavy skillet on the stove for pan searing. Prepare a rack in the roasting pan.
Tip: A hot surface is key for that crusty exterior. - 4
Sear the roast
Sear on all exposed surfaces until a deep brown crust forms, about 4–8 minutes per side. Transferring to the rack ensures even browning.
Tip: Do not move the roast constantly; let it form a crust first. - 5
Roast at moderate heat
Reduce oven to 325–350°F (165–175°C) and roast until the thermometer reads target doneness. Use the probe for accuracy.
Tip: Check temperature early to avoid overshoot. - 6
Monitor internal temperature
Aim for about 120–125°F for rare, 130–135°F for medium-rare, or 140–145°F for medium. Remember carryover will raise the temperature after removal.
Tip: Pull roast 5–15°F below your target. - 7
Rest the roast
Remove from oven and tent loosely with foil. Let rest 20–30 minutes to redistribute juices.
Tip: Resting is essential for juicy slices. - 8
Carve across the grain
After resting, carve into slices across the grain for tenderness and even texture.
Tip: Slice to desired thickness for servings. - 9
Make pan jus (optional)
Skim fat from the pan, deglaze with stock or wine, reduce, and finish with a splash of roast juices for a simple sauce.
Tip: A good jus enhances flavor without overpowering beef. - 10
Serve with sides
Pair with roasted vegetables, mashed potatoes, or a crisp salad. A bright red wine complements the richness nicely.
Tip: Keep sides warm while resting or slicing. - 11
Explore variations
Experiment with pepper crusts, herb crusts, or horseradish cream first to find your preferred profile.
Tip: Small adjustments can tailor the dish to your taste.
Quick Answers
What is the best target internal temperature for prime rib?
For a juicy center, aim for 120–125°F for rare, 130–135°F for medium-rare, and 140–145°F for medium. Remember carryover cooking may raise the temperature by 5–10°F after resting.
Aim for about 125 for rare, 130 to 135 for medium-rare, or 140 to 145 for medium, keeping in mind the roast will rise a bit during rest.
Should I bring the roast to room temperature before cooking?
Yes. Let the roast sit uncovered for 1–2 hours to promote even cooking. This reduces the differential between the outer crust and the center.
Yes—let it sit out for about an hour or two to cook more evenly.
Bone-in or boneless: which is better for prime rib?
Bone-in typically yields more flavor and moisture because of the bone’s insulating effect, though boneless roasts cook faster and may be easier to portion.
Bone-in usually tastes richer, but boneless can be quicker and simpler to portion.
How long should prime rib rest after cooking?
Rest the roast for 20–30 minutes under loose foil. Resting helps juices redistribute, resulting in juicier slices and easier carving.
Rest it for about 20 to 30 minutes to keep the juices in the meat.
Can I cook prime rib without searing?
Searing is optional but recommended for crust and flavor. If you skip searing, rely on a longer roast time at high heat at the start to develop color.
You can skip searing, but you’ll miss a flavorful crust; you may need a longer roast time.
What are good sides to serve with prime rib?
Classic options include roasted vegetables, potatoes, and a bright horseradish or red wine jus. A light salad can balance richness.
Pair with roasted veggies, potatoes, and a tangy horseradish sauce.
Watch Video
Top Takeaways
- Choose bone-in for richer flavor.
- Dry brine for a superior crust and taste.
- Sear first, then roast for crust and even doneness.
- Monitor internal temperature with a probe for precision.
- Rest, then carve across the grain for tender slices.