Slow-Cook Short Ribs: The Ultimate Braising Guide
Master the art of slow-cooking short ribs to fork-tender perfection. This comprehensive how-to covers cuts, browning, braising liquids, timing, serving ideas, and troubleshooting for reliable, delicious results.

Slow-cook short ribs yield fork-tender meat and deeply developed flavor through a long, gentle braise. Start with browning for color and flavor, then braise in a seasoned liquid with aromatics until the connective tissue breaks down. This guide covers cuts, browning, liquids, timing, and serving ideas for consistent results.
Why slow cook short ribs deliver tenderness
Short ribs are a flavorful, generously marbled cut that benefits tremendously from slow, low-heat cooking. The magic happens as collagen melts into silky, gelatinous sauce, wrapping the meat in moisture and depth. According to Cooking Tips, slow braises provide consistent tenderness and a rich sauce when you manage heat and moisture carefully. This section lays the groundwork for why this method works so well, versus quick sears or high-heat braising. You’ll also learn the science behind collagen conversion and how to apply it in a home kitchen, with practical steps to avoid common pitfalls like dryness or over-reduction.
Choosing the right short ribs
For reliable results, start with bone-in short ribs if possible. The bone helps keep moisture in the meat and adds flavor to the braising liquid. If you must choose boneless, look for evenly sized pieces so they cook evenly. Trim a small amount of surface fat, but don’t remove all marbling, which contributes to flavor and juiciness. When shopping, consider rib size, thickness, and whether you prefer English-cut (long rib portions) or chuck-style cross-sections. The goal is a consistent size that braises uniformly and doesn’t dry around the edges.
Browning, seasoning, and searing techniques
Color matters: a deep brown crust (not a burnt crust) on all sides builds flavor through the Maillard reaction. Pat ribs dry before seasoning with kosher salt and black pepper, which helps browning and flavor penetration. Use a heavy skillet or Dutch oven; high heat is best for a quick sear, but avoid overcrowding the pan. Browning should be done in batches if needed to maintain contact with the surface and develop fond, the flavorful residue that will become part of the braising liquid.
Braising liquids and aromatics
A balanced braising liquid supports the meat without overpowering it. Common foundations include beef stock or broth, red wine for aroma and acidity, and a splash of tomato for color and depth. Aromatics like garlic, onions, carrots, and herbs (bay leaves, thyme) brighten the sauce and guide the flavor profile. Adding a splash of acid—like a couple tablespoons of vinegar or a dash of citrus—can help balance richness. If you prefer a lighter finish, incorporate mushrooms for umami without overwhelming the meat’s natural flavor.
Equipment options: oven braise vs slow cooker vs stovetop
Oven braising in a covered pot provides even, steady heat ideal for large batches. A slow cooker excels for hands-off meals, particularly when schedules are tight. A stovetop braise works well for smaller portions and yields a glossy sauce with easy pan access for adjustments. Regardless of method, keep the braising vessel covered to retain moisture and regulate temperature. If your pot is very shallow, consider adding a rack to keep meat submerged and prevent sticking or scorching.
Timing, temperature, and doneness cues
Low, steady heat is essential. Target a temperature around 325°F (163°C) in the oven for a classic braise. The ribs should reach a fork-tender stage, with the meat easily separating from the bone and the sauce thick enough to coat a spoon. Check tenderness after 2.5–3 hours for smaller portions or up to 4 hours for larger cuts. If the sauce reduces too quickly, add a bit more stock or water to maintain lusciousness and prevent scorching. A gentle simmer throughout keeps the meat tender without turning it mushy.
Troubleshooting common issues
If your ribs come out dry, you likely cooked too hot or reduced the braising liquid too aggressively. Too much moisture loss can be offset by adding more stock and lowering the heat. If the meat is oversized or fatty, trim excess fat and adjust braise time. For an overly thick sauce, whisk in a small amount of warm stock until it reaches a glossy, coatable consistency. If the flavor is flat, augment with fresh aromatics and a splash of acidity to brighten the dish.
Serving ideas and variations
Serve ribs over mashed potatoes, polenta, or creamy polenta to soak up sauce. A side of roasted vegetables, such as carrots and Brussels sprouts, complements the richness. For a lighter finish, skim some fat from the sauce and finish with a squeeze of lemon or a handful of chopped parsley. Variations include adding horseradish for bite, or finishing with a splash of soy sauce or miso for an Asian-inspired profile. Leftovers taste excellent reheated gently, improving with time as flavors meld.
Authority sources and safety tips
Refer to trusted guidelines when handling meat and heat. Beef should be heated evenly to safe temperatures and stored promptly. Always chill sauce separately if needed, and reheat gently on the stove or in a low oven to preserve moisture and texture.
Tools & Materials
- Dutch oven or heavy-bottom braising pot(At least 5-7 qt capacity; lid tight-fitting for moisture retention)
- Skillet or frying pan(Prefer heavy cast iron for initial searing)
- Tongs(For turning ribs without piercing the meat)
- Chef knife(Sharp for trimming fat and portioning ribs)
- Cutting board(Stable surface; use separate board for meat)
- Measuring spoons(Accurate salt and spice additions)
- Milk, flour, or cornstarch (optional)(For sauce finishing or thickening if needed)
- Thermometer(Monitor internal temp and sauce heat)
- Oven-safe lid or foil(Seal braising vessel to trap moisture)
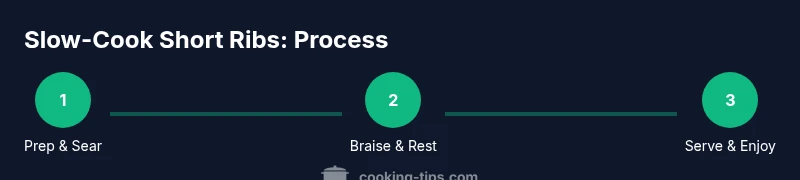
Steps
Estimated time: 3-4 hours
- 1
Preheat and prep
Preheat your oven to 325°F (163°C) and pat the ribs dry. This ensures even browning and helps the seasoning stick without steaming the meat. Set up your braising pot and gather aromatics so everything is ready when you start browning.
Tip: Dry ribs thoroughly; moisture on the surface inhibits browning. - 2
Season the ribs
Season generously with kosher salt and black pepper on all sides. Salt helps flavor penetrate the meat and enhances browning, while pepper adds a subtle heat that complements the sauce.
Tip: Season a little in advance to let salt begin to dissolve for deeper flavor. - 3
Brown the ribs
Sear ribs in hot fat until a deep, caramelized crust forms on all sides. Don’t crowd the pan; work in batches if necessary. This fond will form the foundation of your sauce.
Tip: Leave the ribs undisturbed for a minute or two to develop color. - 4
Deglaze the pan
Add a liquid (wine or stock) to the hot pan and scrape up the fond with a wooden spoon. This picks up all the browned bits and integrates deeply into the braising liquid.
Tip: Avoid splashing; pour slowly and stir to release every browned bit. - 5
Add aromatics and braising liquid
Toss in onion, garlic, carrots, bay leaves, and thyme. Add enough stock and/or wine to reach about halfway up the ribs; this ensures comfort with enough moisture while braising.
Tip: Balance acidity with a touch of tomato paste or a splash of vinegar if needed. - 6
Braise covered in oven
Return the ribs to the pot, cover, and braise in the oven. Keep the heat steady and check once or twice to ensure the sauce remains gently simmering.
Tip: If using a slow cooker, transfer at this point and cook on low until tender. - 7
Check tenderness
After 2.5–4 hours (depending on rib size), test a rib by pulling it gently. It should separate easily from the bone with minimal resistance.
Tip: If not tender, continue braising in 30-minute increments. - 8
Rest, finish, and serve
Let the meat rest briefly before slicing or pulling from the bone. Skim fat from the sauce, adjust seasoning, and spoon over the ribs for serving alongside your chosen starch and vegetables.
Tip: Resting 10–15 minutes improves juiciness and sauce thickness.
Quick Answers
What cut works best for slow-cook short ribs?
Bone-in beef short ribs are preferred for braising because the bone adds flavor and moisture, and the extra fat helps keep the meat juicy. Boneless ribs can work but may cook unevenly or dry out faster.
Bone-in short ribs are best for braising; they stay juicier and flavor is richer.
Can I use boneless short ribs?
Yes, boneless short ribs can be braised, but they tend to cook faster and may dry out if overcooked. Keep a close eye on them and reduce braise time slightly if needed.
Boneless ribs work, but watch the cooking time to avoid drying out.
Why is searing important before braising?
Searing creates browned fond that adds depth to the sauce, improving flavor and color. It also helps seal in moisture and develop a richer crust.
Searing builds flavor and helps seal in moisture.
How do I know when ribs are done?
They’re done when a fork slides in with little resistance and the meat pulls away from the bone easily. The sauce should be saucy and glossy, not watery.
Fork-tender ribs with glossy sauce.
How should I store leftovers?
Cool leftovers quickly, refrigerate within two hours, and reheat gently on the stove or in a low oven. Freeze for longer storage if needed.
Cool fast, refrigerate, and reheat slowly to keep texture.
Watch Video
Top Takeaways
- Tenderize with low, steady heat
- Brown thoroughly for depth of flavor
- Keep braising liquid ample but not overpowering
- Attentive monitoring prevents dryness
- Resting improves texture and sauce incorporation