How to Slow Cook a Roast for Tender, Juicy Meat
Master the art of slow-cooking a roast to fork-tender perfection. This step-by-step guide covers prep, browning, braising, and resting for juicy, flavorful beef every time.

You’ll learn how to slow cook a roast to fork-tender perfection with minimal fuss. This approach relies on low oven heat, a heavy pot with a tight lid, and a long, gentle braise. You’ll follow clear steps for browning, adding moisture, and letting the meat rest for even doneness. Expect flavorful juices and a tender texture throughout.
How to slow cook a roast for best tenderness
Slow cooking a roast is a reliable way to transform a tougher cut into juicy, fork-tender meat. According to Cooking Tips, the key is gentle heat over several hours, which lets collagen break down without drying out the meat. If you’re asking how to slow cook a roast, start with the right cut, a heavy pot, and a plan for moisture. In this approach, you’ll brown the meat first to develop flavor, then maintain a steady simmer of liquid as the roast becomes tender. The result is even doneness from edge to center, with rich, roasted flavors that deepen as the meat rests after cooking. In 2026, Cooking Tips analysis emphasizes the value of patience and temperature control over chasing fast results. Use a thermometer to guide you and avoid lifting the lid too often, which lets heat escape and prolongs cooking time.
Choosing the right cut and size for slow cooking
When you learn how to slow cook a roast, the choice of cut matters as much as the technique. Tougher, well-marbled cuts like chuck or brisket become incredibly tender with long, gentle heat, while round or rump roasts can yield leaner results with proper moisture. For most home cooks, a 3- to 5-pound roast provides a good balance between cooking time and yield. If you’re starting with a larger roast, plan for extra time and use a heavier pot to keep heat even. The Cooking Tips team notes that regional cuts vary, but the principle remains the same: more connective tissue benefits from slow braising, while trimming excess fat helps prevent greasiness in the final slice.
Temperature and time basics for slow cooking
The heart of how to slow cook a roast is temperature and time management. Use a low oven temperature, typically in the 275–325°F (135–165°C) range, and plan for several hours of gentle cooking. A rough guide is 3–6 hours for a 3–5 pound roast, with larger roasts needing proportionally more time. Keep the pot covered to trap moisture and maintain even heat. If you’re unsure about doneness, rely on a probe thermometer and test for tenderness rather than chasing a specific internal temperature. This approach minimizes overcooking and preserves juiciness.
Browning, searing, and building flavor
Browning the roast before braising is a crucial step in how to slow cook a roast. Sear all sides in a hot, heavy skillet or Dutch oven until a deep crust forms, which locks in juices and adds rich color. Use a small amount of oil with a generous sprinkle of salt and pepper to promote a flavorful crust. The crust, once developed, contributes significantly to the final depth of flavor. After searing, you’ll transfer the meat to braising liquid; the Maillard reaction that occurs during searing sets the foundation for a complex, robust palate.
Braising liquids and moisture management
Choose a braising liquid that complements the roast; beef stock, wine, a splash of balsamic, and aromatics like onions, garlic, and herbs create a depth of flavor. The liquid should come up to about one-third to halfway up the roast, ensuring moist heat without drowning the meat. Aromatics—bay leaves, thyme, and peppercorns—enhance the profile without needing heavy sauces. If the liquid reduces too quickly, add a bit more stock or water to maintain consistent braising conditions. The goal is a gentle simmer that sustainingly cooks the meat while enriching every slice with flavor.
Resting, carving, and serving
Resting is essential after slow cooking; tent the roast loosely with foil and let it rest for 10–20 minutes before carving. Resting allows juices to redistribute, preventing a dry slice and ensuring even moisture. Slice against the grain for tenderness, and consider a light drizzle of the cooking juices or a simple pan gravy. This final step smooths the texture and elevates the overall experience. The result should be meat that is easy to cut, evenly juicy, and infused with the braising flavors you built during cooking.
Common pitfalls and troubleshooting
Even with a good plan, slow cooking a roast can go awry. Common issues include under-seasoning, overcrowding the pot which traps steam instead of braising, and removing the lid too often, which slows progress and dries edges. If the meat seems tough, give it more time at a gentle simmer and test tenderness frequently. If the liquid is too thin, reduce it briefly with the lid off at the end. For best results, trust your senses as much as any thermometer and keep your oven temperature steady. The Cooking Tips team suggests recording variations so you can improve future cooks.
Quick-start timeline and tips
To get you from prep to plate efficiently, plan a rough 1-2 hour prep window, then allocate 3–6 hours for slow cooking, plus 10–20 minutes of resting time. Preheat, pat dry, and season the roast. Sear thoroughly, then add aromatics and liquid before transferring to the oven. Check tenderness in the final hour and rest before serving. The method remains flexible for different roasts and kitchen setups, but consistency in heat and moisture is the key to reliable, delicious results.
Tools & Materials
- Roasting pan or Dutch oven with a tight-fitting lid(Heavy-bottom preferred; allows even heat distribution and browning (e.g., cast-iron or enameled pot))
- Boneless or bone-in beef roast (3–6 lb recommended)(Chuck, brisket, or bottom round are ideal for slow cooking)
- Heavy skillet for searing(Preferably cast iron or stainless steel; preheat to a hot, even temperature)
- Instant-read thermometer or probe thermometer(Used to monitor doneness and tenderness without opening the oven frequently)
- Beef stock or broth(Keeps meat moist and helps braised flavors develop)
- Wine or cider (optional)(Adds depth; use in moderation if desired)
- Aromatics (onions, garlic, carrots, herbs)(Enhances flavor; add according to taste)
- Measuring spoons and cutting board(For precise seasoning and safe prep)
- Tongs and carving knife(For handling and serving without tearing meat)
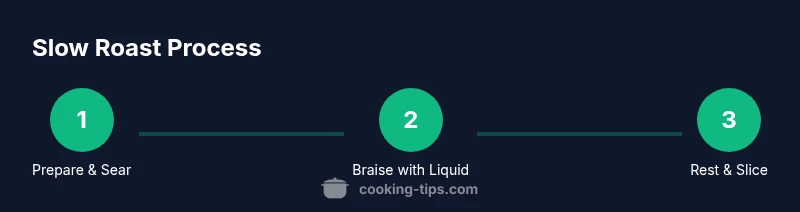
Steps
Estimated time: 3.5-6 hours total
- 1
Prepare and preheat
Preheat the oven to a low temperature (275–325°F/135–165°C). Pat the roast dry with paper towels, then season generously with salt and pepper. This initial prep ensures a clean surface for browning and helps create a flavorful crust.
Tip: Season generously and evenly to boost flavor; dry surface ensures better browning. - 2
Sear the roast
Heat the heavy pot on high heat and sear the roast on all sides until a deep crust forms. This step seals in juices and contributes to the roasted aroma that defines the dish.
Tip: Don’t rush the sear; use a continuous motion to develop an even crust. - 3
Add aromatics and liquid
Remove the roast briefly and sauté aromatics in the same pot. Return the meat, add beef stock (and optional wine), and bring to a light simmer.
Tip: The liquid should come up to at least a third of the roast to maintain moisture. - 4
Slow-cook covered
Transfer the pot to the oven and cook low and slow, keeping the lid on to trap moisture. Check occasionally to ensure liquids stay at a gentle simmer.
Tip: Avoid lifting the lid too often; each opening releases heat and can extend cooking time. - 5
Test tenderness
Around the 70–80% mark, test a midsection with a fork or thermometer. It should feel tender and yield to slight pressure; otherwise continue cooking in 15–30 minute increments.
Tip: Tenderness is more important than a specific internal temp for slow cooking. - 6
Rest and slice
Remove from heat, tent, and rest for 10–20 minutes. Slice against the grain and serve with the braising juices or a simple pan gravy.
Tip: Resting redistributes juices for a moist, even slice.
Quick Answers
What cut is best for slow cooking a roast?
Tougher, well-marbled cuts like chuck roast or brisket yield excellent tenderness when slow cooked. Leaner roasts can work but may require more braising liquid to stay moist.
Chuck or brisket is ideal for slow cooking because the connective tissue breaks down beautifully with long, gentle heat.
What oven temperature should I use for slow cooking?
Aim for a low, steady temperature in the 275–325°F (135–165°C) range. Higher or lower settings can work, but staying in this window helps the roast become tender without drying out.
Keep the oven in a low range, around 275 to 325 degrees, to let the meat break down slowly.
Do I need to sear the roast before slow cooking?
Searing is recommended to develop a deep crust and rich flavor. It’s not mandatory, but it significantly enhances taste and texture in the final dish.
Yes, searing adds flavor and helps seal juices before slow cooking.
Can I slow cook a frozen roast?
Thaw the roast first for more even cooking and to avoid uneven doneness. If you must cook from frozen, plan for a longer time and monitor tenderness closely.
For best results, thaw before slow cooking, but if needed, allow extra cooking time.
How do I know when the roast is done?
Tenderness is the key indicator. If a fork slides in and out with little resistance, the roast is likely ready. A probe can help gauge tenderness in the thickest part.
Check tenderness with a fork or thermometer rather than relying on time alone.
Can I add different liquids besides beef stock?
Yes. Wine, stock, beer, or even a mix of broth and water can work. Aromatics and herbs will carry flavor across liquids while braising.
You can mix liquids, but keep enough moisture to braise without boiling away.
Watch Video
Top Takeaways
- Choose a well-muited cut (chuck, brisket) for best slow-cooked results
- Brown first, then braise with steady moisture for even tenderness
- Maintain steady heat and minimize lid lifting for best texture
- Rest before slicing to lock in juices and improve mouthfeel