Crockpot Roast Beef: A Complete Slow-Cooker Guide
Master tender, flavorful crockpot roast beef with a step-by-step method, from cut selection and searing to braising liquid, vegetables, gravy, and safe storage.

You will learn to make savory crockpot roast beef with a tender, flavorful outcome using affordable cuts, proper searing, low-and-slow braising, and a simple gravy. You'll need a slow cooker, beef roast, onions, garlic, broth, and herbs. This guide covers timing, safe temperatures, and delicious variations. Whether you cook on high or low, this method yields a fall-apart beef with minimal effort.
What is Crockpot Roast Beef?
Crockpot roast beef is a classic slow-cooked dish in which a beef roast braises in a flavorful liquid with aromatics until tender. The long, gentle heat of a crockpot breaks down connective tissue, yielding fork-tender meat and a rich gravy. This approach is ideal for budget cuts like chuck or round, and it suits busy weeknights since the appliance handles most of the cooking once the ingredients are in place. The result is deeply infused beef with a savory sauce that clings to every slice. According to Cooking Tips, browning the meat before braising adds depth to the final flavor, so plan for a quick sear if you want the best crust and color. This guide will help you achieve consistent results using common pantry ingredients and practical timing.
Choosing the Right Cut and Size
For crockpot roast beef, select cuts with good marbling and enough connective tissue to break down during long braising. Chuck roast, brisket, and bottom round are dependable options. Aim for a roast between 2.5 to 4 pounds (1.1–1.8 kg) depending on your crockpot size. A larger roast will often require slightly more liquid and a longer braise, while a smaller cut cooks more quickly. Trim excessive external fat, but leave some marbling intact for flavor. Consider how you’ll serve leftovers; a larger roast often yields more flexible portions for later meals.
Searing for Flavor: Do It Before Slow Cooking
Searing the roast in a hot pan before adding it to the slow cooker is optional but highly recommended if you want a richer crust and deeper flavor. Use a heavy skillet (like cast iron) and a small amount of high-smoke-point oil. Brown the roast on all sides, keeping the surface contact steady rather than moving it constantly. This step creates fond (the browned bits) that you’ll deglaze into the braising liquid, contributing intense, caramelized notes to every bite.
Building a Flavorful Braising Liquid
A robust braising liquid forms the backbone of the dish. Start with beef stock or broth as the base, then add aromatics such as onion, garlic, carrots, and a bay leaf or two. For depth, you can include a splash of red wine or a spoonful of tomato paste, which adds body and a hint of acidity that brightens the gravy. The liquid should come up only partway around the roast—enough to keep the meat submerged in flavor but not so much that it dilutes the concentration of the pan drippings.
Layering Aromatics and Vegetables
Place aromatics in the bottom of the slow cooker first to create a fragrant bed for the meat. Common choices include sliced onions, minced garlic, and chunks of carrot or celery. These vegetables infuse the beef with sweetness and depth while also contributing to a flavorful pan sauce. If your slow cooker is tall, you can lay the roast on top of a bed of aromatics so the meat braises evenly without sticking to the sides.
Temperature, Time, and Doneness
Low and slow is the standard approach for crockpot roast beef. Cook on low for about 8–10 hours or on high for 4–6 hours, then test for tenderness. The goal is fork-tender meat that can be sliced or pulled apart with forks. If your roast isn’t quite tender after the minimum time, give it an extra hour and check again. A thermometer can help: many cooks look for a range around fork-tender without drying out the meat. Remember, rest time helps juices redistribute.
Making Gravy from Juices
After cooking, remove the meat and let it rest before slicing. Skim excess fat from the juices, then simmer on the stove with a cornstarch or flour slurry to thicken into a gravy. For a deeper flavor, simmer the juices with a splash of wine or a teaspoon of Worcestershire sauce, then whisk in a little butter at the end for a satin finish. A smooth gravy coats slices evenly and elevates the entire dish.
Safety, Storage, and Leftovers
Always handle raw beef with clean hands and avoid cross-contamination. Refrigerate leftovers in airtight containers within two hours of cooking and consume within 3–4 days, or freeze for longer storage. Reheat gently in the microwave or a small amount of broth on the stove to maintain moisture. When reheating, add a splash of broth or water to loosen the gravy and prevent drying.
Authority sources and practical tips
For reliability, consult official guidelines from trusted sources when cooking beef. The USDA recommends cooking beef to safe temperatures and handling leftovers properly. The following sources offer detailed guidance on beef roasts, safe handling, and slow-cooker safety: • https://www.fsis.usda.gov/food-safety/safe-food-handling-and-preparation/meat/beef-roasts • https://www.usda.gov/food-safety • https://extension.illinois.edu/food-safety/slow-cooker-safety. Incorporating these practices helps ensure safe, delicious outcomes every time.
Tools & Materials
- Slow cooker (crockpot)(6-7 quart size works well for 3-4 lb roasts)
- Chef's knife(For trimming and slicing)
- Cutting board(Non-slip surface preferred)
- Skillet for searing(Cast-iron or heavy-bottom stainless)
- Tongs(To handle meat safely)
- Meat thermometer(Helps verify doneness)
- Beef stock or broth(For braising liquid)
- Onions, garlic, carrots(Aromatic base)
- Bay leaves, thyme (optional)(Herbs for fragrance)
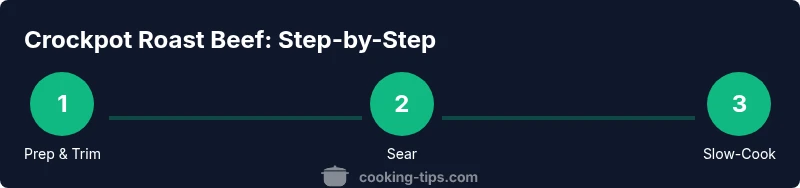
Steps
Estimated time: 8-10 hours
- 1
Prepare and trim
Trim excess fat and pat the roast dry. This helps browning and even cooking. Salt and pepper generously to season the meat.
Tip: Dry surface improves sear color and crust formation. - 2
Sear the roast
In a hot skillet, brown the roast on all sides with a thin layer of oil. This step builds flavor and color through the fond.
Tip: Use a high-smoke-point oil and avoid overcrowding the pan. - 3
Prepare the braising bed
Scatter sliced onions, garlic, and carrots in the bottom of the slow cooker to create a flavor base and prevent sticking.
Tip: Reserving some aromatics to add around the roast keeps the surface from drying. - 4
Deglaze and add liquid
Deglaze the skillet with a splash of broth, scraping up browned bits. Pour remaining broth into the slow cooker and add bay leaves.
Tip: Those fond bits are concentrated flavor—don’t discard them. - 5
Slow-cook
Place the seared roast on top of the bed of aromatics. Cover and cook on low 8–10 hours or high 4–6 hours until fork-tender.
Tip: Resist lifting the lid during cooking to maintain consistent heat. - 6
Rest and slice
Remove the meat and rest 10–15 minutes before slicing. Slice thinly against the grain for tenderness.
Tip: Resting helps retain juices and keeps slices moist.
Quick Answers
What cut is best for crockpot roast beef?
Chuck roast is a favorite for slow cooking due to its marbling and connective tissue that break down into tender meat. Brisket and bottom round are good alternatives. Trim excess fat but keep enough marbling for flavor.
Chuck roast is ideal because it stays juicy and becomes tender with slow cooking.
Is searing before slow cooking necessary?
Searing is optional but highly recommended for flavor and color. It creates fond that enriches the braising liquid. If you’re short on time, you can skip it, but you’ll lose some depth.
Searing isn’t required, but it adds depth to the flavor and color.
How do I know when the roast is done?
Check tenderness by piercing with forks; it should pull apart easily. A thermometer guiding you toward fork-tender ranges helps, but visual tenderness is the key.
If the meat pulls apart with forks, it’s done.
Can I cook on high or low, and how does it affect tenderness?
Low and slow yields the most uniformly tender meat. High heat finishes sooner but can be less forgiving if the roast is unevenly shaped. Choose based on your schedule, with low preferred for best texture.
Low and slow gives the best tenderness; high works when you’re pressed for time.
How should leftovers be stored and reheated?
Cool quickly and refrigerate in airtight containers within two hours. Use within 3–4 days, or freeze for longer storage. Reheat gently with a splash of broth to restore moisture.
Store in the fridge for a few days, or freeze for longer, and reheat with a little broth.
Watch Video
Top Takeaways
- Choose a well-marbled cut and trim fat moderately.
- Sear for color and flavor; deglaze to capture fond.
- Cook low and slow for maximum tenderness and flavor.
- Rest before slicing to retain juices.
- Finish with a silky gravy for a cohesive dish.