Slow Cook Ribs in Oven: A Step-by-Step Guide
Learn how to slow cook ribs in the oven for tender, fall-off-the-bone meat with a simple rub, low heat, and glaze. This guide discusses timing, temperatures, safety, and troubleshooting to deliver reliable results every time.

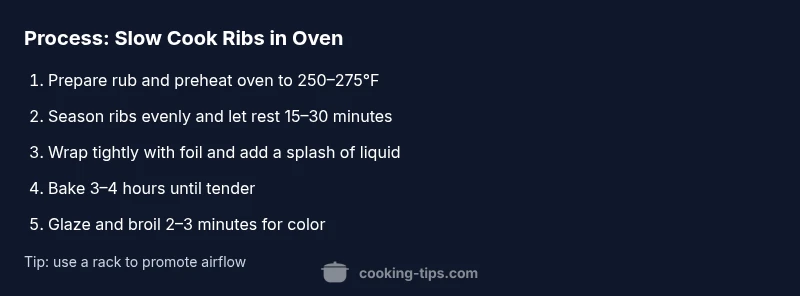
Slow cooking ribs in the oven starts with trimming and applying a flavor rub, then cooking at a low, steady 250–275°F for 3–4 hours until the meat is fork-tender. Finish with a glaze and a brief broil for caramelized edges. Using foil or a rack helps even heat, and a 10–15 minute rest readies the meat for slicing.
Why slow cook ribs in oven works
For home cooks, the oven can be a forgiving kitchen ally for ribs. Slow cooking uses low heat and extended cook time to break down collagen in the meat, yielding tender, juicy ribs with minimal hands-on effort. According to Cooking Tips, this method is especially forgiving for beginners, providing consistent results even if you’re juggling other tasks in the kitchen. The key is to control moisture, heat, and resting time so the meat remains moist and flavorful. When you start with a good rub and a controlled bake, you create a foundation for a delicious meal that can stand up to bold sauces or a simple glaze. In this guide, we’ll walk through the steps, from selecting the right rack of ribs to serving with a tangy sauce or dry rub. You’ll learn how to adapt the method to your oven, your space, and your schedule.
The slow-cook approach aligns with classic pitmaster technique: low heat slowly renders fat and softens connective tissue, producing meat that’s juicy rather than dry. This method is flexible—whether you’re preparing a weeknight dinner or a weekend feast, you can scale rubs, adjust timing, and finish with a glaze that suits your menu. Throughout, expect a humid, forgiving environment if you wrap the ribs, and a crisp, caramelized crust if you broil at the end. The Cooking Tips team emphasizes that patience and temperature control are your biggest allies here.
Choosing the right ribs for slow cooking
Ribs come in several varieties, but for slow oven cooking, bone-in spare ribs or baby back ribs both work well. Spare ribs have more connective tissue and fat, which can translate to a richer result after long cooking. Baby back ribs are leaner and cook a bit faster, so you may adjust time accordingly if you’re short on patience. The fat cap on spare ribs can act as a natural basting mechanism during baking, helping keep meat moist when paired with a moisture trap like foil. Regardless of cut, look for meat with a healthy pink color, some marbling, and a clean bone exposure when you lift a rack. If you see heavy moisture pooling on the tray, that’s a sign your ribs released a lot of bone marrow fat during cook; this is normal, but you may want to drain the pan midway through cooking to prevent steam from over-saturating the surface.
Tools and pantry setup
Before you start, assemble the essential tools and ingredients to keep the workflow smooth. A sturdy baking sheet or roasting pan, a wire rack (optional but helpful for airflow), heavy-duty aluminum foil, a small bowl for rub ingredients, a basting brush, a digital thermometer, and oven mitts are your core toolkit. For pantry items, you’ll need a dry rub mix (salt, sugar, paprika, pepper, garlic, onion, and optional chili), a liquid for moisture (apple juice, beer, or stock), and a glaze (barbecue sauce, honey, and acid like vinegar or lemon juice). If you’re playing with texture, have a light oil spray on hand to prevent sticking and an extra rack or sheet pan to prevent overcrowding. Organize your materials near the oven so you can move efficiently.
The rub: flavor foundations
A robust rub is the backbone of slow oven ribs. Start with a base of kosher salt and brown sugar for balance, then add paprika for color, garlic and onion powder for depth, black pepper for heat, and a pinch of chili for warmth. For a balanced contrast, include a touch of cumin or mustard powder if you like a smoky, tangy profile. Apply the rub evenly on all surfaces, including the underside near the bone. If possible, let the rubbed ribs rest for 30–60 minutes in the fridge or at room temperature to let the flavors penetrate. A dry rub that’s too salty can overpower tenderness, so taste and adjust in future iterations.
This section highlights the importance of patting the rub into the meat for better adhesion and even flavor distribution. It’s also a good moment to prepare your glaze: whisk together a simple mix of barbecue sauce, a splash of apple cider vinegar, and a little honey or maple for gloss and balance. If you’re using a commercial sauce, reserve some for finishing so you can brush it on at the end without over-thickening the surface during the long bake.
Moisture management: wrapping, braising liquid, and steam
Moisture management is essential for fork-tender ribs. Two popular approaches are wrapping the ribs tightly in foil (often called the Texas Crutch) or leaving them uncovered for a dry-cook finish. Wrapping traps moisture and steam, effectively braising the meat in its own juices and any added liquid like a half cup of apple juice or broth. If you wrap, add the liquid before sealing to maximize moisture. If you braise uncovered, you’ll promote surface moisture evaporation and a more pronounced crust. A water bath under a rack can help regulate oven humidity and reduce surface drying, especially in dry kitchen environments. Whichever method you choose, the goal is to maintain moisture while allowing heat to break down connective tissue gradually.
As you proceed, keep the temperature steady and avoid opening the oven door too often. Each opening causes a temperature drop that can extend cooking time and affect tenderness. Adjust by checking the meat’s tenderness with a fork after the early hours, and use a thermometer to verify the internal temperature of the thickest section.
Temperature and timing: finding the sweet spot
Most ovens work well for this task within a 250–275°F (120–135°C) range. The low, steady heat is the secret to breaking down collagen in the ribs without drying them out. Plan for 3–4 hours total, depending on rib size and cut. A helpful rule is to start testing tenderness after about 2.5 hours, using a fork to peek at the meat near the bone. If the meat yields with gentle pressure, you’re close to done. If not, continue cooking, checking every 20–30 minutes. If you’re wrapping, remove the wrap in the final 20–30 minutes to allow the surface to firm and color. If you’re not wrapping, you may choose to add a splash of liquid to maintain moisture during the bake. A meat thermometer can help you avoid overcooking; target a minimum internal temp around 190–205°F (88–96°C) for tenderness, though doneness is best judged by texture, not numbers alone.
Remember: even small changes in oven calibration, rack position, or pan type can alter cooking time by 15–30 minutes. Use these adjustments to fine-tune your process for future batches.
Finishing touches: glaze, crust, and color
The final phase defines the rib’s exterior. If you wrapped, unwrap and brush a light glaze, then bake for an additional 5–10 minutes to develop color. For a crust, move the ribs under a hot broiler for 1–3 minutes, watching closely to prevent burning. The glaze should be glossy, not gluey, and the surface should show a caramelized sheen with a hint of crispness. If you prefer a smoky, sticky finish, apply the glaze in layers during the last 20–30 minutes of cooking. Allow the ribs to rest briefly after removing from the oven; resting lets juices redistribute and keeps slices moist when cut. A clean knife and a sharp cutting edge will help you portion precisely, especially if you’re serving as part of a larger plate with sides.
For best results, coat the surface in a light layer, then reapply layers to build a balanced glaze without over-thickening the surface. A final 2–3 minutes under heat is usually enough to set the glaze without burning sugar.
Resting, carving, and serving
Resting is essential for juicy, evenly distributed flavors. After removing ribs from the oven, tent loosely with foil and allow them to rest for 10–15 minutes. This pause allows juices to reabsorb and makes slicing easier. When you cut, slice between the bones to produce neat individual portions. If you’re serving with sides like coleslaw, cornbread, or mashed potatoes, aim for a plate-to-table window of about 20 minutes so the meal remains hot without overcooking. For a family-style presentation, consider presenting a section of ribs on a large platter, with bone-side up and a light brush of glaze to encourage a glossy finish. Finish with a sprinkle of flaky salt or a finishing sugar for balance if your rub didn’t already include it.
This resting phase helps you avoid a dry surface and a stringy texture. It’s also a great moment to wipe down the pan, deglaze with a touch of beer or stock, and create a simple pan sauce to accompany the ribs if desired.
Troubleshooting common issues
If the ribs come out tough, they likely need more time to break down collagen or you may have used too high a heat, causing surface drying before the interior fully tenderizes. If the meat is tender but lacks flavor, you probably need a more robust rub or glaze, or perhaps you didn’t let the rub rest long enough. If the glaze caramelizes too quickly, reduce the cooking temperature by 15–25 degrees or apply the glaze in thinner layers. If you notice too much moisture in the pan, consider finishing uncovered for 10–15 minutes to evaporate excess moisture and promote a crust. For larger cuts, increase the total cook time by 30–60 minutes, and always rely on texture rather than time alone to determine doneness.
Based on Cooking Tips research, rib tenderness improves with consistent low heat and patience. If you have a convection setting, you may reduce the bake time slightly, but monitor closely to prevent drying.
AUTHORITY SOURCES
- USDA Food Safety and Inspection Service: https://www.fsis.usda.gov/food-safety
- CDC Food Safety: https://www.cdc.gov/foodsafety/index.html
- World Health Organization (Food Safety): https://www.who.int/health-topics/food-safety
Tools & Materials
- Ribs (bone-in spare or baby back)(Choose a full rack with good marbling)
- Dry rub ingredients (salt, brown sugar, paprika, garlic powder, onion powder, pepper)(Balance sweet, savory, and heat)
- Forest-friendly foil (heavy-duty)(Twice-wrapped for moisture retention)
- Sheet pan or roasting pan(Flat, stable surface)
- Wire rack (optional)(Promotes air circulation)
- Basting brush(For glaze application)
- Meat thermometer(Monitor internal temp; target tenderness)
- Liquid for moisture (apple juice or stock)(About 1/2 cup if wrapping)
- Glaze (barbecue sauce or homemade glaze)(Brush in final stage)
- Oven-safe gloves(Handle hot equipment safely)
- Timer(Track long bake and resting periods)
- Optional: convection setting(May reduce time slightly)
Steps
Estimated time: 4 hours 30 minutes
- 1
Prepare ribs
Remove membrane from the bone side if present and pat dry. Trim any excess fat and detach thin, mealy edges to promote even cooking. This step helps the rub adhere better and ensures uniform tenderness.
Tip: Use a paper towel to grip the membrane and pull away in a single motion. - 2
Apply the rub
Coat ribs evenly with the dry rub on all surfaces. Gently press the rub into the meat so it adheres through the long bake. Let rest 20–60 minutes if time allows for deeper flavor.
Tip: Smash spices to release essential oils; avoid clumping. - 3
Preheat oven and prepare setup
Preheat oven to 250–275°F (120–135°C). Line a sheet pan and set a rack if available to promote air circulation. Have foil ready for wrapping if you plan to braise the ribs.
Tip: If using convection, reduce temperature by about 25°F. - 4
Place ribs for bake
Position ribs bone-side down and bone-side up if using a rack; otherwise lay them flat on the sheet. If wrapping, add a splash of liquid before sealing to trap moisture.
Tip: Space ribs evenly so heat circulates around each rack. - 5
Bake low and slow
Cook for 3–4 hours at the chosen low temperature. Check tenderness after about 2.5 hours by inserting a fork near the bone; if it yields easily, you’re close.
Tip: Avoid opening the oven door frequently; each opening cools the oven and extends cook time. - 6
Unwrap to glaze (optional)
If you wrapped, unwrap the ribs and brush with glaze. Return to the oven for 5–10 minutes to set the glaze and improve surface gloss.
Tip: Apply glaze in thin layers to prevent pooling. - 7
Finish under high heat for color
For a crust, move under a broiler or a very hot oven for 1–3 minutes, watching closely to avoid scorching.
Tip: Keep a close eye; hot sugar glazes burn quickly. - 8
Rest before slicing
Let the ribs rest for 10–15 minutes on a cutting board to redistribute juices.
Tip: Rest loosely tented with foil so surface remains warm. - 9
Slice and serve
Slice between bones to create neat portions. Serve with sides and extra glaze on the side for dipping.
Tip: A sharp knife makes clean cuts and preserves texture. - 10
Clean up and store leftovers
Cool any leftovers promptly and refrigerate in shallow containers. Reheat gently to avoid toughening the meat.
Tip: Label and date leftovers for food safety.
Quick Answers
What cut of ribs is best for slow oven cooking?
Bone-in spare ribs and baby back ribs both work for slow oven cooking. Spare ribs provide more meat and fat, which can yield a richer result after long cooking; baby backs cook a bit faster and can be very tender when timed well.
Bone-in spare ribs or baby backs both work well. Spare ribs are meatier and forgiving; baby backs cook faster but can be just as tender with proper timing.
Should I wrap the ribs during cooking?
Wrapping (foil method) traps moisture and braises the meat, which can improve tenderness. If you want more crust, unwrap for the final 20–30 minutes. Use a splash of liquid inside the wrap if you choose this method.
Wrapping helps tenderness by braising in moisture. Unwrap near the end for crust.
What temperature is best for slow cooking ribs in the oven?
A steady 250–275°F (120–135°C) is ideal for breaking down collagen without drying the meat. Convection may allow a slight reduction in time, but monitor tenderness closely.
Keep the oven at 250 to 275 degrees. Convection can shave a bit off the time, but watch closely.
How long should ribs cook in the oven?
Plan for about 3–4 hours at the target temperature, depending on rib size and your oven. Start checking tenderness after 2.5 hours and rely on texture rather than exact times.
Aim for 3 to 4 hours, and check texture after about 2.5 hours.
Can I finish ribs under the broiler?
Yes. A brief broil of 1–3 minutes after glazing creates color and a crisp crust. Watch closely to prevent burning the glaze.
A quick broil after glazing adds color and crust. Keep an eye on it.
What about resting the meat?
Rest the ribs for 10–15 minutes after removing from the oven. Resting helps redistribute juices so slices stay moist.
Rest for 10 to 15 minutes for juicier ribs.
Watch Video
Top Takeaways
- Start with a flavorful rub and low, steady oven heat.
- Moisture management (wrap vs unwrapped) affects tenderness and crust.
- Finish with glaze and short high-heat to caramelize the surface.
- Rest before slicing to keep juices in the meat.
- Plan for about 4.5 hours total from prep to plate.