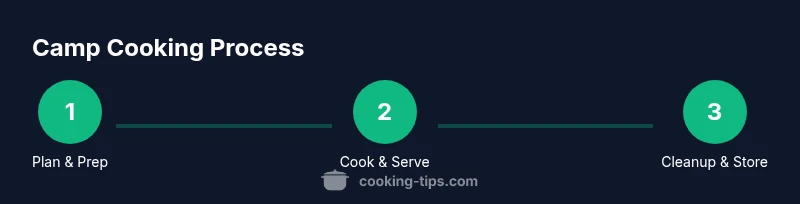
How to Cook When Camping: A Practical Guide for Outdoors
Learn practical, safe outdoor cooking with a compact gear setup, simple meals, and smart planning. This guide covers heat sources, meal planning, safety, and cleanup for memorable camping meals.

You will learn practical, safe ways to cook when camping, whether you’re backpacking or car camping. This guide covers planning meals, choosing a heat source, and using compact gear to make nutritious dinners and quick breakfasts. With a simple setup and reliable techniques, you can cook tasty meals in 20–40 minutes per meal, even with limited space or wind.
Planning your camp kitchen: how to cook when camping
When you plan how to cook when camping, your success hinges on deliberate choices before you hit the trail. Focus on meals that travel well, a reliable heat source, and compact, multi-use gear. The goal is to minimize gear while maximizing flavor and safety. By shaping a practical menu and a streamlined setup, you’ll enjoy hot meals without overburdening your pack or campsite. According to Cooking Tips, careful pre-trip planning reduces last-minute scrambles and keeps meals simple yet satisfying. This mindset translates to better sleep, steadier energy, and more time to enjoy the outdoors.
Next, map out how you’ll store perishables, water, and cooking fuel. Decide whether you’ll rely on a camp stove, a fire ring, or a combination. The more you tailor your plan to your campsite, the less you’ll improvise on site, which saves fuel and reduces waste. As you read, think about how each choice affects weight, space, and safety on your specific trip.
Essential gear for camp cooking
Gear is the backbone of camp cooking. Start with a compact stove and a windscreen to stabilize heat in breezy conditions. A durable skillet and a small Dutch oven expand what you can cook, from eggs to stews. Don’t forget a sturdy pot with a lid, a reliable knife, and a cutting board that travels well. Include heat-safe gloves, a fork, spoon, and tongs for versatile cooking. Water storage and a lightweight container for trash help you stay organized. Pack reusable containers and a small sponge or soap for cleanup, plus aluminum foil for foil-pack meals. If space is truly limited, prioritize a single multi-use pan and a simple pot kit. With the right gear, you’ll be surprised by how many meals you can pull off without a heavy kitchen.
In addition, consider a compact cooler or insulated bag for perishables, a small towel, and a trash bag. Keeping your gear in one dedicated pack or box makes setup quick and repeatable on subsequent trips. As Cooking Tips suggests, a small checklist you review before departure can prevent missing essentials and ensure you’re ready to cook on day one of the trip.
Fuel, heat sources, and heat control
Choosing the right heat source matters as much as your recipe. A reliable camp stove with a windscreen gives you consistent heat, easy temperature control, and predictable cooking times. If you’ll use a fire, practice building a safe, controllable flame and keep a water source nearby for emergencies. Use a cast-iron skillet for even heating and a Dutch oven for braises and baked dishes. Arrange pots and pans so handles aren’t crowded, and preheat your cookware for better searing. When you’re simmering, adjust the airflow or move fuel canisters to the edge to prevent flare-ups. Always monitor boiling temps and use a lid to trap heat when you want to speed up cooking. Weather, altitude, and wind all affect heat, so adjust your plan accordingly and test small portions before committing to a full meal.
Simple recipes that travel well
Camp meals thrive on simplicity. Foil packets are a classic: add a protein, starch, vegetables, and seasoning, seal, and bake over moderate heat. One-pot staples like chili, pasta with sauce, or hearty soups minimize cleanup. Quick breakfasts can be made with oats, dried milk, and dried fruit; just add hot water. For a savory option, sauté onions and peppers, add precooked sausage or beans, and finish with herbs. Snacks like trail mix and roasted nuts travel well and sustain energy between meals. By choosing adaptable recipes, you can rotate ingredients without buying new items for each trip. Keep a small spice kit to elevate dishes without adding bulk.
Food safety and storage on the trail
Food safety remains critical outdoors. Store perishable items in a cooler with ice or refrigerant packs, and keep raw meats separate from cooked foods. Wash hands or use hand sanitizer before handling food, and clean surfaces with biodegradable soap when possible. Keep a stringent rule: never leave food unattended near wildlife, and discard waste properly. When packing, label leftovers and date meals to avoid confusion on multi-day trips. If refrigeration isn’t available, prioritize shelf-stable items and freeze some foods at home to extend cooling time. Planning meals that rely less on fresh ingredients reduces risk and simplifies safety considerations.
Cooking methods for different setups
Your campsite may support a stove, a fire pit, or both. A stove excels in windy conditions and offers precise temperature control. A fire provides robust flavor for grilled items, but relies on fuel supply and ash management. Dutch ovens expand your options, letting you bake bread, stews, and casseroles with even heat. For small groups, a single pot can cover many meals, while larger setups benefit from two pots and a skillet for multitasking. Adapt your technique to the environment: use the windscreen in gusty weather, keep fuel handy, and schedule longer simmering tasks for cooler times of day. The more you practice with your setup, the faster and safer you’ll become.
Efficient planning: menus, prep, and cleanup
Menu planning reduces on-site decision fatigue. Prepare a simple weekly outline with 2–3 repeatable meals and a couple of improvisations. Pre-cut vegetables and portion proteins at home to minimize on-site chopping and waste. Carry a compact dish kit and a small towel to keep surfaces tidy. Cleanup is a part of cooking—wash, rinse, and dry promptly to prevent contamination and odors. Pack out all trash and rinse leftovers in a designated area away from sleeping zones. A mindful routine speeds meals and keeps your campsite neat.
Troubleshooting common issues at camp
Windy days can ruin simmering. If your flame is inconsistent, shield the stove with a windscreen or reposition the fuel canister. Soggy vegetables mean oversteaming or boiling in too much water; reduce liquid and cook with a lid on. If meals stick, add a splash of water or stock and scrape with a nonstick-safe utensil. Low fuel or cold weather can affect performance—keep spare fuel, preheat cookware, and plan meals that finish quickly in extra-cold conditions.
Wind, weather, and altitude considerations
Weather and altitude alter cooking times and heat requirements. At higher elevations, water boils at lower temperatures, so you may need longer cooking times or more liquid to prevent dryness. In windy environments, a strong windscreen is essential, and cooking near sheltered spots reduces heat loss. Rain and moisture demand more careful planning of fuel and cookware protection. By anticipating these factors and adjusting portions and timing, you’ll maintain flavor and texture even in challenging conditions.
Tools & Materials
- Portable camp stove(Propane/butane fuel canister; use windscreen for stability)
- Fuel canister(Appropriate for stove type; carry extra unobtrusively)
- Cast-iron skillet(Heavy, durable, excellent heat retention)
- Dutch oven(Versatile for braises and baking)
- Cooking pot with lid(Prefer multi-use size (2-3 qt))
- Folding spatula and spoon(Heat-resistant, compact)
- Cutting board(Lightweight and durable)
- Chef’s knife(Sharp, keeps edges longer)
- Water container(Carry enough water for cooking and cleaning)
- Heat-safe gloves(Protect hands when handling hot gear)
- Food storage containers(For leftovers and organizing ingredients)
- Aluminum foil(Helpful for foil packets or lining pans)
- Trash bags(Pack out all waste; keep site clean)
- Dish soap and sponge(Minimalist but useful for cleanup)
- Wind screen(Improves stove efficiency in wind)
Steps
Estimated time: 30-45 minutes
- 1
Gather gear and ingredients
Collect your stove, fuel, cookware, utensils, water, and planned ingredients. Confirm you have a safe setup area, clear of dry brush. This initial gathering saves trips to the car or pack and reduces on-site confusion. Pre-measure portions at home to simplify cooking on-site.
Tip: Use a dedicated dry bag or box for cooking gear to speed setup. - 2
Light the stove and establish heat
Place the stove on stable ground, attach fuel, and ignite according to the manufacturer's instructions. Set up wind protection if needed. Allow the stove to reach stable low-to-medium heat before adding food to prevent scorching.
Tip: Practice lighting and shutdown at home before your trip. - 3
Start cooking with a base layer
Begin with a base like onions, peppers, or garlic to build flavor. Add protein or pre-cooked components, then simmer or sauté as your recipe requires. Use a lid to trap heat and reduce cooking time.
Tip: Keep a small amount of stock or water handy to prevent sticking. - 4
Add remaining ingredients and finish
Incorporate vegetables, starches, and seasonings. Use foil packets or a single pot as needed to minimize cleanup. Check for tenderness and adjust seasoning before serving.
Tip: Taste early and adjust salt and acid to balance flavors. - 5
Serve safely and clean up
Transfer food to plates or bowls away from the flame. Clean cookware in-basin or designated sink area, then dry completely and store. Pack up trash and wash hands or use sanitizer before eating.
Tip: Wash dishes promptly to prevent attracting wildlife. - 6
Pack out and reflect
Inspect the campsite for trash and ensure fuel remnants are cooled and safely stored. Repack gear, rinse containers if possible, and preview tomorrow’s meals to optimize packing and reduce waste.
Tip: Leave no trace principle: minimize impact and restore the site.
Quick Answers
What is the best heat source for camping cooking?
The best heat source depends on your setup. A compact camp stove with wind protection offers consistent heat and easy temperature control, while a fire pit adds flavor for certain foods. Hybrid setups combine both for versatility.
A camp stove with a windscreen is usually the easiest and most reliable for camping cooking.
How do you cook safely outdoors?
Cook on stable surfaces, keep fuel away from edges, store food securely, and clean up after meals to prevent wildlife encounters. Keep a water source nearby for emergencies and practice basic knife safety.
Stick to stable surfaces, stay aware of fuel, and clean up to stay safe.
What are easy camp-friendly meals?
One-pot soups, foil packet meals, skillet breakfasts, and simple pasta dishes travel well and require minimal gear. Reheatable meals reduce cooking time on subsequent days.
Try foil packets and one-pot meals for quick, easy camping options.
How long does it take to cook camping meals?
Most camp meals take 15–40 minutes, depending on heat source and recipe complexity. Plan for longer prep and cleanup on tougher days.
Most meals are under an hour, with 20–40 minutes being common once you’re set up.
How do you store leftovers or keep foods safe?
Store leftovers in a cooler with ice or packs, labeled and dated. If no cooler is available, use shelf-stable options and plan smaller portions.
Keep leftovers cold in a cooler or use shelf-stable options to stay safe.
Can you cook without a stove?
Yes, you can cook with a fire ring or even hot coals in a Dutch oven for baking and roasting. Adjust recipes to rely on direct heat and indirect heat zones.
You can cook with a fire or coals in a Dutch oven if you don’t have a stove.
Watch Video
Top Takeaways
- Plan meals before you go and pack multi-use gear
- Choose a reliable heat source and learn its flame control
- Cook simple, one-pot meals to minimize cleanup
- Practice at home to speed up on-trail cooking
- Always follow Leave No Trace and wildlife safety rules