How to Cook Ribs on a Smoker: A Home Cook's Guide
Master the art of smoking ribs with a reliable, home-cook friendly method. Learn rubs, temps, wrap timing, resting, and serving for juicy, tender results every time.

You will learn how to cook ribs on a smoker: choose your ribs, prepare a simple rub, set the smoker to a low temperature (around 225-250°F), smoke gently for several hours, wrap to finish, rest, and slice for tender results. This quick answer summarizes the approach and timing for beginners.
Why smokers deliver unparalleled flavor
Smoked ribs gain depth from slow heat, hardwood smoke, and a well-managed bark. The Cooking Tips team has found that low, steady temperatures unlock collagen in the muscle, turning tough meat into tender, juicy ribs while preserving moisture. The wood you choose adds aroma and background sweetness or smoke; fruit woods like apple or cherry produce milder smoke, while stronger woods like hickory or oak give a bold finish. A well-calibrated smoker keeps temperatures steady enough to form a consistent bark without drying the meat. Consistency matters: avoid big temperature swings and keep vents adjusted so the fire stays even. Hydration matters, too: a pan of water or moist spritzes help maintain humidity inside the chamber. Finally, resting time after cooking allows juices to redistribute, ensuring slices stay juicy. With practice, you’ll learn the rhythm of the cook, the feel of the bark, and the aroma that signals perfection.
Selecting ribs and trimming
There are two common rib types: baby back and spare ribs. Baby backs are smaller and leaner, cooking a bit faster, with a leaner bite. Spare ribs are larger, have more connective tissue, and reward longer, slower cooking times. For beginners, start with a full rack of spare ribs or two racks for multiple servings. Trim away obvious excess fat, then remove the silver skin (the thin membrane) on the bone side; this helps rubs penetrate and makes the meat more tender. If you’re serving a crowd with different tastes, consider mixing both rib types for variety. When buying, look for meat that’s pinkish-red with a light fat cap; avoid pale, dry spots. If you’re short on time, consider pre-cut racks; otherwise, you’ll gain flexibility and better yields by choosing whole racks.
Building a reliable rub and glaze
A good dry rub layers salt, sugar, spices, and sometimes a tiny amount of pepper. Salt helps with moisture retention and bark formation, while sugar aids browning and flavor. A simple starting rub might include coarse salt, paprika for color, black pepper, and a touch of brown sugar. Let the rub sit on the meat for 30-60 minutes to begin flavor penetration, then start the smoking session. If you’d like glaze, add a separate sauce or paste near the end of the cook to avoid burn. A glaze should be applied toward the last 15-30 minutes so it sticks and caramelizes without burning. Taste preferences vary widely, so start with a balanced rub and adjust next time based on your results. For even flavor, apply the rub evenly across both sides and sides of the rack.
Smokers, fuels, and wood: how to set up
Select a smoker you’re comfortable with, whether charcoal, electric, or pellet. The goal is stable, low heat and a clean smoke. Start with a fuel and wood combination that suits your smoke flavor goal: hickory for a robust backbone, oak for balance, and fruit woods for a gentler aroma. Place a water pan in the smoker to help regulate humidity, and maintain airflow by adjusting vents. Preheat the smoker to around 225-250°F and let it settle for 15-30 minutes before placing the ribs. Keep the chamber closed as much as possible to maintain consistent heat. If your smoker has a thermometer probe, place it in the thickest part of the rack, away from the bone, to monitor internal temperature without opening the chamber.
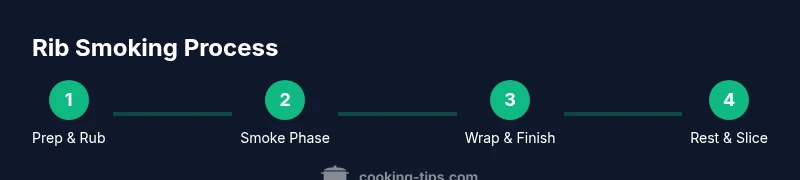
The stage-by-stage cook: 4 phases
Phase 1: The initial smoke (0-2 hours). Place ribs bone-side down and away from direct flame if possible; monitor temp and moisture. Phase 2: The stall management and bark formation (2-4 hours). Maintain a gentle smoke, and spritz or mop lightly to keep meat moist. Phase 3: The wrap (2-3 hours, depending on doneness). Wrap tightly with foil and a splash of liquid to speed tenderness. Phase 4: The finish (30-60 minutes). Unwrap, apply a light glaze if desired, and continue cooking until the ribs pass the bend test and reach the recommended internal temperature.
Temperature targets and timing
Ribs are not like chicken—they finish when tenderness is achieved rather than an exact internal temp. A common target is 195-205°F (measured in the thickest part, away from bone). For many cooks, gently smoking at 225-250°F until the bark is set and meat starts to pull back from the bone is ideal; the total cook time often ranges 4-6 hours for spare ribs, 5-7 hours for baby backs depending on size and temp stability. Resting after cooking is essential—wrap in clean towels and let rest 15-30 minutes before slicing.
Wrapping technique (Texas crutch) and finishing
Wrapping tight with foil or butcher paper reduces moisture loss and speeds tenderness. For the wrap, add a splash of liquid like apple juice or broth before sealing; this steams the meat and helps break down collagen. Return to the smoker and continue until the ribs are tender and the bark is stable. Unwrap and finish on indirect heat briefly if you want a final glaze set and bark to reform.
Resting, slicing, and serving
Let ribs rest 10-20 minutes before slicing; a rest period allows juices to reintegrate. Slice between the bones with a sharp knife and serve with your preferred sauce or dry rub on the side. For presentation, cut into individual portions and arrange on a warmed platter.
Troubleshooting common issues
If ribs come out dry, check your temperature stability and moisture management; spray more and avoid over-drying. If the bark is too hard or thick, wrap earlier or adjust sugar content in the rub. If the ribs are undercooked, extend the wrap stage slightly or finish with a brief return to heat. If heat is uneven, rotate racks or adjust vent settings and keep the smoke flow steady.
Variations, sauces, and sides
Experiment with different rubs and glazes—from a light honey glaze to a spicier chipotle finish. Serve with classic sides like coleslaw, cornbread, baked beans, and pickles for contrast. Leftover ribs reheat nicely in foil with a splash of water or broth to maintain moisture.
Tools & Materials
- Smoker (charcoal, electric, or pellet)(Choose one you’re comfortable controlling for steady temps)
- Meat thermometer or probe(Place in thickest part, away from bone)
- Instant-read thermometer(For quick checks during rest and finish)
- Aluminum foil or butcher paper(Used for wrapping during the Texas crutch)
- Water pan(Helps regulate humidity in the smoker)
- Racks of ribs (pork)(Two racks for a crowd is common)
- Rub ingredients (salt, paprika, pepper, brown sugar)(Base rub; adjust to taste)
- Meat cutting board and sharp knife(For trimming and carving)
- Spray bottle with water or apple juice(Optional moisture management)
- Tongs and heat-safe gloves(Handling hot racks safely)
Steps
Estimated time: 6-8 hours
- 1
Prepare ribs
Remove the membrane from the bone side and trim excess fat. Pat dry so the rub adheres well. This ensures even flavor and bark formation.
Tip: Use a butter knife or papertowel to loosen the membrane before peeling it away. - 2
Apply rub
Coat both sides evenly with a balanced rub; let it sit for 30-60 minutes to start flavor penetration while the smoker warms.
Tip: Don’t rub too hard; you want to coat, not mash the meat. - 3
Preheat smoker and start ribs
Preheat to 225-250°F and place ribs bone-side down. Maintain low, steady heat for consistent bark development.
Tip: Keep vents adjusted to prevent temperature spikes. - 4
Monitor and spritz (optional)
Periodically check temps and spritz with a light liquid to maintain surface moisture; do not over-saturate.
Tip: Relaxing the lid few times per hour preserves heat. - 5
Wrap for tenderness (Texas crutch)
Wrap tightly with foil or butcher paper with a splash of liquid to speed tenderness; return to smoker.
Tip: Seal the wrap well to trap steam and juices. - 6
Finish and rest
Unwrap, glaze if desired, and finish until ribs are tender and reach ~195-205°F internally. Rest 15-30 minutes before slicing.
Tip: Let carryover heat finish the final few degrees.
Quick Answers
What internal temperature should ribs reach to be considered done?
Ribs are typically considered done when the meat near the bone is tender and the internal temperature in the thickest part reaches about 195-205°F. Tenderness is often more important than an exact number, which is checked with the bend test or probe for tenderness.
Ribs finish when they are tender; aim for 195-205 degrees Fahrenheit in the thickest part and use a bend test to confirm tenderness.
Should I wrap the ribs during cooking?
Wrapping is optional but common. The Texas crutch wraps in foil or butcher paper help retain moisture and speed tenderness, while some cooks prefer an unwrapped barkier finish. Decide based on desired texture and schedule.
Wrapping helps tenderness and moisture, but you can skip it if you want a crisper bark. It’s a matter of texture preference and timing.
What wood should I use for ribs?
Choose a wood that matches your flavor goal. Hickory provides a bold backbone; oak offers balance; fruit woods like apple or cherry give a milder sweetness. Many cooks blend a strong wood with a fruit wood for complexity.
Use a mix of woods, like oak with a touch of apple for balance and sweetness.
How can I prevent dry ribs?
Maintain steady temperature, use a water pan, spritz or mop to keep surface moisture, and avoid overcooking. Wrapping during the mid-cook phase can also help retain moisture and yield juicier meat.
Keep temps steady, use moisture, and don’t overcook. Wrapping helps retain moisture.
How long should I rest the ribs after cooking?
Rest ribs for about 15-30 minutes after cooking to allow juices to redistribute. Keep them loosely tented during resting to prevent cooling too quickly.
Rest for 15-30 minutes to reabsorb juices, then slice.
Is sauce necessary for ribs on a smoker?
No, sauce is optional. A good dry rub and proper bark can stand on its own. If you prefer sauce, apply it toward the end to avoid burning.
Sauce is optional; apply near the end if you want extra glaze.
Watch Video
Top Takeaways
- Choose rib type based on crowd size and time available
- Maintain steady 225-250°F for consistent bark
- Wrap at the right stage to balance tenderness and bark
- Rest before slicing to keep juices in the meat
- Use a simple rub and optional glaze for flavor diversity