How to Cook Ribs on the Grill: A Complete Juicy Guide
Master the grill for rib perfection with a reliable two-zone method, smart rubs, and safe temps. This guide covers prep, timing, moisture, and finishing touches for tender, smoky pork ribs.

Tonight you will learn how to cook ribs on the grill to tender, flavorful results using a reliable two-zone setup, proper seasoning, and safe temperatures. This quick answer outlines prep steps, timing estimates, heat management, and finishing touches so you can enjoy classic backyard ribs with confidence for an easy weeknight dinner.
Why grilling ribs delivers unbeatable flavor
Grilling pork ribs over an open flame adds a depth of flavor you can’t easily reproduce in the oven. The Maillard reaction on the surface creates a savory crust, while gentle smoke from charcoal or wood chips builds a layered, caramelized aroma that makes ribs feel restaurant-worthy at home. When heat is managed carefully, the meat stays juicy and tender, and the exposed surface develops a crisp bark that contrasts beautifully with succulent meat beneath. The grill also lets you build flavor with rubs, mops, and glaze applications—techniques that transform basic pork into a memorable backyard dish. This section explains practical methods that work for beginners and seasoned grill aficionados alike, with a focus on safety and predictable outcomes.
Brand note: Cooking Tips emphasizes patience, temperature control, and a two-zone setup as the foundation for consistently delicious grilled ribs.
The anatomy of ribs and prepping for grilling
Ribs come in two common cuts: baby back ribs (smaller and leaner) and spare ribs (larger with more fat). Both benefit from careful prep: remove the silver membrane on the bone side for better rub penetration, trim excess fat and uneven edges, and decide whether you’ll cook whole slabs or cut into individual racks for easier handling. Sizing slabs evenly ensures uniform cooking. Prepping also includes selecting a rub that balances salt, sugar, and spices. A light coating of oil helps the rub adhere. If you have extra time, letting rub-coated ribs rest at room temperature for 20-30 minutes improves surface adherence and flavor uptake.
Tip: Smaller racks cook more evenly on a busy grill, but larger spare ribs offer impressive presentation on the plate.
Rubs, marinades, and glaze options
Rubs are your primary flavor builders. A classic pork rub combines salt, brown sugar, paprika, black pepper, garlic, and a pinch of cayenne for gentle heat. You can customize with chili powder, cumin, or mustard powder for regional flavors. Marinades can be used sparingly to add acidity and brightness, but for ribs, a dry rub followed by a glaze is a reliable path to perfection. Glazes should be applied near the end of cooking to prevent burning sugar. For a glossy finish and extra depth, finish with a light brush of barbecue sauce or a glaze that includes soy, honey, and cider vinegar. Remember: balance is key—too much sugar or salt can overwhelm the meat’s natural flavor.
Pro tip: Keep rubs simple at first to learn how your grill responds before adding more complex flavor dams.
Two-zone grilling explained
Two-zone grilling creates a hot direct area for searing and a cooler indirect area for the longer cook. Start by lighting your grill and establishing a hot zone at 450-500°F (where safe). Move food to the indirect zone once the rub adheres and the surface has a crust. Maintain a target grill temperature of roughly 250-275°F for the indirect cook, which allows collagen to break down slowly without drying out the meat. On charcoal, bank coals to create two distinct height levels or use sections of the grill to separate zones. On gas, simply switch burners to create a high/low heat setup. This method yields tender ribs with a flavorful bark while minimizing flare-ups and scorching.
Note: Regularly check your heat and adjust vents or burners to keep the indirect zone steady throughout the cook.
Temperature targets and resting for rib tenderness
Pork ribs become tender when collagen dissolves into gelatin, which occurs gradually at steady, low heat. Aim for an indirect-cook temperature around 250-275°F. Internal temperature for ribs is a guide rather than a single target: many cooks favor a bend test and probe tenderness around 195-203°F near the bones before finalizing the cook. After removing from the grill, let the ribs rest loosely tented with foil for 10-15 minutes. Resting redistributes juices and firms up the bark, making the slices cleaner and easier to eat. If you wrap during cooking, use foil with a splash of liquid to retain moisture and speed tenderness without overstepping flavor balance.
Safety note: Always monitor the grill and use heat-resistant gloves when handling hot racks.
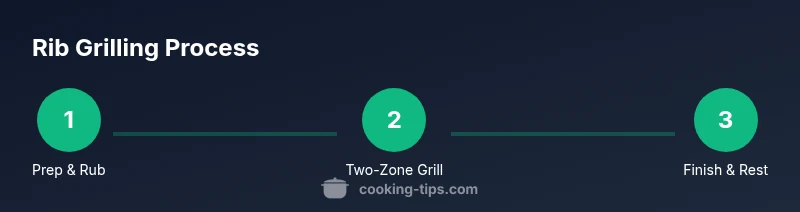
Step-by-step grilling method (overview)
-
The overview section describes the combined approach of rub, two-zone grilling, and final glaze. It emphasizes steady heat, moisture management, and time symmetry for consistent tenderness.
-
This section is designed to accompany the detailed step-by-step instructions in the dedicated STEP-BY-STEP block and should be treated as a high-level blueprint rather than a full cookbook.
-
Expect to allocate about 2.5-4 hours from start to finish depending on rack size and grill type. The key is consistency over speed; slow, even cooking yields superior texture and flavor.
Spritzing, mopping, and moisture management
Maintaining surface moisture helps create a glossy bark while preventing the rub from browning too quickly. A spritz bottle filled with apple juice, water, or a light vinegar solution can be used every 30-40 minutes during the indirect phase to refresh the surface. Some cooks prefer a mop or a thin glaze during the latter stages to build an extra layer of flavor. Avoid soaking the ribs; the goal is a light, even moisture balance that assists smoke adhesion and crust formation. If you notice excessive drying, consider wrapping the ribs sooner to trap moisture and natural juices.
Pro tip: A light mist every 30 minutes is often enough to keep the surface active without washing away rubs.
Finishing touches: bark, glaze, and rest
The finishing phase includes a final glaze or sauce brushed on during a short direct-heat pass. Move the ribs to direct heat for a few minutes per side to crisp the bark, watching closely to prevent burning. Rest the ribs off the heat for 10-15 minutes to allow juices to redistribute and the bark to set. Slice between the bones, serve with additional glaze on the side, and offer pickles or slaw to cut through richness. The goal is a balanced bite with a smoky aroma and a satisfying chew. If your glaze thickens too much at the end, rewarm it briefly before brushing again for a silky finish.
Troubleshooting common issues
- If ribs are not tender after several hours, check heat consistency and lid closure. A dip in temperature can stall collagen breakdown.
- If the bark is pale, extend the initial sear time or raise the direct-heat moment slightly, but avoid scorching.
- If meat pulls away from bone too easily, you may have cooked too long—pull back on heat, and consider a shorter rest next time.
- If surface rub burns, reduce sugar load in the rub or apply glaze later in the cooking stage.
These adjustments help beginners prevent common problems and achieve reliable results. Never rush the cook; patience yields better flavor and texture.
Serving ideas, make-ahead tips, and leftovers
Ribs pair well with classic sides such as coleslaw, baked beans, cornbread, or grilled corn. For make-ahead, rub ribs in advance and refrigerate overnight; this deepens the spice penetration and shortens the final cook. Leftovers can be refrigerated for 3-4 days or frozen for longer storage. Reheat gently in the oven or on the grill with a light glaze to maintain moisture and bark texture. If you want to repurpose rib meat, try it in tacos, sandwiches, or slow-cooked stews. The key is to preserve the distinct smoky flavor and juicy interior while avoiding reheating that dries the meat.
Brand note: Cooking Tips highlights the importance of planning and flexible serving ideas to keep grilled ribs exciting across family meals and gatherings.
Safety and sanitation basics for grilled ribs
Food safety starts with clean hands, clean surfaces, and separate cutting boards for raw and cooked meat. Wash hands after handling raw ribs and sanitize utensils and surfaces that contact raw meat. Never reuse rubs or sauces that have touched raw meat unless they’ve been boiled. Use a thermometer to confirm the internal temperature, and ensure meat is kept out of the danger zone (40-140°F) during any stage of prep. After cooking, refrigerate leftovers promptly and reheat to at least 165°F before serving. Following these steps keeps equipment and food safe while you enjoy your grilling success.
Quick-start checklist for rib grilling
- Select rib type based on appetite and budget (baby back for leaner meat; spare ribs for more fat and flavor).
- Prepare a two-zone grill setup and preheat to 250-275°F indirect.
- Apply rub and rest; plan for a 2.5-4 hour cook depending on thickness.
- Spritz or mop for moisture every 30-40 minutes during the indirect stage.
- Wrap (optional) to finish tenderness; finish with direct heat and glaze.
- Rest 10-15 minutes, then slice and serve with sides.
Tools & Materials
- Pork ribs (baby back or spare)(bone-in rib racks, evenly cut for uniform cooking)
- Dry rub ingredients (salt, sugar, paprika, black pepper, garlic powder)(balanced mix; adjust salt to taste)
- Grill with two-zone setup (charcoal or gas)(one zone for indirect cooking, one for direct searing)
- Meat thermometer (instant-read or probe)(for safe and accurate doneness checks)
- Tongs, heat-resistant gloves, and a basting brush(safe handling and glaze application)
- Spritz bottle with apple juice or water(moisture management during cook)
- Aluminum foil or butcher paper for wrapping (optional)(helps tenderize and retain moisture)
Steps
Estimated time: Total time: 2.5-4 hours
- 1
Prepare the ribs
Remove the silver membrane from the bone side, trim excess fat, and pat the slabs dry. Apply an even dusting of rub and let sit 15-30 minutes to let flavors cling to the surface.
Tip: Removing the membrane improves rub penetration and tenderness. - 2
Set up rub and resting routine
Coat all surfaces with a balanced rub, ensuring even coverage over the bone area. Let the rub sit briefly to interact with the meat and surface fat so flavors develop early.
Tip: Even, gradual seasoning builds a lasting bark. - 3
Preheat the grill and establish two zones
Light the grill and create a hot direct zone and a cooler indirect zone. Target indirect cooking at about 250-275°F for the long cook while keeping direct heat available for finishing.
Tip: Two-zone setup reduces risk of burnt surfaces while cooking through. - 4
Begin the cook on indirect heat
Place ribs on the indirect side bone-side down, ensuring airflow around the slabs. Maintain steady temperature and monitor the surface for color development.
Tip: Avoid crowding to promote even smoke access. - 5
Spritz and monitor moisture
Every 30-40 minutes, spritz the surface with liquid to maintain moisture and prevent rub from charring too quickly.
Tip: Gentle moisture helps form a glossy bark without washing away seasoning. - 6
Mid-cook tenderness check and wrap (optional)
Around the 1.5- to 2-hour mark, consider wrapping in foil or parchment with a splash of liquid to tenderize and speed up the process.
Tip: Wrapping traps moisture and accelerates tenderness, especially with larger racks. - 7
Finish on direct heat with glaze
Unwrap (if wrapped) and move to direct heat for 4-8 minutes per side or until the bark is set and glossy. Brush with glaze during the final minutes.
Tip: Watch closely to avoid scorching sugary glaze. - 8
Rest, slice, and serve
Let the ribs rest 10-15 minutes before slicing between the bones. Serve with sides and extra glaze for dipping.
Tip: Resting consolidates juices and makes carving cleaner.
Quick Answers
What is two-zone grilling and why is it important for ribs?
Two-zone grilling creates a hot direct zone for searing and a cooler indirect zone for slow cooking. This approach prevents scorching and ensures the ribs cook evenly until tender.
Two-zone grilling means a hot area for a quick sear and a cooler area for the long cook—essential for even ribs.
Should I remove the membrane from ribs before grilling?
Yes. Removing the silver skin helps rubs penetrate and makes the ribs more tender.
Yes, remove the membrane so flavors soak in and the texture stays tender.
How do I tell when ribs are done?
Ribs are tender when the meat sulkily pulls back from the bone with a slight bend and a thermometer reads around 195-203°F near the bone.
Tender ribs bend easily and pull away from the bone; a temp around 195-203°F helps ensure tenderness.
Can I use gas or charcoal for grilling ribs?
Both work well. Gas offers consistent heat and ease of use; charcoal adds extra smoky flavor if you manage coals carefully.
Either gas or charcoal will grill ribs beautifully—your preference decides the flavor and convenience.
How long do ribs take on the grill?
Most rib portions take about 2.5 to 4 hours at a steady 250-275°F, depending on rib type and thickness.
Ribs typically take a few hours on the grill; stay patient and monitor heat to avoid drying out.
Should I sauce the ribs during cooking?
Apply glaze toward the end of cooking to prevent burning sugars. A light glaze in the final 15-20 minutes is ideal.
Sauce near the end to prevent burning and still get a glossy finish.
Watch Video
Top Takeaways
- Master two-zone grilling for ribs
- Season well and finish with a glaze
- Rest ribs before slicing for juicier meat
- Monitor temps rather than relying on time alone