How to Cook Ribs on a Charcoal Grill
Learn a reliable, step-by-step method to cook ribs on a charcoal grill. This guide covers preparation, two-zone setups, rubs, timing, wrapping, resting, and serving for fall-off-the-bone results.

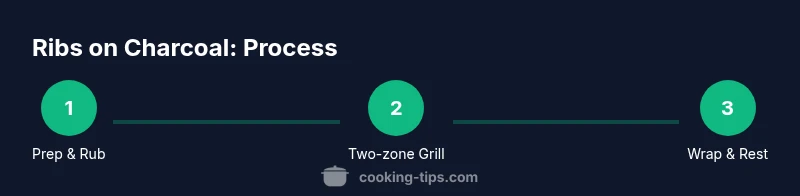
You’ll learn a reliable, two-zone method for cooking ribs on a charcoal grill: trim and rub, set up a two-zone fire, cook slowly indirect until tender, wrap to finish, then rest before slicing. With proper temp control (about 225–250°F) and a finishing glaze, you’ll get bark, smoke, and juicy meat every time.
Why charcoal grilling ribs requires patience and temperature control
Cooking ribs on a charcoal grill rewards patience. The key is steady heat and controlled smoke, which build the bark (the crust) and keep the meat tender inside. When you cook ribs on a charcoal grill, you’re balancing two goals: extracting smoke flavor from the charcoal and preventing the meat from drying out. According to Cooking Tips, a two-zone setup is the simplest way to manage both heat and smoke without constant babysitting. Start with a lower target ambient temperature of about 225–250°F (107–121°C) and resist the urge to crank the heat higher for speed. Slow, deliberate cooking yields better bark formation, a juicy interior, and a predictable finish that home cooks can replicate week after week.
Selecting ribs and trimming for even cooking
Choose St. Louis-cut or baby back ribs based on your preference for meatiness and cook time. For charcoal grilling, St. Louis-cut ribs are sturdy and cook evenly, making them a popular choice. Remove the membrane from the bone side to improve rub penetration and tenderness. Trim excess fat if it’s thick, but leave a thin fat cap for moisture. The rub you apply should include salt, sugar, paprika, garlic powder, onion powder, chili powder, and a touch of black pepper. Let the rub sit for at least 20 minutes (or up to 2 hours refrigerated) to begin caramelization as the ribs heat up on the grill, which helps form a robust bark.
Preparing the grill: two-zone setup for even smoking
A two-zone setup means piling charcoal on one side for high-heat direct searing and leaving the other side empty for lower-temperature indirect cooking. Light the charcoal in a chimney starter for quick, even ignition. When ready, distribute hot coals to create a hot zone and a cooler zone. Place a water pan or a foil boat on the cool side to regulate humidity and catch drips. This arrangement lets you sear over direct heat to establish color and flavor, then move the ribs to the indirect side to finish cooking slowly without scorching.
Creating a flavorful rub and marination plan
A balanced rub contributes depth without overpowering the pork. A common ratio is 2 parts brown sugar to 1 part salt, with paprika, garlic powder, onion powder, chili powder, and black pepper. You can add a touch of cumin or mustard powder for extra depth. Apply a light, even coat—more on the bones than the meat’s surface helps protect moisture. If you like, marinate or dry-brine for several hours in the fridge to boost flavor and juiciness. Allow the rub to form a crust as the ribs warm up on the grill, a step that contributes to the signature bark.
The cooking timeline: 2-1-1 or 2-2-1 methods explained
Two popular charcoal grill rib methods are the 2-1-1 and 2-2-1 approaches. In the 2-1-1 method, you cook 2 hours indirect, wrap with liquid for 1 hour (the “Texas crutch” style), then finish 1 more hour indirect. The 2-2-1 method uses 2 hours indirect, 1 wrap hour, then 1 hour indirect—often used when you want more bark and a longer resting window. Maintaining a steady 225–250°F during the indirect phase helps render fat and soften connective tissue without drying the meat. Resist the temptation to raise the temperature for faster results; the goal is tenderness with a smoky flavor.
Finishing steps: wrap, glaze, and smoke balance
Wrapping the ribs in foil during the mid-cook phase traps moisture and speeds tenderness. After wrapping, you can add a thin layer of sauce or a splash of apple juice for moisture, but avoid oversaucing—too much liquid can make the bark soggy. Return the wrapped ribs to the indirect zone, then check internal temperature and tenderness. If the meat is fork-tender and a toothpick slides in with little resistance, unwrap to firm up the surface and apply a glaze if you like. Unwrap and resume cooking for 15–20 minutes to set the glaze and develop a final, glossy crust.
Resting, slicing, and serving rib perfection
Resting is essential after the long cook. Let the ribs sit, loosely tented with foil, for 10–20 minutes to redistribute juices. A properly rested rib will cut cleanly and stay moist. Slice between the bones with a sharp knife, then fan the racks for serving. Pair with classic sides like cornbread, coleslaw, and grilled corn. A light spray of water or apple juice during service can refresh the bark and keep slices juicy. Remember: the best ribs are the ones you can slice without tearing, while still carrying a smoky aroma in every bite.
Troubleshooting common issues and safety reminders
If you encounter flare-ups, close the grill vents slightly to reduce oxygen and control the flame. Keep a spray bottle handy to dampen flames without smothering the bark. If the ribs aren’t tender after the expected time, check your grill’s temperature consistency; hot spots can steal moisture. Always use heat-resistant gloves when manipulating hot grates and foil. Make sure meat temperatures follow safe guidelines and avoid cross-contamination by using separate utensils for raw and cooked meat. Safety and patience are the quiet heroes of great barbecue.
Tools & Materials
- Pork ribs (St. Louis-cut or baby back)(2 racks recommended for a family meal)
- Charcoal briquettes or lump charcoal(Enough to maintain two zones)
- Charcoal chimney starter(Quickly lights charcoal without lighter fluid)
- Two-zone grill setup (one hot zone, one cool zone)(Indoors/ outdoors depending on your grill)
- Heat-resistant gloves(Protection when handling hot grates)
- Meat thermometer(Monitor internal temp toward 195–203°F (90–95°C))
- Rub ingredients (brown sugar, paprika, kosher salt, garlic powder, onion powder, chili powder, black pepper)(Mix to your taste; adjust salt level)
- Apple juice or water spray bottle(For moisture and steaming during cook)
- Aluminum foil(Used for wrapping during the cook)
- Basting brush or sprayer(For glaze or moisture during finish)
- Cutting board and sharp knife(For slicing after resting)
- Thermometer-safe water pan(Adds humidity in the grill)
Steps
Estimated time: Total time: about 4 hours
- 1
Trim and apply rub
Rinse and pat dry the ribs, remove the membrane on the bone side, and trim excess fat. Mix your rub ingredients and apply an even coat to all surfaces, pressing gently so the rub adheres. Allow 15–60 minutes for flavors to start building on the surface.
Tip: Let the rub sit longer for deeper flavor; 1–2 hours refrigerated is ideal. - 2
Light the grill and set up two zones
Fill the charcoal chimney and light. When gray ash forms, dump coals to create a hot zone on one side and a cooler area on the other. Place a water pan in the cool zone to stabilize humidity and temperature.
Tip: Use a grill thermometer and keep vents open just enough to maintain 225–250°F. - 3
Sear over direct heat
Place ribs over the hot zone for 2–4 minutes per side to develop color and initial bark. This sear locks in flavors and helps with even cooking.
Tip: Watch for flare-ups; have a spray bottle ready and move ribs away quickly if flames rise. - 4
Move to indirect heat and begin timing
Shift ribs to the indirect side. Maintain 225–250°F and monitor internal temps toward 160–170°F as the connective tissue begins to break down.
Tip: Use a timer and aim for a gentle simmer of the bone-side meat, not a full boil. - 5
Wrap for tenderness (Texas crutch)
After about 2–2.5 hours, wrap ribs tightly in foil with a splash of apple juice or water. Return to indirect heat and continue cooking for 1 hour.
Tip: Double-wrap for a snug seal to trap moisture; cut steam vents if needed. - 6
Check tenderness and glaze option
Unwrap and test for tenderness; if bone meets little resistance, you’re close. If you want glaze, apply a light layer and cook 15–20 minutes more, uncovered, to set the finish.
Tip: A gentle glaze should be sticky, not soupy; avoid drowning the bark. - 7
Rest the ribs
Remove ribs from heat and let rest loosely tented for 10–20 minutes. Resting helps the juices redistribute and improves slice quality.
Tip: Rest longer if you can; it greatly improves juiciness and texture. - 8
Slice and serve
Slice between the bones for even portions and present on a warm tray. Serve with sides like grilled corn, coleslaw, or cornbread.
Tip: Cut with a sharp knife and wipe blade between cuts for clean slices.
Quick Answers
What is the best rub for ribs on a charcoal grill?
A balanced rub with brown sugar, paprika, kosher salt, garlic powder, onion powder, chili powder, and black pepper provides a great mix of sweetness, spice, and bark. Adjust salt to taste and let it sit before cooking for deeper flavor.
Use a balanced rub with brown sugar and spices; let it rest on the ribs for deeper flavor before grilling.
How long should ribs cook on a charcoal grill?
Plan for about 3 to 4 hours total at 225–250°F, depending on rib cut and thickness. Use a 2-1-1 or 2-2-1 method to balance tenderness and bark.
Ribs should cook low and slow for roughly three to four hours, using a two-zone setup.
Should I wrap ribs in foil during cooking?
Wrapping helps tenderize by trapping moisture, especially after the initial color. Return to indirect heat after wrapping until tender, then unwrap for a final glaze if desired.
Wrapping can speed tenderness and keep meat moist; unwrap later for a final glaze.
What internal temperature should ribs reach?
Ribs reach tenderness around 195–203°F (90–95°C) when the connective tissues break down. Always rely on tenderness as the primary cue, not just a temperature.
Aim for about 195–203°F, but tenderness is the real guide.
Can I glaze ribs during cooking?
Yes, apply a light glaze during the final 15–20 minutes after unwrapping. Too much glaze earlier can prevent bark formation and add excessive sweetness.
You can glaze near the end for a glossy finish; don’t overdo it early.
What safety steps are important when grilling ribs?
Keep hot coals contained, use gloves, and avoid cross-contamination by keeping raw and cooked tools separate. Always ventilate and monitor flare-ups to prevent fires.
Stay safe: gloves, separate utensils, and watch the flames.
Watch Video
Top Takeaways
- Prepare a two-zone grill for consistent heat and smoke.
- Season with a balanced rub and let flavors build.
- Cook low and slow to tenderize without drying out.
- Wrap to finish if extra tenderness is needed.
- Rest before slicing to preserve juiciness.