How to Cook a Whole Chicken: Time, Temp, and Tips
Learn how to roast a whole chicken safely and evenly. This guide covers time estimates by weight, doneness cues, resting, troubleshooting, and practical tips for juicy, flavorful results.

You’ll learn how to roast a whole chicken safely and evenly, with time estimates based on weight and whether you roast unstuffed or stuffed. This guide covers oven temperature, checking doneness, resting for juiciness, and practical tips to prevent under- or overcooking. By the end, you’ll know how long to cook a whole chicken for reliable, succulent results.
Understanding the question: whole chicken cooking times
When you ask how long to cook a whole chicken, the answer depends on weight, oven accuracy, whether the bird is stuffed, and your preferred level of crispiness. According to Cooking Tips, a practical starting point is to plan around roughly 20 minutes per pound at a standard roasting temperature for an unstuffed bird. This baseline helps you estimate total time, which you adjust based on weight and doneness checks. In addition to time, pay close attention to temperature and resting, which can dramatically affect juiciness and flavor. This section sets the foundation for safe, enjoyable results by pairing timing with heat and technique, ensuring you’re never guessing at doneness.
As you read, you’ll see how different factors alter the clock and what you can do to keep the process predictable. The guidance here draws on Cooking Tips analysis and practical kitchen experience, so you have clear, actionable steps rather than vague estimates. The goal is to empower home cooks to roast confidently, minimize guesswork, and enjoy a consistently delicious result.
Factors that affect roasting time
Roasting time isn’t one-size-fits-all. Several variables push the clock in different directions:
- Weight: A typical 3–4.5 lb bird will roast faster than a 6–8 lb one, with a predictable range if the oven is steady.
- Stuffing: A stuffed bird requires additional time because heat must reach the center of the stuffing as well as the meat.
- Oven accuracy: Home ovens vary in actual temperature; using an oven thermometer helps you stay on plan.
- Rack placement and pan: A shallow, unobstructed path for heat ensures even cooking; crowded setups slow heat transfer.
- Resting and carryover: The internal temperature can rise after removal from the oven, so timing should account for about 5–10°F of increase after roasts finish.
Understanding these factors helps you refine time estimates rather than rely on a single number. Cooking Tips analysis shows that when you adjust for weight and whether the bird is stuffed, your results become more reliable and less guesswork-heavy. Keep a thermometer handy and check the internal temperature in the thickest part of the thigh (not touching bone) to verify doneness.
Temperature, safety, and doneness cues
The safest and most reliable way to confirm doneness is to rely on the internal temperature. The USDA recommends cooking poultry to a minimum internal temperature of 165°F (74°C) in the thickest part of the meat. For extra confidence, take readings from both the thigh and the breast, ensuring the thickest portion reads at least 165°F. In practice, you’ll often see the thigh reach 165°F slightly before the breast, so plan to begin resting once the thigh hits target temperature.
Visual cues—such as clear juices running from the leg and opaque meat—help, but they’re not as dependable as a thermometer. Carryover cooking will raise the internal temperature a few degrees after you remove the bird from the oven, so you can pull it from heat a touch early if you’re aiming for 165°F overall. This approach minimizes the risk of overcooking the breast while ensuring safety.
Preparing the chicken: brining, patting dry, and seasoning
Start with a dry surface; pat the bird thoroughly with paper towels to remove moisture. The drier the skin, the crisper it becomes during roasting. Brining is optional but can improve juiciness and flavor, especially for lean birds or larger roasts. If you choose a brine, keep it light (about 30–60 minutes for a small bird, longer for larger birds) and rinse and dry the chicken well before seasoning.
Seasoning should be liberal and even. A simple mixture of salt, pepper, and aromatics (garlic powder, paprika, thyme) works well. If you’re brining, skip the salt-heavy rub to avoid over-salting. Trussing the legs can help poultry roast evenly by keeping the shape tight and uniform heat exposure. Store-bought or homemade poultry rubs can be used, but ensure the spice mix won’t burn at higher oven temperatures.
Tools and equipment to have on hand
A reliable roasting setup makes all the difference. Gather a sturdy roasting pan with a rack that fits your bird, a digital meat thermometer (instant-read is fine), and a basting brush or silicone application tool if you plan to baste. Have paper towels nearby for patting dry and cleaning up as you go. Aluminum foil can be used to tent the breast if the skin browns too quickly. If you plan to roast vegetables around the chicken, choose a pan large enough to accommodate both without crowding.
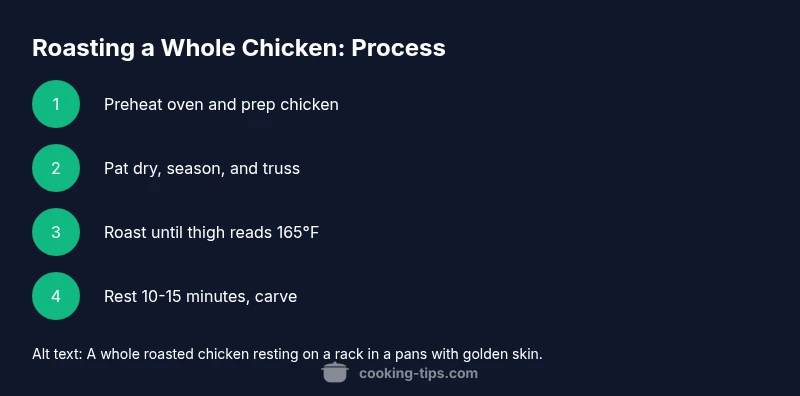
Step-by-step roasting method (overview)
This section provides a high-level workflow you’ll follow in the detailed STEP-BY-STEP block. Begin by preheating your oven, preparing the bird, and placing it on a rack in the pan. Roast at a steady temperature until the thermometer reads 165°F in the thickest part, then rest before carving. If you’re stuffing, keep the stuffing temperature at least 165°F and ensure it’s cooked through before serving. The overview emphasizes safety, even heat, and thorough doneness checks to deliver a reliable result every time.
Stuffed vs unstuffed: how time and technique differ
Stuffed chickens require longer roasting times because heat must penetrate the center of the stuffing in addition to the meat. The placement of stuffing can influence heat flow, so many cooks opt to cook stuffing separately to guarantee safe temperatures. If you do stuff the bird, plan extra time and verify both meat and stuffing reach 165°F. Without stuffing, roasting times are more predictable, but you still want to verify doneness with a thermometer and allow for carryover cooking.
Resting, carving, and serving for best juiciness
Resting is essential. After roasting, tent the bird loosely with foil and let it rest 10–15 minutes. Resting allows juices to redistribute, making carving easier and slices juicier. When you’re ready to carve, start with the legs and thighs, then separate the breasts, slicing against the grain. Serve with pan juices or a light gravy for added moisture and flavor.
Troubleshooting and common mistakes to avoid
Common issues include uneven browning, undercooked thighs, or dry breast meat. If the breast browns too quickly, tent with foil to prevent burning while the rest continues. If you notice the thighs are undercooked, return the bird to the oven in short increments, checking frequently with a thermometer. Avoid opening the oven door too often; each inversion in oven temperature can significantly affect timing. By watching temperatures and maintaining a steady roast, you’ll prevent most typical problems.
Tools & Materials
- Roasting pan with rack(Fits a 4-6 lb chicken; allows airflow under the bird)
- Meat thermometer (digital preferred)(Insert into thickest part of thigh without touching bone)
- Kitchen twine(Optional for trussing the legs)
- Paper towels(Dry the chicken thoroughly for crisp skin)
- Basting brush or silicone spatula(Optional for applying oil or butter)
- Aluminum foil(Tent the breast if browning too quickly)
Steps
Estimated time: 1.5-2.5 hours
- 1
Preheat and prep
Preheat the oven to your target roasting temperature (commonly 350°F/175°C). While it warms, remove the chicken from its packaging, pat dry, and arrange on the rack in the roasting pan.
Tip: A dry surface is the first step to crispy skin; the rest of the process builds on this foundation. - 2
Pat dry and season
Thoroughly pat the skin dry with paper towels, then rub with oil or melted butter and your chosen seasonings. Salt is essential for flavor and skin crispness.
Tip: Even an unseasoned bird benefits from a bit of fat and a balanced rub. - 3
Truss and prepare cavity
If desired, tie the legs together with kitchen twine and tuck the wings under to promote even cooking. A simple, compact shape helps heat circulate consistently.
Tip: Trussing prevents the legs from splaying and ensures uniform heat exposure. - 4
Place on rack, begin roasting
Place the bird breast-side up on the rack. Slide it into the oven and roast for the initial period without opening the door, to establish even heat contact.
Tip: Opening the oven lets heat escape and can extend cook time by minutes per occurrence. - 5
Check doneness with thermometer
Insert the thermometer into the thickest part of the thigh without touching bone. If the reading is below 165°F, continue roasting and recheck every 5–10 minutes.
Tip: Rely on temperature, not color alone, to determine doneness. - 6
Adjust for carryover cooking
Once the internal temperature nears 165°F, remove the chicken from the oven. Let it rest loosely tented for 10–15 minutes to allow juices to redistribute.
Tip: Resting improves juiciness and carving ease. - 7
Carve with care
Transfer the chicken to a cutting board. Carve by separating the legs and thighs first, then slice the breasts against the grain for tender servings.
Tip: Make clean, deliberate cuts to preserve moisture and presentation. - 8
Serve or store leftovers
Serve immediately with pan juices or a light sauce. Refrigerate leftovers within two hours and use within 3–4 days, or freeze for longer storage.
Tip: Label and date leftovers to track freshness. - 9
Clean up
Allow pans to cool, then wash thoroughly. If you roasted vegetables, scrape up flavorful fond from the pan for quick gravies or pan sauces.
Tip: A quick wash prevents bacterial growth and preserves equipment for next use.
Quick Answers
What is the safe internal temperature for cooked chicken?
The chicken should reach 165°F (74°C) in the thickest part of the meat. Use a thermometer for accuracy.
Cook the chicken to 165 degrees Fahrenheit for safety, using a thermometer for accuracy.
How long do you roast a whole chicken per pound?
A common guideline is about 20 minutes per pound at 350°F, but verify doneness with a thermometer and adjust for stuffing if used.
Roast around twenty minutes per pound at 350 degrees, then check the thermometer for doneness.
Should I stuff the chicken when roasting?
Stuffing adds time and requires the center to reach 165°F. Many cooks prefer unstuffed for reliability.
Stuffing can complicate cooking; many opt to cook stuffing separately for even doneness.
Can I brine the chicken before roasting?
Brining can increase juiciness and flavor, especially for larger birds. Rinse, pat dry, then season as you normally would.
Brining can improve juiciness, but be mindful of salinity and time.
Can I roast vegetables with the chicken?
Yes, arrange vegetables around the chicken if space allows, adjusting roast time so everything cooks through evenly.
You can roast vegetables alongside the chicken, but watch space and heat flow.
Does convection change roasting time?
Convection can reduce cooking time by about 10–15%. Monitor with a thermometer and adjust as needed.
Convection speeds up cooking; start checking earlier than with a conventional oven.
Watch Video
Top Takeaways
- Plan time by weight and stuffing status.
- Always verify doneness with a thermometer at 165°F.
- Rest the chicken 10–15 minutes before carving.
- Avoid overstuffing to ensure even cooking.
- Pat dry and season for crisp skin and flavor.