How to Cook Chicken Breast in the Oven: Easy Guide
Learn how to oven-roast chicken breasts that stay juicy and flavorful. This practical guide covers prep, temperature, timing, and variations to ensure perfect results every time for home cooks.

By oven-roasting chicken breasts you can achieve juicy, evenly cooked meat with minimal effort. Start with evenly sized breasts, pat dry, and season well. Preheat the oven and bake until the thickest part reaches about 165°F (74°C), then let rest for 5 minutes before slicing. This method yields tender results with light browning and flavorful crust.
The Basics: Why Oven-Baked Chicken Breasts Win
Oven-baking chicken breasts is a reliable, hands-off method that fits busy weeknights and weekend meal prep. When done well, the meat stays juicy inside with a lightly browned exterior and a mild, adaptable flavor base that accepts a wide range of seasonings. According to Cooking Tips, the oven's steady heat minimizes the risk of overcooking one area while undercooking another, a common challenge with stovetop methods. Using an oven also reduces cleanup compared with pan-frying, especially if you line the sheet pan and use a rack to promote air circulation. For many home cooks, this approach offers dependable results without specialized equipment or advanced techniques.
Choosing the Right Chicken Breast
Choosing the right chicken breast starts with freshness and size. Look for breasts that are evenly sized or plan to trim and flatten larger ones so the thickness is uniform. Skinless, boneless breasts are easiest to bake, but bone-in or skin-on varieties can still work with adjusted times and a higher level of browning. If you buy frozen breasts, thaw completely in the fridge before cooking for even heat distribution. Fresh, high-quality chicken yields better flavor and texture, but proper handling and cooking are the real drivers of juiciness.
Preparing for Oven-Baking
Preparation is where a lot of the magic happens. Begin by patting the chicken dry with paper towels to remove surface moisture, which helps form a crust. A light brine or dry brine (salt applied and rested for 15–60 minutes) can significantly improve juiciness, especially for larger breasts. After drying, season generously with salt, pepper, and optional herbs or spices. A light coat of olive oil or a butter-based finish can enhance browning, but it’s not mandatory. Finally, have your baking sheet ready with parchment paper or a wire rack to improve air circulation and even browning.
The Role of Thickness and Uniformity
Uniform thickness is crucial for even cooking. If breasts are oddly shaped, gently pound them to a consistent thickness using a meat mallet or sturdy rolling pin. A target thickness around ¾ to 1 inch (2–2.5 cm) helps ensure the heat penetrates evenly and reduces the chance of a dry outer edge with a undercooked center. For extra precision, you can use a kitchen thermometer to confirm the final internal temperature rather than relying on time alone.
Seasoning and Flavor Building
Seasoning is more than salt and pepper. Build flavor with a quick mix of garlic powder, paprika, dried oregano, or lemon zest. If you prefer a punch of richness, finish with a small amount of olive oil or a pat of butter that melts over the hot surface. For added brightness, a squeeze of lemon juice after resting can elevate the dish. The key is to season evenly on all sides and not to oversalt, especially if you are brining.
Airflow and Rack Method for Even Browning
Airflow matters. Placing breasts on a wire rack set over a sheet pan allows hot air to circulate around the meat, promoting even browning and a uniform crust. If you don’t have a rack, place the breasts directly on a parchment-lined tray, but turn them once halfway through cooking to encourage even color. A nonstick spray on the rack can help keep the surface from sticking and facilitate easy removal.
Temperature and Timing Guidelines
The safe, reliable approach is to bake at a moderate oven and monitor internal temperature rather than chasing a fixed time. Most cooks find 375–425°F (190–220°C) works well, with thinner breasts taking less time and thicker ones more. The goal is an internal temperature of about 165°F (74°C) at the thickest part. Use a meat thermometer to verify doneness; carryover heat will continue to raise the temperature a few degrees after removal if you rest properly.
Resting and Serving Ideas
Resting is essential. After removing from the oven, let the chicken rest for 5 minutes before slicing. This allows the juices to redistribute and keeps the meat moist. Slice against the grain for tenderness and serve with a simple pan sauce, fresh herbs, or a bright citrus dressing. For variety, pair with roasted vegetables, a green salad, or a grain such as quinoa for a complete meal.
Healthier Variations and Quick Fixes
If you’re watching fat or calories, you can skip the extra oil and still achieve crisp edges by using a light spray of oil on the surface and relying on the natural moisture of the meat. Try different flavor profiles—Mediterranean with oregano and lemon, or a smoky paprika rub. You can also finish under the broiler for 1–2 minutes to boost browning if you like a crisper crust without overcooking the interior.
Common Mistakes and How to Avoid Them
Common pitfalls include uneven thickness, under-seasoning, and overcooking. To avoid these, start with uniformly shaped breasts, use a thermometer, and rest the meat before slicing. Avoid crowding the pan, which reduces airflow and leads to steaming rather than roasting. Finally, choose a safe, effective temperature and stick with it for a consistent result each time.
Tools & Materials
- Oven(Preheat to 375–425°F (190–220°C) as needed for thickness.)
- Baking sheet(Line with parchment for easy cleanup.)
- Wire rack (optional)(Promotes air circulation and even browning.)
- Meat mallet or rolling pin(Used to flatten breasts to uniform thickness.)
- Meat thermometer(Target 165°F (74°C) at thickest part.)
- Paper towels(Pat dry surfaces to improve browning.)
- Olive oil or butter (optional)(Light coating enhances browning.)
- Seasonings(Salt, pepper, and herbs/spices of choice.)
- Brine container (optional)(For dry or wet brine pre-treatment.)
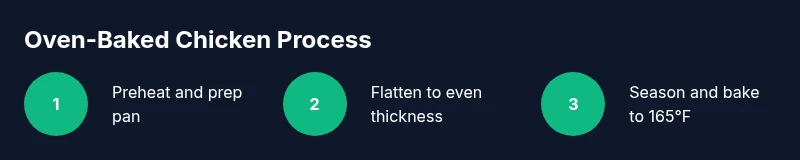
Steps
Estimated time: 30-45 minutes
- 1
Preheat the oven and prepare the pan
Set the oven to 375–425°F (190–220°C) depending on thickness. Line a baking sheet with parchment for easy cleanup and lay out a rack if you have one to improve air circulation.
Tip: A fully preheated oven ensures immediate searing and even browning. - 2
Flatten breasts to uniform thickness
If needed, place each breast between plastic wrap and gently pound to about ¾–1 inch (2–2.5 cm) thick so they cook evenly.
Tip: Even thickness prevents overcooking the edges while the centers finish. - 3
Dry and season thoroughly
Pat breasts dry with paper towels, then apply salt, pepper, and your chosen spices on all sides. Optional: brush lightly with olive oil for browning.
Tip: Season generously but taste-conscious; you can always adjust at the table. - 4
Arrange for even heat exposure
Place breasts on the lined sheet pan or a rack so air can circulate around each piece. Leave space between them for heat to surround each side.
Tip: Avoid overcrowding to prevent steaming rather than roasting. - 5
Bake to safe internal temperature
Bake until the thickest part hits about 165°F (74°C). Times vary by thickness; use a thermometer rather than a clock to determine doneness.
Tip: Check near the end of cooking and rotate the pan if your oven has hot spots. - 6
Rest before slicing
Remove from oven and let the chicken rest for 5 minutes to redistribute juices. Slice against the grain for maximum tenderness.
Tip: Resting is as important as cooking for juicy results.
Quick Answers
Should I brine chicken breasts before baking?
Brining can help retain moisture, especially for larger breasts. A short dry brine (salt overnight or 15–60 minutes) also works well. If you skip brining, a light coating of oil and proper seasoning still yields juicy results.
Brining helps moisture; a short dry brine also works. If you skip brining, season well and bake to temp.
What internal temperature should chicken reach?
The USDA recommends 165°F (74°C) as a safe internal temperature for chicken. Use a thermometer at the thickest part to confirm before resting.
Cook chicken to 165 degrees and rest before slicing.
Can I bake frozen chicken breasts in the oven?
Yes, but cooking time will be longer and even thawing is preferred. If you bake from frozen, plan for a significantly longer time and monitor temperature closely.
Yes, but expect longer cooking time and test doneness with a thermometer.
Do I need to cover chicken while baking?
Uncovered baking promotes browning and a crisper crust. Covering is useful if you want to trap moisture or prevent drying, but it reduces browning.
Uncovered gives browning; cover if you want more moisture.
What about bone-in or skin-on breasts?
Bone-in breasts take longer; skin-on adds color and flavor. For convenience, many home cooks prefer skinless, but you can adapt timing and use a rack.
Bone-in takes longer; skin-on browns nicely. Adjust time accordingly.
How do I season chicken for best flavor?
Salt is essential for flavor and juiciness. Pair with pepper and herbs or spices of choice. Marinades are optional but can boost depth if you have time.
Salt and herbs deliver great flavor; marinades are optional.
Watch Video
Top Takeaways
- Preheat and plan around uniform thickness.
- Season generously and monitor temperature, not time.
- Use a rack or space breasts for even browning.
- Let the meat rest before slicing for juiciness.
- Experiment with flavor profiles to keep meals interesting.