How Long to Cook Chicken Breast in the Oven
Learn how long to cook chicken breast in the oven for juicy, safe results with temperature, thickness, and rest guidelines. A practical, step-by-step guide for home cooks.

You can bake chicken breast in the oven to juicy, safe doneness by following a simple time-and-temperature plan. For most boneless, skinless breasts, aim for 375°F (190°C) for about 18-25 minutes, depending on thickness, then rest a few minutes before slicing. Always use a thermometer to hit 165°F (74°C) for safety.
Why oven-cooking is a reliable method for chicken breast
For many home cooks, how long to cook chicken breast in the oven is a key question for juicy results. According to Cooking Tips, oven cooking offers predictable results for lean chicken when you manage heat, time, and temperature. The dry heat of the oven surrounds the meat, helping it cook evenly without excessive moisture loss. This method shines when you want hands-off cooking and consistent outcomes across batches. By using a thermometer-based approach, you can avoid the guesswork and still get a tender, sliceable finish. If you’re new to oven cooking, start with boneless, skinless breasts around 1 inch thick and a moderate temperature, then adjust for thicker pieces or bone-in options in later batches.
Temperature, thickness, and doneness: the core rules
The three pillars of oven-baked chicken are temperature, thickness, and doneness. Start by preheating to 375°F (190°C). This moderate heat helps the surface brown slightly while the interior cooks evenly. Doneness is defined by internal temperature, not cooking time alone. For chicken breast, target an internal temperature of 165°F (74°C) at the thickest part. If you don’t have a thermometer, a rough estimate for a 1-inch breast is about 18-25 minutes; for thicker pieces (1.5 inches or more) you’ll need longer, often 25-30 minutes. Always let the meat rest briefly after removal, since carryover cooking will raise the internal temperature a few degrees. Thickness matters more than total weight; uniform thickness ensures even heat distribution, while jagged edges can overcook first.
How to prep for even cooking
Preparation is the quiet engine behind reliable oven-baked chicken. Pat the breasts dry with paper towels to remove surface moisture, which helps browning and minimizes steam. If you’re starting with very uneven pieces, consider pounding them to uniform thickness or slicing thicker breasts into even portions. Lightly brush or spray with oil to promote browning, then season with salt, pepper, and your favorite spices. Arrange the pieces in a single layer on a parchment-lined baking sheet, or use a wire rack over the sheet to improve air circulation. Let the seasoned chicken sit for 5-15 minutes at room temperature to improve surface adhesion, then slide into the preheated oven.
The role of resting time and carryover cooking
Resting is essential after the oven finishes its work. Remove the chicken at 165°F and let it rest for 5-10 minutes before slicing. This pause allows the juices to redistribute, resulting in juicier slices and less bleeding when cut. The carryover effect means the internal temperature can rise by a few degrees as the meat rests, so pulling a hair early is common and acceptable when done with a thermometer. If you’re in a hurry, a short rest of 3-5 minutes still improves juiciness, but longer rest improves texture.
Common mistakes and how to avoid them
Common errors include overcooking due to inflexible times, or under-seasoning. Avoid these by relying on a thermometer rather than the clock, and by ensuring even thickness for all pieces. Don’t skip patting dry, which damages browning; skip oil if you are watching calories, but don’t skip seasonings. If your breasts appear pale or lack browning, you can briefly raise the oven temperature to 400°F (204°C) for 2-3 minutes or finish under the broiler for a minute or two, watching closely to prevent burning. Finally, always rest; skipping resting is the surest way to a dry cut.
Variations: flavor boosters and alternative methods
Flavor is easy to customize with oven-baked chicken. Try lemon-garlic, paprika, or fresh herbs applied before baking. For a richer crust, brush a thin layer of olive oil mixed with Dijon mustard or honey. You can also add a quick marinade 15-60 minutes before cooking for deeper flavor. If you enjoy different textures, finishing the chicken under the broiler for 1-2 minutes yields a deeper browning on the surface. Remember that bone-in chicken breasts require a bit longer (and a lower heat to prevent drying).
Tools & Materials
- Oven(Preheat to 375°F (190°C).)
- Meat thermometer (instant-read)(Check thickest part to reach 165°F (74°C).)
- Baking sheet or shallow pan(Line with parchment for easy cleanup.)
- Wire rack (optional)(Promotes air circulation for even browning.)
- Parchment paper or aluminum foil(Optional for easy cleanup.)
- Oil or cooking spray(Lightly oil to prevent sticking.)
- Salt and pepper, or preferred spices(Season generously but not heavily.)
- Fresh herbs (optional)(For finishing flavor.)
Steps
Estimated time: 30-45 minutes
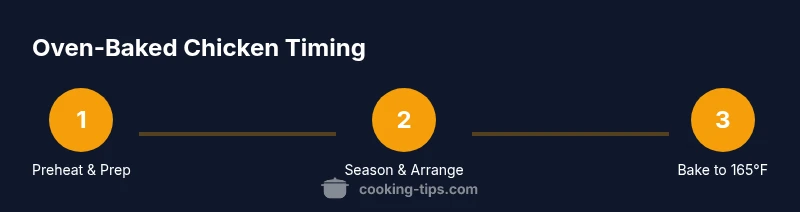
- 1
Preheat and prepare chicken
Preheat oven to 375°F (190°C). Pat chicken dry with paper towels to remove surface moisture, which helps browning. If pieces are uneven, gently pound to uniform thickness.
Tip: Patting dry prevents steaming and helps browning. - 2
Season and arrange on tray
Brush or spray breasts with a light coating of oil. Season with salt, pepper, and optional spices. Place in a single layer on a parchment-lined sheet or on a wire rack over the sheet for even heat distribution.
Tip: A wire rack improves browning around the edges. - 3
Bake and monitor doneness
Bake until the thickest part reads 165°F (74°C) on an instant-read thermometer. Check at 18 minutes for 1-inch breasts; longer for thicker cuts. If edges brown too fast, loosely tent with foil.
Tip: Probe the center, not the edge, for accuracy. - 4
Rest and serve
Remove from oven and rest 5-10 minutes before slicing. Resting redistributes juices and improves texture.
Tip: Resting is essential for juicy results.
Quick Answers
What is the safe internal temperature for cooked chicken breast?
The safe internal temperature is 165°F (74°C) when measured in the thickest part. Use a thermometer for accuracy.
Cook the chicken until it reaches 165 degrees Fahrenheit for safety.
Does thickness affect bake time?
Yes. Thicker pieces need more time. Aim for 165°F in the center and adjust based on thickness and oven performance.
Yes, thickness changes the time you need to bake.
Can I bake chicken breasts from frozen?
It's best to thaw before baking. If you must bake from frozen, expect longer cooking time and verify doneness with a thermometer.
Bake from frozen only if you must, and check doneness with a thermometer.
Should I brine chicken breast before baking?
Brining can improve moisture; if you brine, reduce salt in the seasoning. Pat dry before baking for better browning.
Brining helps moisture; adjust salt accordingly.
What if there’s little browning on the chicken?
Increase oven to 400°F for a couple of minutes or finish under the broiler for 1-2 minutes, watching closely.
If color is lacking, a brief broil finish helps.
Is resting necessary for chicken breast?
Yes. Rest for 5-10 minutes after baking to redistribute juices and improve texture.
Resting helps keep juices inside the meat.
Watch Video
Top Takeaways
- Use a thermometer for juicy, safe chicken.
- Uniform thickness ensures even cooking.
- Rest 5-10 minutes to finish cooking and keep juices.
- Bake at 375°F for consistent results.