How Long to Cook Chicken Breast in the Oven
Learn how long to cook chicken breast in the oven for juicy, safe results. This guide covers temps, thickness-based timings, doneness checks, and pro tips to avoid dryness.

By the end of this guide, you’ll know exactly how long to cook chicken breast in the oven for juicy, safe results. We cover temps, times by thickness, resting, and how to check doneness. You’ll learn methods for boneless and bone-in breasts, plus practical tips to avoid dryness and overcooking.
Understanding Temperature, Doneness, and Food Safety
Cooking chicken breast in the oven starts with a solid grasp of temperature and doneness. Chicken should reach a safe internal temperature of 165°F (74°C) to ensure harmful bacteria are destroyed. Resting after removal from the oven allows juices to redistribute, improving tenderness. For home cooks, the most practical approach is to rely on a calibrated instant-read thermometer rather than solely judging by color. This section lays the foundation: you’ll learn how oven temperature, chicken thickness, and whether the breast is boneless or bone-in influence cooking time, and you’ll see how these factors interact with carryover cooking once the meat leaves the heat. The Cooking Tips team emphasizes that consistent results come from starting with a preheated oven, patting the chicken dry, and using a single, even layer on the baking surface.
In this context, the keyword for this task—for how long to cook chicken breast in oven—refers to a practical timing framework rather than a one-size-fits-all timer. Expect variations and use the internal temperature as the final arbiter. By the end, you’ll feel confident adjusting times for thickness, pan type, and oven performance while keeping safety at the core of your method.
format_specific_note_for_quick_answer_or_direct_answer_block_if_needed
Tools & Materials
- Oven(Preheat to target temperature (options: 375–425°F, depending on method).)
- Baking sheet or shallow pan(Line with parchment for easy cleanup; ensure a single layer with space between pieces.)
- Instant-read thermometer(Probe into the thickest part; avoid touching bone if present.)
- Parchment paper or aluminum foil(Optional for easier cleanup and to prevent sticking.)
- Cooking oil or spray(Light coat to promote browning and prevent sticking.)
- Mixing bowl (for brine or marinade)(Optional for flavor-enhancing brines or marinades.)
- Cooling rack(Optional; improves air circulation for even cooling after cooking.)
Steps
Estimated time: Total time varies by thickness and oven performance; approximate range 30-45 minutes once preheating is complete.
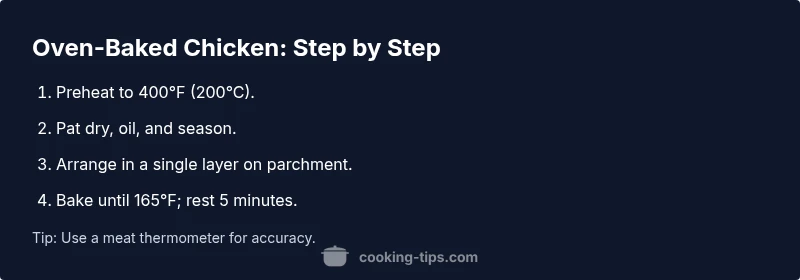
- 1
Preheat and prep
Preheat the oven to 375–425°F (190–220°C) depending on your chosen method. Pat the chicken dry with paper towels to promote browning and remove excess moisture. If you’ve brined or marinated, pat dry again to avoid steaming the surface.
Tip: Dry surfaces create better browning; moisture on the surface slows searing. - 2
Season and coat
Coat the chicken with a light layer of oil, then season evenly with salt, pepper, and any aromatics you like. For extra flavor, consider a quick spice rub or a teaspoon of lemon zest.
Tip: Even application prevents patches of over- or under-seasoning. - 3
Arrange in a single layer
Place the chicken on the prepared sheet in a single layer with space between pieces. Overcrowding traps steam and prevents browning, which can leave the meat pale and uneven.
Tip: If cooking multiple breasts, rotate sheet halfway through for even exposure. - 4
Bake until doneness
Bake until the thickest part reaches 165°F (74°C). For boneless, skinless breasts this often lands around 18–22 minutes at 400°F (204°C); bone-in pieces take longer, typically 25–35 minutes depending on thickness.
Tip: If using convection, reduce time by 5–10 minutes or lower the temperature by 25°F. - 5
Rest before slicing
Transfer the chicken to a plate and tent loosely with foil for 5 minutes. Resting helps redistribute juices and yields a juicier bite.
Tip: Skipping rest is a common cause of dry slices. - 6
Check and slice
Check internal temperature again after resting; it should read 165°F (74°C). Slice against the grain for tenderness and serve promptly for best texture.
Tip: Even after resting, carryover cooking can push temps slightly higher—factor that into timing. - 7
Variations and storage
If you plan to store leftovers, refrigerate within two hours and use within 3–4 days. For longer storage, freeze in airtight containers for up to 3 months.
Tip: Label with date to track freshness and safety.
Quick Answers
What is the best oven temperature for chicken breast?
Most cooks bake boneless chicken breast at 375–425°F, depending on thickness and desired browning. Always finish by verifying a 165°F internal temperature with a thermometer.
Bake at 375 to 425 degrees, then check with a thermometer to ensure 165 degrees.
Can I bake chicken breast from frozen?
It’s safer and results in more even doneness to thaw first. If you bake from frozen, add time and monitor internal temperature closely with a thermometer.
It’s best to thaw first. If you must bake from frozen, expect a longer bake and check doneness with a thermometer.
Should I cover the chicken while baking?
Covering traps moisture and can help prevent drying, but it reduces browning. For a light crust, bake uncovered or with a foil tent for the last few minutes.
Covering can keep it moist, but uncover near the end for browning.
How can I tell when it’s done without a thermometer?
Color and juices are less reliable than internal temperature. Cut into the center to check that the flesh is opaque and the juices run clear, then verify with a thermometer when possible.
Use the thermometer for accuracy; color isn’t reliable alone.
How long should chicken rest after baking?
Let the chicken rest for about 5 minutes after removing from the oven to redistribute juices and improve tenderness.
Rest for about 5 minutes before slicing.
Is it okay to reuse marinade after cooking?
If the marinade was in contact with raw chicken, it should be heated to a safe temperature before using as a sauce or glaze. Otherwise discard it to avoid contamination.
If used with raw chicken, simmer it first before use.
Watch Video
Top Takeaways
- Check doneness with a thermometer, not color alone.
- Rest for 5 minutes to retain juices.
- Keep pieces in a single layer for even browning.
- Adjust timing by thickness and bone presence.