What Temperature to Cook Chicken: A Practical Guide for Home Cooks
Learn the exact internal temperature and timing to cook chicken safely and juicy every time, with practical methods for baking, searing, grilling, poaching, and resting.

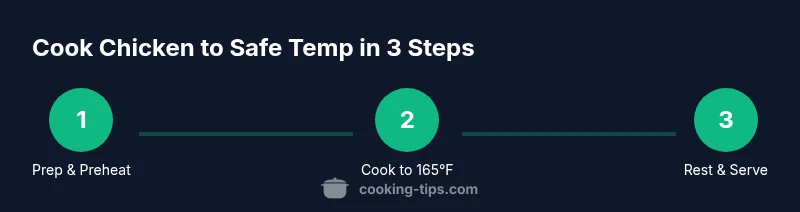
If you’re wondering what cook chicken to, the answer is to reach an internal temperature of 165°F (74°C) for safe, juicy results. Use a digital thermometer to verify, and let the meat rest 3–5 minutes. Choose your method—roasting, sautéing, or grilling—and tailor timing to the cut and thickness. Keep skin on for moisture when desired, and season early for even flavor.
Why Temperature Matters in Chicken Cooking
Temperature controls safety and texture. Understanding what temperature to cook chicken to shapes the final experience from plated meal to leftovers. The difference between a dry, tough piece and a juicy, flavorful one often comes down to a single degree. In practical terms, high heat can push proteins to squeeze out moisture, while not enough heat leaves pathogens alive and texture gummy. The challenge for home cooks is to pick a target temperature that is high enough to destroy bacteria but low enough to keep meat moist. According to Cooking Tips, a thermometer-guided approach reduces guesswork and yields consistent results across different cuts. This section explains why temperature matters, how carryover heat can continue cooking after you remove the chicken from heat, and how to measure it accurately. You’ll learn to select a target temperature that balances safety with mouthfeel and flavor, and you’ll discover how thickness, bone presence, and marinade affect heat transfer, and how to plan the timing around your oven or grill schedule.
Safe Temperatures: 165°F Minimum for Chicken
The baseline safety standard for chicken is 165°F internal temperature. This target ensures all Salmonella and other common bacteria are neutralized. Reaching 165°F is not the end of the story, because the final texture depends on how heat is applied and how quickly the temperature rises. For most home cooks, the goal is to meet 165°F with the thickest part of the meat and then let the piece rest. Resting allows carryover heat to finish the job and redistributes juices, improving flavor and tenderness. Bone-in pieces and larger cuts may reach 165°F in the center later than smaller, boneless portions, so plan cooking intervals accordingly. Using steady heat, not a burst of high heat, helps preserve moisture. The key takeaway is: measure with a calibrated thermometer and avoid eying color alone. This practice, advocated by Cooking Tips, makes your kitchen safer and your results more reliable.
Resting and Carryover Heat
Carryover heat continues to cook chicken after you remove it from heat. Depending on the size and cut, it can add several degrees and push the interior temperature past 165°F. Resting for 3–5 minutes (boneless breasts) or 5–10 minutes (larger bone-in pieces) allows juices to redistribute and helps the final texture feel moist rather than dry. If you slice too soon, those juices run out and leave you with a drier result. The resting window is part science, part habit: tentatively remove from heat once the thermometer reads near target, then cover loosely with foil to trap warmth without steaming the surface. If you plan to hold cooked chicken for service, keep it warm at 140-150°F to maintain safety and quality until serving. These guidelines apply across methods—roasting, pan-searing, grilling, or poaching—and align with best practices recommended by Cooking Tips.
How to Measure: Using a Thermometer
Invest in a reliable thermometer and learn how to use it effectively. For chicken, insert the probe into the thickest part of the breast or the innermost area of a thigh, avoiding bone, cartilage, or skin, to get an accurate reading. Instant-read thermometers give quick results, while leave-in probes are convenient for roasts and larger pieces. Calibrate your thermometer regularly and test it in ice water and boiling water to confirm accuracy. When checking multiple pieces, clean the probe between tests to prevent cross-contamination. Temperature accuracy matters more than guesswork about color. By practicing, you’ll develop a sense for when to pull the meat and finish the cook with carryover heat.
Cut and Thickness: How They Change Timing
Thickness and cut influence temperature targets and cooking time. A boneless, skinless breast cooks quickly and reaches 165°F sooner than bone-in thighs or whole birds. A thick piece requires more heat penetration, which can be achieved with a longer bake, a two-step method (sear then finish in the oven), or a gentle poach before finishing with a quick sear. Uniform thickness is essential for even cooking; pound thicker parts to match thinner ones or butterfly the breast so it cooks evenly. Fat content and skin presence also affect heat transfer: skin helps retain moisture, but excess fat can create hot spots. Plan your method around the cut: breasts on high heat, thighs on moderate heat, whole birds with even spacing. This approach minimizes the risk of undercooked centers or overcooked exteriors.
Methods at a Glance: Baking, Searing, Grilling, Poaching
Baking at 375-425°F (190-220°C) is forgiving for larger pieces and bone-in portions; it’s ideal when you want hands-off cooking and a uniform finish. Searing in a hot pan creates a flavorful crust and shortens overall cook time, but it’s important to finish in the oven to reach 165°F inside. Grilling gives a smoky flavor and fast outer browning; move pieces to indirect heat to avoid scorching while the center finishes. Poaching yields ultra-tender, moist meat and is excellent for shredding or adding to salads. When selecting a method, consider the cut, your equipment, and whether you’ll serve immediately or chill for later. Each method relies on proper temperature management and a thermometer for verification. This section helps you map the right technique to the chicken you’re cooking, from quick weeknight breasts to weekend roasts.
Step-by-Step Timing Guide for Common Cuts
Because every kitchen is different, use this as a flexible guide rather than a rigid rule. Boneless, skinless chicken breasts on a grill or in a skillet typically finish in roughly 6-8 minutes per side over medium heat, but thickness can alter this. Bone-in thighs require longer cook times, often 25-40 minutes in the oven at 375°F, depending on size. A whole chicken will take longer still, usually 1 to 2 hours at a moderate oven temperature, with the interior reaching 165°F in the thigh and breast. Always verify with a thermometer and account for carryover heat. If you’re working with a thick breast or a joint piece, consider starting with a quick sear to brown the surface, then finish in the oven. These practices reduce the risk of undercooked centers and overcooked exteriors.
Flavor and Juiciness: Techniques to Keep Chicken Moist
Flavors intensify when you season early and use simple, clean ingredients. Salt helps with moisture retention when applied ahead of time or brined briefly; you can also marinade for flavor but avoid overly acidic marinades that can toughen meat if left too long. Techniques such as basting with pan juices, using butter at the end, or finishing under a quick broil can add surface moisture and color. Adding skin to chicken pieces preserves moisture and yields pleasing texture, especially when you finish with crisp skin. Resting remains crucial for moisture retention. For weeknight meals, plan ahead with a basic dry brine or quick marinade and a predictable pan-searing rhythm to keep chicken juicy and flavorful.
Troubleshooting: Overcooked, Undercooked, or Unevenly Cooked
When chicken ends up dry, it usually means it cooked too long or too hot. If you notice dryness, check the internal temperature and rest briefly to regain moisture. Undercooked chicken is a safety risk; always re-check the reading in a new spot and finish with a controlled heat source. Uneven cooking often occurs with uneven thickness or crowded pans; flatten, trim, or separate pieces to improve heat distribution. Avoid charring by lowering heat after browning and letting the center finish gently in the oven or on indirect heat. These fixes rely on consistent thermometer use, proper resting, and strategic heat management, which Cooking Tips emphasizes for dependable weeknight results.
Quick Reference Cheat Sheet: Temperature, Time, Methods
Target internal temperature: 165°F (74°C) for all chicken cuts. Methods: bake, sear, grill, or poach, each with its own approach to timing and moisture. Typical workflows: sear first, then finish in oven; bake in a preheated oven; poach gently for ultra-tender results. Always verify with a thermometer, rest the meat, and slice against the grain for tenderness. Bookmark this cheat sheet to keep on hand during meal prep.
Tools & Materials
- digital instant-read thermometer(reads to 1°F precision; insert into the thickest part away from bone)
- sharp chef's knife(6-8 inch blade for cleanly trimming and portioning)
- cutting board(prefer wood or plastic; sanitize between uses)
- kitchen tongs(for turning and transferring chicken safely)
- paper towels(pat dry to improve browning)
- rimmed baking sheet or skillet(ensures even browning and prevents spills)
- oven, stovetop, or grill(depends on method chosen)
- kosher salt(seasoning for moisture retention and flavor)
- black pepper(optional seasoning)
- neutral oil with high smoke point(for searing if not using skin-on pieces)
Steps
Estimated time: Total time: 45-75 minutes
- 1
Choose method and prep
Decide whether you’ll bake, sear, grill, or poach based on cut and timing. Gather tools and prepare chicken by patting dry and trimming excess fat. This initial preparation sets the stage for even cooking and better moisture retention.
Tip: Plan your equipment layout before you start to reduce multitasking. - 2
Preheat equipment
Preheat the oven or pan to the target temperature. A properly heated surface improves browning and reduces the time the meat spends in the danger zone. If you’re finishing on the grill, set up direct and indirect zones.
Tip: A brief preheat makes searing faster and more even. - 3
Pat dry and season evenly
Pat the chicken dry with paper towels to remove surface moisture, then season thoroughly with kosher salt and pepper (and any dry herbs you like). Dry surfaces brown better and hold seasonings more effectively.
Tip: Even coating helps create a flavorful crust without burning spices. - 4
Cook to safe internal temperature
Insert the thermometer into the thickest part of the meat, away from bone. Monitor until it reaches 165°F (74°C) and avoid lifting the temperature with too high heat. After reaching target, remove from heat.
Tip: If in doubt about a piece’s thickness, test in two spots. - 5
Rest to finish carryover heat
Let the chicken rest for 3–5 minutes (breasts) or 5–10 minutes (larger pieces). Resting allows juices to redistribute and can raise the internal temp slightly due to carryover heat.
Tip: Loosely tent with foil to keep warm without steaming the crust. - 6
Slice and serve safely
Cut against the grain for maximum tenderness and serve promptly. If serving later, keep at safe holding temperatures and reheat gently if needed.
Tip: Always slice just before serving to preserve moisture.
Quick Answers
What is the safe internal temperature for cooked chicken?
The safe internal temperature for cooked chicken is 165°F (74°C). Verify with a thermometer in the thickest part, then rest briefly. Temperature accuracy matters more than visual cues.
Cook chicken to 165 degrees and rest a few minutes for safety and juiciness.
Can you cook chicken from frozen?
Cooking from frozen is not ideal because it lengthens cooking time and can lead to uneven doneness. Thaw before cooking when possible or use longer, lower heat and verify doneness with a thermometer.
It's better to thaw first; if you must cook from frozen, allow extra time and check temperature carefully.
Does color indicate doneness?
Color is not a reliable indicator of doneness. Always rely on a thermometer to confirm the internal temperature.
Color alone isn't enough—use a thermometer to be sure.
How long should chicken rest after cooking?
Rest chicken for about 3-5 minutes for breasts and 5-10 minutes for larger pieces to let juices redistribute and carryover heat finish the cook.
Rest for a few minutes to keep the meat juicy.
What is the best method for juicy chicken?
There isn’t a single best method. For juicy results, combine a good sear with a finish in the oven or gentle poaching, and always rest before slicing.
Juicy results come from balancing sear, finish, and rest.
Should I brine or marinate chicken?
Brining helps moisture retention, while marinades add flavor. For cut pieces, a light brine can improve moisture without overpowering natural flavor.
Brine can help, marinade for extra flavor.
Watch Video
Top Takeaways
- Aim for 165°F internal temperature for safety.
- Rest the chicken after cooking to retain moisture.
- Choose cooking method based on cut for best texture.
- Use a thermometer rather than color to judge doneness.