Slow Cook Pork Riblets: A Step-by-Step Guide
Learn a reliable method to slow cook pork riblets for fall-off-the-bone tenderness using oven or slow cooker. This step-by-step guide covers trimming, rubs, timing, glaze, safety, and storage for consistent, restaurant-quality results.

By mastering slow-cooking pork riblets, you’ll achieve tender, flavorful meat with minimal effort. This guide teaches trimming, rubs, and finishing techniques for oven or slow-cooker methods, plus glaze ideas, safety tips, and storage guidance. Follow the steps below to start right away and tailor the finish to your taste.
Why slow cook pork riblets deliver tender, juicy texture
Pork riblets are small, bone-in rib segments with plentiful connective tissue. Slow cooking them at gentle temperatures allows collagen to break down and fat to render, yielding meat that pulls cleanly from the bone without drying out. The technique is forgiving and ideal for busy weeknights because you can start the riblets and let them cook while you prep sides. According to Cooking Tips, low heat paired with moisture retention consistently produces superior tenderness compared with high-heat roasting or quick sears. If you’re new to riblets, begin with a simple dry rub or glaze and adjust seasoning during the final stage for a balanced finish. The goal is a deeply flavorful bite every time.
Selecting riblets and trimming
Choose riblets that are uniform in size and show a touch of marbling. Look for fresh pork riblets with a pinkish-red hue, intact bones, and no strong odor. Trim away excess fat and remove the thin silverskin on the bone side if possible to promote even texture. Pat riblets dry to remove surface moisture, which helps browning and crust formation. If you’re buying pre-trimmed riblets, skip nothing essential—consistency matters for even cooking. Cooking Tips notes that uniform pieces ensure rubs penetrate evenly and reduce the risk of some portions overcooking.
Flavor foundations: rubs, marinades, and sauces
Flavor is built before heat. A simple dry rub of kosher salt, black pepper, smoked paprika, garlic powder, and a touch of brown sugar creates a savory-sweet crust. If you have time, marinate riblets for 4–6 hours in a mixture that includes soy, garlic, ginger, and a splash of citrus for added depth. For a finishing glaze, combine hoisin with soy, honey, and a dash of chili for a gentle heat. Cooking Tips’ tests show riblets benefit from a glaze that caramelizes during the last stage of cooking. Always taste a small piece after applying rub to fine-tune salt and heat to your preference.
Preparing riblets: drying, trimming, and marinating
Pat riblets dry to maximize browning and crust formation. Trim ragged edges and remove any stubborn membranes on the bone sides for more even texture. If you marinate, pat dry again before applying the rub to preserve surface dryness. Let riblets come to room temperature for 15–20 minutes before cooking to promote even heat penetration. If cooking in multiple batches, keep finished pieces warm in a low oven while others finish. Season in stages: a salt-based rub first, then glaze later to avoid oversalting and to develop a sticky, flavorful coating.
Slow cooking methods: oven, slow cooker, and outdoor smoker
Slow cooking offers flexibility. An oven at 250–275°F (120–135°C) or a slow cooker on low for 6–8 hours yields tender riblets, while a 2.5–4 hour window on high in a slow cooker works for shorter timelines. A small amount of liquid—stock, cider, or beer—helps maintain moisture. For added flavor, finish with a glaze under the broiler or in a hot oven for 5–10 minutes to develop surface caramelization. If you have a smoker, you can add smoky notes by cooking at 225°F (107°C) and finishing with a glaze. The aim is a moist interior with a lacquered exterior.
Oven method: temperature, time, and technique
Preheat the oven to 250–275°F (120–135°C). Arrange riblets on a rack over a sheet pan to promote airflow and even browning. Roast for 2.5–3.5 hours, turning once mid-way. Brush with glaze during the last 15–20 minutes and, if desired, broil briefly to set the glaze. Use a meat thermometer to confirm the thickest piece reaches 145°F (63°C) and allow a 5–10 minute rest before serving. Keeping the oven door closed reduces heat fluctuations and promotes uniform results.
Slow cooker method: setup and timing
Season riblets and place them in a slow cooker with 1/2 to 1 cup of liquid. Cook on low for 6–8 hours or on high for 3–4 hours until the meat is tender and the bones loosen. For a lacquered finish, transfer the riblets to a hot pan with glaze and reduce for a few minutes. If your model doesn’t brown well, finish under the broiler for 2–4 minutes. Always verify an internal temperature of 145°F (63°C) at the thickest part and let rest briefly before serving.
Glazing and finishing for shine
A glaze adds color and texture. Mix soy sauce, honey, a touch of hoisin, and a splash of rice vinegar for a glossy finish. Apply glaze during the final cooking window or after removing from heat to let it set without burning. For deeper caramelization, apply a second thin layer after a brief rest and briefly return to heat. If you prefer a stickier finish, increase sugar slightly and finish under the broiler for a minute or two. Let the glaze set for 5–10 minutes before serving to maximize adhesion.
Safety, storage, and reheating leftovers
Cook riblets to 145°F (63°C) and let rest. Refrigerate leftovers within two hours in shallow containers; they keep for 3–4 days. Reheat slowly in the oven or a covered pan with a splash of broth to preserve moisture. Freeze leftovers for 2–3 months in airtight bags; thaw in the fridge and reheat gently to 165°F (74°C). Practice safe handling to prevent cross-contamination and enjoy leftovers within a reasonable time frame.
Troubleshooting common issues and quick fixes
If riblets turn out tough, extend cooking time or add more moisture during braising. If flavor is flat, adjust salt and spice balance or enhance the glaze with a little vinegar or citrus. If glaze won’t stick, pat dry riblets before glazing and apply in thin coats. For lack of crispness, finish under the broiler for a few minutes or briefly increase oven heat at the end. Always check doneness with a thermometer and account for carryover heat after removing from heat.
Side dish ideas and serving suggestions
Pair riblets with crisp potatoes or rice to soak up glaze, plus bright greens like lemony slaw. Quick-pickled onions or a tangy chimichurri provide contrast to the sweet glaze. Serve with crusty bread or cornbread to catch excess sauce. A light cucumber salad keeps the meal balanced and refreshing, while a chilled white wine or sparkling beverage cuts through richness.
Flavor pairings and regional twists you can try
Explore sweet-smoky profiles with chipotle or maple glaze, or introduce miso, sesame, or ginger for an Asian twist. For a Southern touch, use brown sugar, black pepper, and paprika with a smoky edge. A citrus note—orange or lime—brightens the dish. If you want deeper smoke, brush with a vinegar-based sauce during the last 20 minutes of cooking for a zesty finish.
Tools & Materials
- Sharp knife(For trimming riblets and removing silver skin as needed)
- Cutting board(Stable surface for trimming and portioning)
- Paper towels(Pat riblets dry for browning and moisture control)
- Mixing bowls(Combine rubs, marinades, and glaze ingredients)
- Measuring spoons(Accurate spice and sugar measurements)
- Aluminum foil(For loosening or covering during finish as needed)
- Sheet pan(Used with oven method for catching drips)
- Wire rack(Elevates riblets for better air exposure)
- Slow cooker(Essential for the slow-cooker method)
- Oven(Low-temperature oven setup for the classic method)
- Meat thermometer(Check 145°F (63°C) at the thickest part)
- Cooking tongs(Handle riblets safely during transfer)
Steps
Estimated time: Total time varies by method: 3.5–4.5 hours (oven), 6–8 hours (slow cooker), plus 5–15 minutes for glaze and rest.
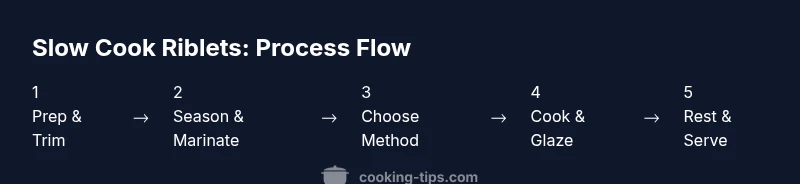
- 1
Trim and pat dry riblets
Start by trimming ragged edges and removing visible silver skin if possible. Pat riblets dry with paper towels to remove surface moisture, which helps browning and crust formation. Allow riblets to come to room temperature for even heat penetration before you begin.
Tip: Use a sharp knife and steady, controlled cuts to avoid tearing meat. - 2
Apply rub or marinate
Season riblets with a balanced rub or marinate for 4–6 hours for deeper flavor. Pat dry after marinating to preserve surface dryness before cooking. This helps the rub adhere and promotes a crisp crust later.
Tip: Taste a small piece to adjust salt and heat before cooking. - 3
Choose your cooking method
Decide between oven, slow cooker, or smoker. Each method has pros: oven for crust, slow cooker for hands-off tenderness, smoker for extra depth. Gather required liquids and keep a backup plan in case you switch methods mid-prep.
Tip: Plan for browning at the end if your method doesn’t provide it. - 4
Cook riblets
Cook using your chosen method: oven on low heat, slow cooker on low, or smoker at a steady temperature. Use a rack if possible and maintain moisture with a small amount of liquid.
Tip: Keep the oven door closed for consistent heat and moisture retention. - 5
Apply glaze and finish
Brush on glaze during the final stage and, if desired, finish under a broiler or in a hot oven for 5–10 minutes to set the glaze and add shine.
Tip: Apply in thin layers to prevent pooling and burning. - 6
Check doneness and rest
Verify internal temperature reaches 145°F (63°C) in the thickest part; rest 5–10 minutes to redistribute juices before serving.
Tip: Resting improves tenderness and bite. - 7
Serve with sides
Pair riblets with starches and greens to balance richness; offer pickles or a bright slaw for contrast.
Tip: Provide crusty bread or rice to soak up glaze. - 8
Store and reheat
Store leftovers in shallow containers in the fridge within two hours. Reheat slowly with a splash of broth to maintain moisture.
Tip: Reheat to 165°F (74°C) and only reheat once.
Quick Answers
Can I use frozen pork riblets?
Yes, you can cook from frozen, but thawing first ensures even cooking and better texture. If you must cook from frozen, extend cooking time by roughly 50% and check doneness with a thermometer.
You can start from frozen, but thawing first is best for even cooking and texture.
Do I need to marinate riblets before slow cooking?
Marinating adds depth, but it’s optional. A good dry rub can deliver ample flavor, and a glaze at the end boosts sweetness and brightness.
Marinating is optional; a dry rub plus glaze works well.
What internal temperature should riblets reach?
Pork riblets should reach 145°F (63°C) and rest for 5–10 minutes before serving to finish cooking and retain juices.
Aim for 145 degrees and let it rest a bit before serving.
Can I finish riblets under the broiler?
Yes. After glazing, broil for 2–4 minutes to set the glaze and create a crisp surface. Watch closely to prevent burning.
Finish under the broiler for a short time to set the glaze.
What sides pair well with slow-cooked riblets?
Crisp potatoes or rice, plus a bright slaw or pickled onions, balance rich riblets. A light bread or cornbread helps soak up glaze.
Pair with potatoes and greens for a balanced plate.
How should I store and reheat leftovers?
Store leftovers in shallow containers in the fridge within two hours. Reheat slowly with a splash of broth to keep moisture; refrigerate within 3–4 days.
Store in shallow containers and reheat gently with moisture.
Watch Video
Top Takeaways
- Cook riblets low and slow for tenderness
- Balance rubs and glaze for both flavor and color
- Use moisture to prevent drying in any method
- Finish with a glaze for shine and depth
- Rest meat before serving to lock in juices