Oil Stain Removal: How to Get Cooking Oil Stains Out of Clothes
Learn a practical, step-by-step method to remove cooking oil stains from clothes, with fabric-safe pre-treatments and washing tips from Cooking Tips.

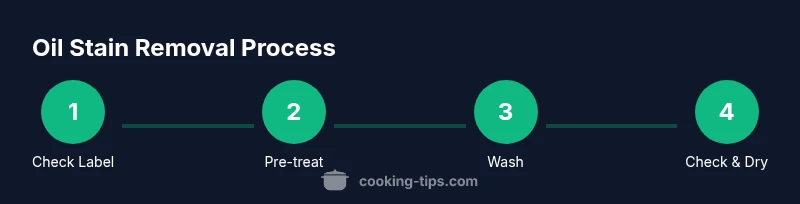
By following this guide, you’ll learn how to get cooking oil stains out of clothes with a simple, proven method. Start with quick pre-treatment, then wash using the right detergent and water temperature, and finish with careful drying. This step-by-step approach works for cotton, synthetics, and blends, and helps prevent set-in marks.
What makes cooking oil stains tricky
Oil stains are notoriously stubborn on fabric, especially when heat follows the spill. If you’re wondering how to get cooking oil stains out of clothes, act fast and follow a simple, proven routine. According to Cooking Tips, the most reliable approach combines quick pretreatment with a gentle wash, then a careful drying choice to avoid heat setting. This explanation breaks down why oil binds to fibers and how different fabrics respond, so you can apply a kitchen-smart routine to everyday garments. By following the sequence below, you’ll maximize your chances of complete removal across cotton, blends, and many synthetics.
Quick assessment: Fabric types and care labels
Before you treat a stain, check the fabric care label to know which methods are safe. Natural fibers like cotton tolerate heavier treatments, while synthetics and blends may require milder agents. Colorfast fabrics matter too; if a dye bleed is possible, perform a small test on an inconspicuous area. This quick assessment helps you decide whether to use dish soap, enzymatic cleaners, or a gentler approach. Always note the stain’s size and the time since the spill—fresh stains respond much better to early intervention. The right assessment sets the stage for a successful removal without damaging the garment.
Pre-treating oils: best first moves
Pre-treating is where most folk see the biggest gains. Start with a small amount of plain dish soap applied directly to the stain, then gently work it into the fabric with a soft brush or clean cloth. Let it sit for 5–10 minutes to break down the fats, then rinse with cold water from the back of the stain. If you have an enzyme-based stain remover, apply according to label directions and allow 10–15 minutes for the enzymes to break down the oil. This combination—soap plus enzyme treatment—often yields the best lift without harming fibers.
Fabric-specific approaches: cotton, synthetic, wool, and silk
Cotton and most blends usually respond well to dish soap plus enzyme cleaner, followed by regular washing. Synthetics like polyester can tolerate warmer water, but test first if the garment is dark or bright colored. For wool and silk, skip aggressive scrubbing and use a milder detergent and a gentle hand wash or spot treatment, as these fibers are more sensitive to harsh chemicals and heat. In all cases, avoid rubbing the stain too hard, which can push oil deeper into fibers. This nuanced, fabric-aware approach increases your odds of complete removal without damaging the garment.
Common home remedies and what to avoid
Common home remedies include dish soap, baking soda, and white vinegar to help lift oil. Baking soda can absorb some oil, but it’s not a substitute for proper washing. Vinegar can help with lingering odors but should be used sparingly and never on silk or wool. A note of caution: chlorine bleach can interact poorly with many stains and fabrics, and heat from a dryer can set oil, making the stain permanent. This section helps you separate proven steps from unreliable hacks, so you can stay on the right track.
The washing cycle: temps, detergents, and cycles
Use a liquid detergent that targets grease and oils, and wash in cold to warm water per fabric care label. Air on the side of cooler temps for delicate fabrics, and consider a warm cycle for sturdy cottons if the stain persists after pretreatment. If the stain remains after the wash, don’t dry it; reapply pretreatment and wash again. For whites or colorfast fabrics, an oxygen-based bleach can be added according to package directions to brighten fibers and help lift residual stains, while avoiding chlorine bleach on colored garments.
Drying decisions: heat vs air-dry
Drying is a critical finishing step. Heat can set any remaining oil stain, turning a winnable stain into a permanent mark. If you’re unsure whether the stain is gone, air-dry the garment or hang it to dry, then inspect. Only after confirming the stain is fully removed should you consider a warm or hot dryer setting. A cautious approach to drying preserves your garment’s color and fabric integrity and reduces the risk of re-staining from residual oil.
Old stains and repeat attempts
Older stains are tougher. If an oil stain has sat for hours or days, a repeat pretreatment cycle often helps. Reapply dish soap and/or enzyme cleaner, let it sit longer (up to 20 minutes if fabric allows), and rewash. For stubborn cases on sturdy fabrics, you can repeat the full sequence once more, but avoid excessive scrubbing, which can wear threads. Patience and repeat application are sometimes required for set-in stains to fully release.
Quick-reference stain flowchart and flow tips
Use this quick reference to guide your actions: Fresh stain? Pre-treat with dish soap and enzyme cleaner, then wash. Not fully removed? Re-treat and rewash, then check before drying. If uncertain, default to air drying and test again later. This simple decision flow helps you manage many stains without guessing, and keeps your clothes looking their best.
Authority sources and additional reading
For evidence-based guidance on stain removal and fabric safety, consult reputable sources. Cooking Tips references industry and academic guidance to support practical home laundry practices. For deeper reading, we point to university extension resources and established reference materials you can trust.
Wardrobe care to prevent future stains
Preventive care reduces future stains and simplifies cleaning. Treat spills immediately, use protective sprays on delicate fabrics when appropriate, and follow care label instructions for washing and drying. Regularly check pockets and pre-treat potential problem areas to minimize surprise stains. By integrating these habits into your routine, you’ll keep your wardrobe cleaner and easier to maintain over time.
Tools & Materials
- Liquid dish soap(Plain, degreasing formula works best for greases.)
- Enzyme-based laundry stain remover(Follow product directions; enzymes help break down fats.)
- Liquid laundry detergent(Choose a mild formula suitable for your fabric.)
- Baking soda(Optional absorbent when oil is fresh.)
- White vinegar(Optional odor and cleaning aid; test on color first.)
- Clean white cloths or sponges(Use to blot and apply treatments without recontamination.)
- Soft-bristled brush(Gently work treatment into fabric without abrasion.)
- Water (cold to warm)(Needed for rinsing and diluting cleaners.)
Steps
Estimated time: 30-45 minutes
- 1
Check the care label and blot excess oil
Inspect the garment’s care label to confirm safe treatment methods. Use a clean white cloth to blot—do not rub, which can push oil deeper into fibers. Early action reduces set-in risk and makes later steps more effective.
Tip: Act quickly after a spill; fresh stains respond best. - 2
Pre-treat with dish soap
Squirt a small amount of dish soap directly on the stain and gently work it in with a soft brush or fingertip. Let it sit for 5–10 minutes so the soap can emulsify the oil before washing.
Tip: Do not let the soap dry on the fabric. - 3
Apply enzyme-based stain remover
Apply enzyme-based stain remover according to the product label, focusing on the center of the stain. Allow 10–15 minutes for enzymes to break down fats, which aids lift during washing.
Tip: Enzymes work best on fresh stains; avoid letting them dry. - 4
Rinse with cold water
Rinse from the back of the stain with cold water to push the oil out of the fibers. Repeat until the water runs clear.
Tip: Cold water prevents setting the stain further. - 5
Launder with appropriate detergent
Wash in warm water with a mild detergent, following the garment’s care label. If the stain is stubborn, a second wash cycle can improve results.
Tip: Don’t exceed the recommended water temperature for delicate fabrics. - 6
Inspect before drying
Check the stain after washing. If any oil remains, repeat pretreatment and wash again before drying the garment.
Tip: Never put a stained item in the dryer until you’re sure the stain is gone. - 7
Consider oxygen-based bleach for whites/colorfast fabrics
For white or colorfast fabrics, you may use an oxygen-based bleach per label directions to boost stain removal and brighten fibers.
Tip: Avoid chlorine bleach on colored fabrics to prevent fading. - 8
Handle delicate fabrics with care
Delicate fibers (like wool or silk) may require hand washing or professional cleaning. Always test on an inconspicuous area first.
Tip: Gentle handling preserves fabric integrity. - 9
Repeat if necessary
If residue remains, re-apply pretreatment and rewash. Some stains require a second cycle for full removal.
Tip: Give stains a second chance before deciding to replace the item.
Quick Answers
Can dried oil stains be removed from clothes?
Dried oil stains can sometimes be removed with repeated pretreatment and washing, depending on fabric and stain severity.
Dried stains can sometimes come out with patience and the right pre-treatments.
Is hot water safe for oil stains?
Hot water can set oil stains in some fabrics; use cold or warm water based on fabric care labels.
Hot water can set the stain, so start with cold or warm water.
Should I use bleach on oil stains?
Bleach can be harsh on fabrics. Use oxygen-based bleach for whites or color-safe options, and never mix with oils.
Bleach should be used carefully; oxygen-based options are safer for color fabrics.
How long should pretreatment sit?
Most pretreatments should sit for 5–15 minutes; tougher stains may require longer if fabric tolerates it.
Let the treatment work for a bit, but don’t let it dry.
Will stain removers harm delicate fabrics?
Some stain removers can affect delicate fabrics. Always test first and follow label directions for delicate care.
Test a small area and use gentle methods on delicate fabrics.
Can I treat stains on upholstery the same way?
Some techniques apply to fabric upholstery, but check the fabric backing and consider professional cleaning for furniture.
For furniture, follow the upholstery care label or consult a pro.
Watch Video
Top Takeaways
- Act quickly after spills to improve removal chances
- Pre-treat with dish soap and enzyme cleaner for best lift
- Avoid heat until the stain is fully removed to prevent setting
- Test care labels and fabrics before applying cleaners
- Repeat pretreatment and washing for stubborn stains