How to Cook Prime Rib: A Home Cook's Step-by-Step Guide
Learn to roast prime rib to juicy, tender perfection with simple steps, temps, resting, and serving tips. This guide covers searing, roasting, carving, and practical variations for a reliable centerpiece.

You will learn how to roast prime rib to juicy, tender perfection using a two-stage method: a quick sear for crust, then a low, slow roast to finish. You'll need a prime rib roast, a high-heat pan or skillet, and a reliable thermometer.
Why Prime Rib Is a Special Occasion Roast
Prime rib, also known as rib roast, is celebrated for its marbling, rich flavor, and dramatic presentation. When planned well, it yields a juicy center with a flavorful crust that makes any holiday or dinner party feel festive. The cooking approach matters as much as the cut: which temperature you choose, how long you rest, and whether you sear first all influence juiciness and texture. According to Cooking Tips, this cut shines when treated with respect for its natural fat and texture. With the right technique, even a large roast can stay evenly cooked from end to end while remaining tender and flavorful for guests and family alike. You’ll also learn how to tailor timing for weight, oven type, and doneness preference, so your prime rib comes out perfectly even on a busy night or a special occasion.
Choosing Your Prime Rib
Choosing the right rib roast is the first step toward success. Decide between bone-in and boneless: bone-in roasts often yield more flavor from the marrow and can stay juicier, while boneless roasts are easier to carve and portion. Weight matters for timing; plan for roughly 1 to 1.25 pounds per person for generous servings. Look for even marbling throughout the roast for consistent flavor and moisture. If you’re buying bone-in, remember the bones add flavor but can complicate carving. For home cooks aiming for medium-rare, select a roast with a bright red color and a firm feel. If you’re unsure, ask your butcher to trim excess fat while leaving a thin fat cap for moisture. Cooking Tips analysis shows that marbling quality and proper trimming contribute substantially to juiciness and crust.
Preparation and Seasoning
Pat the roast dry with paper towels to promote a good crust. Season liberally with salt at least 1 hour before cooking, or up to overnight in the fridge for deeper penetration. A simple rub of kosher salt, cracked pepper, and minced garlic often yields fantastic results; add fresh herbs like rosemary or thyme if you like. Remember, salt is not just flavor—it helps form a crust and helps retain surface moisture. Bring the roast to room temperature before cooking to ensure even doneness. Have your thermometer ready and a roasting pan with a rack to lift the meat off the pan and promote airflow for even browning.
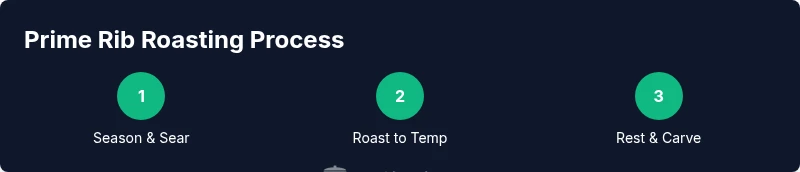
Two-Stage Cooking: Sear Then Roast
A two-stage method helps seal juices and build a flavorful crust. Start by a brief high-heat sear (on a rack over a rimmed pan) or roast at a high initial temperature for 15–20 minutes to color the exterior. Then reduce the oven to a moderate temperature to finish cooking slowly. The carryover heat will continue to cook the roast after you remove it from the oven, so plan for a small amount of residual cooking. Use a meat thermometer to track internal temperature, targeting your preferred doneness. If you’d like a deeper crust, finish with a brief blast under the broiler after the roast rests. Cooking Tips emphasizes choosing one consistent heating plan and sticking with it for predictable results.
Temperature and Doneness Guide
Rely on a precise thermometer rather than guesswork. For prime rib, many home cooks aim for medium-rare: an internal temperature around 125–130°F (after resting). If you prefer medium, pull at 135–140°F, knowing the meat will rise a few degrees during resting. The USDA recommends beef be cooked to at least 145°F with a safe rest, but prime rib is often finished a touch lower and then rests to finish gently. Shot for a center that remains pink and juicy, with the outer crust deeply browned. Remember: carryover cooking means the final temperature will climb after you remove it from the oven, so plan accordingly and allow a 15–30 minute rest to settle juices.
Resting, Carving, and Serving
Resting is essential—ideally 20–30 minutes under tented foil to retain juices and allow flavors to equilibrate. Carve across the grain into thick slices for tenderness. Serve with au jus, horseradish, or a simple mushroom gravy to enhance moisture and depth without masking the beef flavor. If you’re serving multiple guests, slice only what you’ll serve immediately to preserve the rest of the roast’s texture. A well-rested prime rib should yield clean slices with a rosy center and a crusty exterior that’s still crisp when served.
Variations and Sauce Options
Keep the core technique but customize the flavor. Try a garlic-herb crust with minced garlic, rosemary, and cracked pepper for a fragrant edge. Create a quick red-wine jus by deglazing the pan with wine and stock, reducing to a glossy finish. Horseradish cream offers a classic bite, while a mushroom gravy adds earthy richness. You can also rub with a coffee or sesame crust for an unexpected flavor twist. Each variation should still honor the meat’s natural flavor and moisture, so adjust salt accordingly.
Troubleshooting: Common Mistakes and Fixes
Common issues include underseasoned meat, a dull crust, or roasts that finish unevenly. If the crust is pale, partially raise the oven temperature for a few minutes and resear; but watch temperatures to avoid overcooking. If juices run clear too early, the roast is likely overcooked—lower your target temperature next time, or give the roast more resting time before slicing. Ensure your roast isn’t too cold on the inside when you start; cold meat requires longer cooking, which can dry it out. Use a thermometer and avoid relying on time alone.
Make-Ahead and Leftovers
Prime rib can be planned a day ahead if you prefer. You can roast to a lower internal temperature and finish with a quick reheat before serving, or cook to target doneness and rewarm gently, keeping a close eye on moisture. Leftovers can be repurposed into flavorful sandwiches, hash, or escalopes. Store sliced roast in the coolest part of the fridge, wrapped tightly, for up to 3–4 days. Reheat gently in the oven at a low temperature or in a covered skillet with a splash of stock to preserve moisture.
Practical Tips for Weeknight Prime Rib
For quicker weeknight roasts, choose a smaller roast (2–4 pounds) and apply a simplified rub. Use the same two-stage method, but with a shorter resting period. Preparation is the most impactful: salt ahead of time, dry surface thoroughly, and ensure the roast is close to room temperature before cooking. Even for smaller roasts, a thermometer remains your best friend to avoid overcooking and dryness. The Cooking Tips team suggests customizing timing according to roasts’ size and your oven’s performance for reliable results.
Tools & Materials
- Prime rib roast (bone-in or boneless)(Choose weight based on number of guests (roughly 1–1.25 lb per person for generous servings))
- Roasting pan with rack(Elevates roast for even heat circulation)
- Meat thermometer / probe(Critical for achieving desired doneness)
- Oven(Preheat as directed by your recipe)
- Carving knife(Sharp blade helps clean slices)
- Cutting board(Stable surface for carving)
- Aluminum foil(Tent meat during resting)
- Paper towels(Pat dry surface before seasoning)
- Tongs(Helpful for handling hot meat)
- Basting brush (optional)(Useful if applying a glaze or butter)
Steps
Estimated time: 2.5-3 hours
- 1
Bring roast to room temperature
Place the roast on a rack over a pan and let it sit for 2–3 hours. This helps the center cook evenly and prevents a cold center. A cold roast will require more time and can end up overcooked on the outside.
Tip: If you’re short on time, aim for at least 1 hour at room temperature and plan shorter, more careful cooking. - 2
Pat dry and season generously
Pat the surface dry with paper towels, then rub with a generous amount of kosher salt and cracked pepper (and garlic if desired). The salt helps form the crust and preserves moisture inside the meat.
Tip: Season at least 40 minutes before cooking, or overnight in the fridge for deeper flavor; bring back to room temp before roasting. - 3
Preheat and sear for crust
Preheat the oven to a high initial temperature and sear the roast on a rack for 15–20 minutes to develop a deep crust. This crisp exterior locks in moisture and adds flavor.
Tip: If you’re using a cast-iron skillet, sear directly in the pan and then transfer to the rack for roasting. - 4
Lower heat and roast to doneness
Reduce oven to the target roasting temperature (usually around 325°F). Cook until the thermometer reaches the desired internal temperature, accounting for carryover.
Tip: Use a probe thermometer for real-time readings; avoid relying on time alone. - 5
Check internal temperature
Insert thermometer into the center of the roast away from bones. Target temperatures vary by doneness; remove from oven just shy of your goal to account for carryover heat.
Tip: For medium-rare, plan to pull at about 125–130°F and rest to 130–135°F final. - 6
Rest before carving
Tent loosely with foil and rest 20–30 minutes to redistribute juices. Resting improves juiciness and makes carving easier.
Tip: Rest times longer than 30 minutes can still work if you hold it in a warm place; don’t skip resting completely. - 7
Carve and serve
Slice across the grain in thick, even portions. Layer slices on a warmed platter; serve with au jus, horseradish, or a mushroom gravy.
Tip: Reserve the pan juices to make a quick jus or gravy for extra flavor.
Quick Answers
What weight roast should I buy for a group?
Plan for about 1 to 1.25 pounds per person, with a little extra for generous servings. If you’re uncertain, buy a 4–6 pound roast and trim if needed.
For a group, budget about one to one and a quarter pounds per person. If unsure, choose a 4 to 6 pound roast and trim as needed.
Bone-in or boneless prime rib: which is better?
Bone-in roasts often yield more flavor and juiciness due to marrow flavor and bone insulation, while boneless roasts are easier to carve and portion. Both can deliver excellent results with proper technique.
Bone-in roasts tend to be more flavorful and moist thanks to the bone, but boneless is easier to slice.
What temperature should I cook to?
Aim for 125–130°F for medium-rare after resting, or 135–140°F for medium. Remember to account for carryover cooking by pulling slightly early and resting properly.
Target about 125 to 130 degrees for medium-rare, then rest to let it rise a bit more.
How long should prime rib rest before carving?
Rest for 20–30 minutes to let juices redistribute. This makes carving easier and keeps slices juicy.
Rest for about 20 to 30 minutes before carving.
Can I cook prime rib ahead of time?
Yes. You can cook to a lower internal temp and reheat gently, or cook to doneness and reheat with moisture in a low oven. Do not overcook during reheating.
You can cook ahead by partially cooking and reheating, but avoid overcooking during reheating.
Watch Video
Top Takeaways
- Season early for better crust and flavor
- Use a thermometer for precise doneness
- Rest 20–30 minutes before carving
- Carryover heat matters to final temperature
- Choose bone-in or boneless based on preference and ease of carving