How Long to Cook Corn on the Cob: Timings by Method
Discover exact cook times for corn on the cob across boiling, steaming, microwaving, and grilling. Practical tips, doneness cues, and a step-by-step guide from Cooking Tips.

How long you cook corn on the cob depends on the method you choose. Boiled corn takes about 4–7 minutes once the water returns to a boil. Steamed corn typically needs 6–10 minutes. Microwave corn on the cob usually finishes in 3–5 minutes per ear, while grilled corn requires 10–15 minutes total, turning halfway for even charring. For very fresh corn, aim for tender kernels with a slight bite; adjust by ear size.
Why timing matters when cooking corn on the cob
Timing is the most visible variable in achieving perfect corn on the cob. Ear size, freshness, and whether you cook with the husk on or off all influence how long it takes to reach tender, flavorful kernels. According to Cooking Tips, fresh corn often cooks more evenly, and choosing ears of similar size helps standardize times across a batch. Start with a plan: pick your method based on how much time you have and how much flavor you want. This guide breaks down typical time ranges and how to adapt them to your kitchen setup. If you’re multitasking, you can parboil and finish on the grill to pair speed with smoky notes; if cooking for a crowd, boiling multiple ears in a large pot reduces overall time.
In practice, the goal is not only to reach tender kernels but also to preserve sweetness and texture. Fresh corn can overcook quickly, so short, monitored cook times are often better than chasing a precise minute. When you know the method you’ll use, you can plan your prep around it and minimize gaps between steps. Keeping a few ears warm while others finish is perfectly fine—just avoid stacking hot ears, which can cause uneven cooking.
How to judge doneness: tenderness and aroma
Doneness is best judged by tenderness and aroma rather than color, since bright yellow kernels can vary. Test a kernel by biting it; a tender pop indicates readiness. If you press the kernels gently with a fork, they should yield with a slight resistance, not mush. Fresh corn has a natural sweetness and a creamy fragrance when it’s just cooked; if it smells starchy or chalky, it needs another minute or two. If you’re cooking many ears, pull the first batch slightly earlier to account for carryover heat. Using this method will help you avoid overcooking, which makes corn tough and dry.
Your timing will also depend on the equipment you use. A wide, shallow pot allows water to return to boil more quickly, while a steamer insert can help you avoid dry kernels. If you’re feeding a crowd, consider parboiling in batches and finishing on the grill to maximize flavor without slowing down the overall process.
Boiling corn on the cob: timing and tips
Boiling corn on the cob is a classic, forgiving method that suits gatherings. Start with a large pot of water, seasoned lightly with salt if you like. Bring the water to a rapid boil, then add ears in a single layer. Return to a boil and cook 4–7 minutes, depending on size and sweetness. Remove with tongs, drain well, and serve hot. If your ears are in the husk, you can leave the husk on for steaming while boiling; otherwise peel and silk after cooking to reveal glossy kernels. For best flavor, don’t crowd the pot—work in batches if you have more ears than the pot can hold at once. Temperature control matters: keep the boil steady without vigorous splashing that could overcook the surface.
Steaming, microwaving, and grilling: timing at a glance
Steaming keeps kernels juicy and bright, requiring 6–10 minutes. Microwaving is fastest, typically 3–5 minutes per ear, and works best when ears are arranged evenly. Grilling adds smoky flavor and 10–15 minutes total, turning once. For microwaving, place ears on a plate with a touch of water (about 1–2 tablespoons) and cover before microwaving. For grilling, oil the grates lightly and cook over medium-high heat, turning every 2–3 minutes until kernels are tender. If corn is frozen or very cold, add a minute or two to the standard times. Each method has its charm: boiling is reliable and family-friendly, microwaving is quick, steaming preserves moisture, and grilling delivers a charred, caramelized edge.
When choosing a method, consider your timeline, equipment, and whether you want extra flavor from butter or herbs added after cooking. The same ears can yield different textures depending on how you finish them, so feel free to experiment with combinations—boil, then finish on the grill for a quick flavor upgrade.
Adjusting timing for ear size and freshness
Adjusting timing for ear size and freshness makes a big difference. Very small ears may need 4 minutes boiling; extra-large ears may require up to 9 minutes. If corn is very fresh and sweet, start checking at the lower end of the range to avoid overcooking. If ears are older or chilled, increase time by 1–2 minutes. Always factor altitude and pot size; a crowded pot cools slower, extending cooking. For the grill or microwave, similar principle applies: adjust by ear count and thickness. If you’re unsure, cook one ear first as a test and compare against the others. Freshness matters more than you might think; very fresh corn can go from sweet and crisp to mushy quickly if left unattended. Keep a timer handy and taste as you go.
Common mistakes and how to avoid them
Common mistakes include overcooking, under-seasoning, and crowding the pot. Overcooking yields dry kernels and a dull taste; avoid by tasting early and removing promptly. Do not skip pre-warming the pot; add ears only after water returns to boil to ensure even cooking. Crowding reduces heat efficiency, so cook in batches if needed. Another pitfall is cooking without salt in the water; salt is optional for flavor, but it can help with seasoning in some methods. Finally, don’t neglect resting time after cooking; a minute or two of standing allows flavors to settle and juices to redistribute, especially if you’ve slathered the ears with butter.
To maximize consistency, keep the ears in a single layer and avoid stacking. If you’re cooking multiple ears in the oven or on a grill, plan for a second batch and keep finished ears warm in a low-temp area.
Authoritative sources
For further guidance on food safety and cooking practices, official resources provide general principles that support home cooking, including handling vegetables like corn safely. See the following sources for additional context:
- https://www.fsis.usda.gov/wps/wcm/connect/fsis-contentlibrary/fsis-content-areas/food-safety-safety-guides/keep-food-safe
- https://extension.illinois.edu/foodsafely
- https://www.cdc.gov/foodsafety
These organizations emphasize safe handling, preventing cross-contamination, and cooking foods to safe temperatures when applicable. While corn on the cob does not require a specific internal temperature, following safe boiling, steaming, or grilling practices helps maintain flavor and texture.
Quick timing recap by method
- Boiling: 4–7 minutes after water returns to a boil (per batch, in a single layer).
- Steaming: 6–10 minutes.
- Microwave: 3–5 minutes per ear.
- Grilling: 10–15 minutes, turning halfway.
Remember, outcomes vary with ear size, sweetness, and freshness. Use these guidelines as a starting point, then adjust based on the kernels’ feel and aroma. A quick test bite at the end is your best assurance of tenderness and flavor.
Tools & Materials
- Large pot with lid(6–8 quart; tall enough to cover ears in a single layer)
- Corn on the cob (ears)(Fresh, with husks or shucked)
- Water(Enough to cover ears by about 1–2 inches)
- Tongs(For safe handling of hot ears)
- Microwave-safe dish with lid(Optional for microwave method)
- Grill or grill pan(Optional for grilling to add char and smoky flavor)
- Butter, salt, and herbs(Finish with flavor after cooking)
Steps
Estimated time: 20-40 minutes
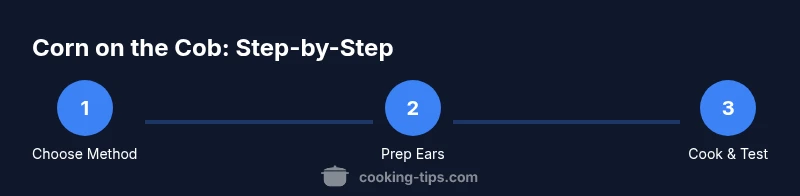
- 1
Choose your cooking method
Decide between boiling, steaming, microwaving, or grilling based on your time and flavor goals. This first step sets the cadence for prep and cooking.
Tip: If you’re feeding a crowd, equalize ear sizes to simplify timing. - 2
Prepare the corn
Peel away any loose husks and silk from the ears. Trim the ends if needed to create uniform shapes for even cooking.
Tip: For grill-ready corn, leave a light layer of husk to protect kernels and add steam while grilling. - 3
Heat your cooking vessel
Fill a pot with water and bring to a full boil, or preheat your grill/steamer. Proper heat ensures even cooking from the start.
Tip: Don’t add ears until water is at a rolling boil to avoid undercooking the edges. - 4
Cook the corn
Add ears in a single layer and cook for the time appropriate to your method. Use a timer to avoid guesswork.
Tip: Turn ears halfway in grilling or boiling to promote even texture. - 5
Check for doneness
Test tenderness by biting a kernel or using a fork to assess yield. Kernels should be plump and tender, not mushy.
Tip: If unsure, test a second ear to confirm consistency. - 6
Finish and serve
Remove ears, pat dry, and season with butter, salt, or herbs as desired. Serve hot for best flavor and texture.
Tip: Keep finished ears warm in a low-heat oven or wrapped in a clean towel if serving later.
Quick Answers
What is the quickest way to cook corn on the cob?
Microwaving is usually the fastest per ear, about 3–5 minutes. Boiling takes longer but is very forgiving, around 4–7 minutes after the water boils.
Microwave is typically the fastest for a single ear, but boiling is reliable if you’re cooking several ears at once.
Should I husk the corn before cooking?
You can cook corn with the husk on or off depending on the method. Husks can help retain moisture during boiling, while removing husks provides quicker, even contact for grilling.
Husked or un-husked can work; it just depends on your method and texture preference.
Can I cook multiple ears at once?
Yes. Use a large pot for boiling or grill ears in a single layer with enough space to prevent crowding. For very large batches, cook in batches.
Definitely—just avoid crowding so heat stays even.
How do I tell when corn is done without overcooking?
Look for tender kernels that yield with a slight bite. The aroma should be sweet and fresh, not starchy or mushy.
Tender kernels with a pleasant aroma mean it’s done.
Is salted water necessary when boiling?
Salt is optional for flavor; it does not affect doneness. You can add it lightly if you like a hint of seasoning.
Salt isn’t required to cook corn, but it can add a touch of flavor.
How long does cooked corn keep well?
Cooked corn is best eaten fresh but can be refrigerated for 3–5 days. Reheat gently to maintain tenderness.
Refrigerate up to a few days and reheat slowly to preserve texture.
Watch Video
Top Takeaways
- Choose a method based on time and flavor.
- Test tenderness to confirm doneness.
- Carryover heat can finish kernels after removal.
- Season after cooking for the best flavor.