Microwave Corn on the Cob: A Quick Guide for Perfect Ears
Learn to cook microwave corn on the cob with husked or husk-on methods. Step-by-step timing, doneness tests, and serving ideas for quick, juicy ears.

Want perfectly tender corn on the cob in minutes? This quick answer shows you how to microwave corn on the cob using husk-on or husked ears, with timing guidelines for 1–4 ears, and simple checks to ensure juicy kernels. Gather fresh corn, a microwave-safe plate, and a damp paper towel for best results.
Why microwave corn on the cob is a quick option for busy cooks
Corn on the cob is a staple, and microwaving offers speed without sacrificing flavor. For home cooks juggling tasks, the microwave can deliver tender kernels in just minutes, with far less water use than boiling. This method retains sweetness because the kernels steam inside their own moisture, not in an open pot. According to Cooking Tips, when you keep moisture around the kernels, you help preserve the natural sugars that give corn its characteristic sweetness. The approach also minimizes cleanup, since you can cook ears directly on a plate and simply dispose of the damp towel. The technique works well for weeknight dinners, dorm meals, or when you want corn ready in the same time frame as your main course. It’s also adaptable: you can cook one ear for a quick lunch or multiple ears for a family meal by adjusting the time and rest period. The key is to manage heat evenly and avoid overcooking, which toughens the kernels. If you’re new to microwaving corn, start with a single ear to gauge your microwave’s wattage, then scale up. With a little practice, you’ll find a rhythm that fits your kitchen routine.
Choosing the best ears for microwaving
Selecting ears that heat evenly makes a big difference in microwave cooking. Look for ears that are similar in size and weight, with bright, intact husks or smooth, unblemished kernels if you’re husking them first. Fresh corn will taste sweeter and cook more consistently than older ears. If you’re buying in advance, store corn in the refrigerator with the husk on until ready to cook. According to Cooking Tips analysis, uniform ears reduce hot spots and ensure each kernel reaches the desired tenderness at the same time. For multiple ears, try to pick ones that are close in size so they cook together rather than separately. This simple step minimizes guesswork and improves results for busy cooks.
Husked vs. husk-on: which method to pick
Husked (ears with silk removed) and husk-on (ears left with their husks) each have advantages. Husk-on traps steam inside, helping keep kernels moist and sweet, and can be easier to handle right after cooking. Husked ears cook a bit faster and are often simpler to season after cooking. If you’re new to microwaving corn, start with husk-on to maximize moisture; you can peel back the husk after cooking if you want to taste the maize’s natural sweetness without extra steam. For very small or microwave-sensitive kitchens, husked corn can be a quicker, cleaner option. Cooking Tips notes that the best choice often depends on your texture preference and your microwave wattage.
Prep steps for consistent results
Prep matters as much as the microwave itself. If you’re using husked ears, trim the stem and pull off the silk. If you leave the husk on, simply peel back the outer layers enough to remove the silk while leaving the husk mostly intact. Rinse if you’d like, but it’s not strictly necessary. Place the ears on a microwave-safe plate and wrap each ear with a damp paper towel to trap steam, which helps maintain juiciness. For best results, avoid overcrowding—cook in a single layer and give each ear some space so heat circulates evenly. By following these prep steps, you’ll minimize uneven cooking and get consistently tender kernels. According to Cooking Tips, moisture management during microwaving is a key factor in achieving juicy, plump kernels.
Step-by-step microwave method (overview)
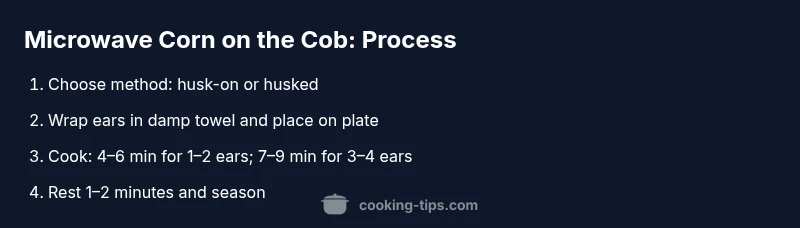
This quick overview outlines the core actions before you dive into the full step-by-step guide. Decide whether to microwave with the husk on or off, then prep the ears accordingly, wrap with a damp towel on a plate, cook for the recommended time, rest briefly, and season before serving. The method is designed to be flexible for 1–4 ears and works well whether you’re cooking a quick solo snack or a small family batch. You’ll adjust timings based on your microwave’s wattage and ear size, but the general flow remains the same. Remember: safety first—steam can be hot, so handle ears with care after cooking. Cooking Tips emphasizes evaluating doneness by tenderness and color for reliable results.
Timing and wattage: how long to cook
Timing depends on wattage and the number of ears. For most 1000W microwaves, 4–6 minutes is typical for 1–2 ears; 7–9 minutes covers 3–4 ears. If your microwave is around 700W, add 1–2 minutes. For best results, rotate the ears halfway through cooking if your microwave lacks a turntable, then resume cooking. After cooking, let the corn rest for 1–2 minutes; carryover heat finishes the cooking and helps distribute moisture. If kernels still feel firm, give them another minute or two, then recheck.
Testing doneness and handling steam safely
Doneness is best judged by tenderness. Use tongs to transfer the ears to a plate, then insert a fork or the tip of a knife into a kernel. If it’s tender from end to end, the corn is ready. If the kernel resists, microwave in 30–60 second increments until texture turns creamy and juicy. Steam escapes as soon as you unwrap towels or husks, so open cautiously and away from your face. Always allow the corn to rest before tasting; the residual heat will keep the kernels plump. When serving, consider removing the husk or peeling back the towel to blot away excess moisture. Safety matters: never touch hot plates with bare hands, and use oven mitts as needed.
Flavoring, toppings, and serving ideas
Butter is a classic addition, and a pinch of salt enhances sweetness. For variety, try a light dusting of paprika, chili powder, or fresh herbs like chives or parsley. If you like a dairy-free option, olive oil or a squeeze of lime can brighten the kernels. For a crowd-pleaser, offer toppings in small bowls so everyone can customize their ears. Remember to adjust seasoning after the cook if you used damp towels, since moisture can dilute flavors slightly. Quick seasoning ideas like lemon zest with butter or a sprinkle of parmesan can elevate plain corn to a simple, elegant side dish.
Storing leftovers and reheating
Leftover microwave corn should be cooled briefly, then stored in an airtight container in the fridge for up to 2 days. To reheat, place the corn on a plate with a small splash of water, cover with a damp paper towel, and microwave on low power for 30–60 seconds, checking tenderness after each interval. Reheating with moisture helps prevent drying out. If you’re reheating multiple ears, add time in small increments to avoid overcooking. Never refrigerate corn and reheat it with the husk on, as humidity can cause the husk to mold if not dried properly. The Cooking Tips team notes that reheating should maintain moisture and flavor rather than attempting a second full cook.”],
mainTopicQuery:
Tools & Materials
- Fresh corn on the cob (1–4 ears)(Choose ears of similar size for even cooking.)
- Microwave-safe plate(Flat plate works best; avoid metal.)
- Damp paper towels(Wrap ears to trap steam; re-wet if drying out.)
- Knife or kitchen scissors(For trimming silk or ends if needed.)
- Butter or salt (optional)(For serving and flavor.)
Steps
Estimated time: Total time: 8-12 minutes depending on ears and wattage
- 1
Choose your method
Decide whether to microwave with the husk on or off. Husk-on traps steam for juicier kernels; husked ears cook a bit faster and are easier to handle after cooking.
Tip: Tip: Start with husk-on for most ears; switch to husked if you need faster results. - 2
Prep and place
If husked, trim the ends and remove silk. If husk-on, peel back a portion to remove silk while leaving most husk intact. Place ears on a microwave-safe plate and wrap with a damp paper towel.
Tip: Tip: Arrange ears in a single layer with space between them for even heating. - 3
Microwave the ears
Cook on high: 4–6 minutes for 1–2 ears, 7–9 minutes for 3–4 ears in a 1000W microwave. Rotate halfway if no turntable to promote even cooking.
Tip: Pro tip: If you’re unsure of wattage, start with 6 minutes and test, then add 1 minute if needed. - 4
Rest and test
Let the corn rest 1–2 minutes after cooking to finish steaming. Test tenderness by piercing a kernel with a fork; it should be tender from tip to base.
Tip: Pro tip: A short rest makes the kernels juicier and easier to bite into. - 5
Season and serve
Add butter, salt, or your preferred seasonings. Peel back the towel or remove husks, then serve immediately for best texture.
Tip: Pro tip: A light brush of melted butter helps flavor without making the corn soggy. - 6
Store leftovers
If you have leftovers, cool briefly and store in an airtight container in the fridge for up to 2 days. Reheat with a damp towel to retain moisture.
Tip: Warning: don’t reheat for too long or you’ll dry out the kernels.
Quick Answers
Can I microwave corn on the cob from the freezer?
Yes, you can, but expect longer cooking time and a slightly different texture. Thaw briefly or add 1–2 minutes to the cooking time and check tenderness.
Yes, you can microwave frozen corn, but it may take a bit longer; thaw or add time and test for tenderness.
Is it better to microwave with husk on or off?
Both work well. Husk-on retains moisture and sweetness, while husked ears cook a bit faster and are easier to season after cooking.
Both methods work; choose based on texture you prefer and how you’ll season after cooking.
How can I tell when the corn is done?
Tender kernels that give slightly when pressed with a fork indicate doneness. If it’s still firm in the center, cook a little longer in 30‑second increments.
Check tenderness with a fork; if it’s soft from end to end, it’s done.
What if my microwave is low wattage?
Add 1–2 minutes to the cooking time and test for tenderness. Smaller ears may need less time, larger batches more.
If your microwave is weaker, add a bit more time and test again.
Can I reheat corn on the cob in the microwave?
Yes. Reheat in 30–60 second bursts with a damp towel to prevent drying out. Check tenderness after each interval.
Yes, you can reheat in short bursts to keep the corn moist.
Is microwaving corn on the cob unhealthy?
Microwave cooking is safe and preserves nutrients similarly to other methods when done properly. It’s a quick method that uses little added fat.
Microwaving is safe and efficient; it preserves nutrients like other cooking methods when done correctly.
Watch Video
Top Takeaways
- Choose husk-on for juicier corn
- Wrap ears in a damp towel to trap steam
- Adjust timing by wattage and ear count
- Let corn rest 1–2 minutes before serving
- Season to taste for best flavor