How to Roast a Whole Chicken in the Oven
Master oven-roasted whole chicken with a practical, step-by-step guide. Learn prep, timing, doneness, and troubleshooting to achieve crispy skin and juicy meat every time.

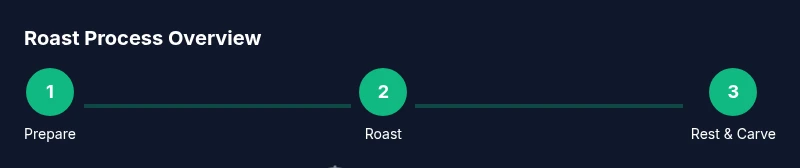
A properly roasted whole chicken in the oven is crispy-skinned and juicy inside. Start with a hot blast to set the skin, then finish at a moderate temperature until the internal temp reaches 165°F. Rest before carving. See our detailed step-by-step guide.
Why Oven-Roasted Whole Chicken Is a Kitchen Essential
An oven-roasted whole chicken is a versatile centerpiece that feeds a family and yields great leftovers for later meals. It’s economical, reliable, and surprisingly adaptable for a range of flavors. The core principle behind a successful roast is a two-stage approach: a brief, high-heat blast to set the skin, followed by a gentler finish to cook the meat evenly without drying it out. This technique works in standard home ovens and can be tweaked for convection for extra crispness. Beyond a simple roast, you can tailor the flavor with citrus, garlic, fresh herbs, or a light stuffing. With patience and proper technique, you’ll achieve restaurant-like results at home. Remember to plan for a short rest after cooking; resting lets juices redistribute for a tastier bite. By focusing on dry patting, even seasoning, and correct temperature, you’ll gain confidence and consistency in your results. The sections that follow cover selection, prep, timing, and practical roasting tips to help you roast with ease.
This guide follows practical Cooking Tips methods to deliver a reliable, flavorful roast every time, whether you’re cooking for family dinners or special occasions.
Choosing the Right Chicken and Prepping It
Start with a whole chicken around 4 to 5 pounds for typical family meals. If you buy frozen, plan extra time for thawing in the refrigerator before roasting to avoid icy pockets that can lead to uneven cooking. Remove the giblets and neck from the cavity, then pat the bird dry with paper towels—the drier surface helps achieve a crisp skin. Consider a light dry-brine: rub salt evenly over the skin and in the cavity, then chill uncovered for 8–24 hours. This pulls moisture to the surface, improving both texture and flavor. Allow the chicken to come to room temperature for 20–30 minutes before roasting, then rub with oil or melted butter and season generously with salt, pepper, and aromatics (garlic, lemon, thyme, or rosemary). If you’d like extra fragrance, tuck citrus peels or herbs inside the cavity. Keep seasoning balanced; overly salty or heavily stuffed birds can hamper cooking. The goal is a well-seasoned, evenly colored skin that browns thoroughly without scorching.
Flavor Foundations: Salts, Fats, and Aromatics
Salt is essential for seasoning and helps the meat retain moisture during roasting. Fats—oil or butter—lightly coat the skin to promote crispness and even browning. Aromatics like garlic, onions, citrus, and fresh herbs elevate the aroma and flavor of the finished chicken. A simple approach is to rub the outside with oil, then rub in salt, pepper, and any desired herbs. For deeper flavor, consider a small amount of citrus zest, garlic cloves tucked in the cavity, and a few sprigs of thyme or rosemary. If you prefer stuffing, keep it light so air can circulate and the bird cooks evenly. Avoid heavy marinades that introduce moisture on the skin; they can hinder browning. The aim is a dry surface that browns crisply while the interior stays juicy.
Temperature, Time, and Doneness Guidelines
The safe internal temperature for cooked poultry is 165°F (74°C). Practical roasting uses a two-stage approach: start at a high heat to crisp the skin, then finish at a lower temperature to cook through without drying. A common method is to roast at 450°F (232°C) for 15 minutes to jump-start browning, then reduce the oven to 350°F (175°C) and continue roasting until the breast reaches 160–162°F with the thighs at 170–175°F. Cooking times vary by weight, but a 4–5 pound chicken typically finishes in about 60–90 minutes with the two-stage method. Always verify doneness with an instant-read thermometer inserted into the thickest part of the breast and thigh, avoiding bone. Let the chicken rest for 10–15 minutes before carving to reabsorb juices. Resting improves juiciness and makes carving cleaner.
Practical Roasting Techniques: Rack, Trussing, and Pan Choice
Using a rack elevates the chicken off the pan, promoting even heat circulation around the bird and crisper skin on all sides. Truss the legs loosely to keep the bird compact and ensure uniform cooking. Choose a shallow roasting pan with high sides to catch drippings and avoid splatters. A light glaze of oil or butter helps with browning, but avoid heavy basting that cools the bird between checks. If you’re using a convection oven, you can shorten the time slightly or lower the temperature by about 25°F; monitor the internal temperature rather than relying solely on time. Let the roast finish without opening the oven door repeatedly, which can cause temperature fluctuations. These practices help you achieve a well-browned exterior and moist interior.
Troubleshooting and Common Mistakes
Common issues include skin that won’t crisp, uneven doneness, or dry meat. If the skin is pale, raise the oven temperature for the final minutes or switch to convection if available. If the breast is undercooked while the thighs are done, you can tent the bird with foil and finish in a warmer oven or covered pan. Avoid overcooking, which makes the breast dry; use a thermometer to guide when to pull the chicken from heat and let it rest. If you notice excessive sweating from the cavity, a light dry-brine before roasting can help reduce moisture loss and improve browning. With practice, you’ll recognize cues from color and aroma that indicate a near-perfect roast.
Tools & Materials
- Roasting pan with rack(Oven-safe; fits 4–5 lb chicken)
- Instant-read meat thermometer(Probe should reach the center of the breast without touching bone)
- Kitchen twine(For trussing legs and wings snugly)
- Paper towels(Pat chicken dry for browning)
- Oil or melted butter(Light coating to promote browning)
- Salt and pepper(Season generously but balanced)
- Optional aromatics(Garlic, lemon, fresh herbs for inside cavity)
Steps
Estimated time: Total time: 70-90 minutes
- 1
Preheat oven and prepare chicken
Set your oven to 450°F (232°C) and place a rack in the middle. While the oven heats, pat the chicken dry inside and out with paper towels to remove surface moisture. This drying step is crucial for crisp skin, so don’t skip it.
Tip: A dry surface browns more evenly; pat thoroughly and let air-dry for a few minutes. - 2
Season and oil
Rub the entire chicken with a light coating of oil or melted butter. Generously season with salt and pepper on the outside and inside the cavity. If using aromatics, place a few garlic cloves or lemon slices inside the cavity for extra aroma.
Tip: Seasoning inside the cavity boosts flavor without needing heavy surface salt. - 3
Truss and position
Loosely tie the legs together with kitchen twine and tuck the wings under the body. Place the chicken breast-side up on the rack in the roasting pan to promote even browning all around.
Tip: Trussing helps the bird keep a compact shape, which cooks more evenly. - 4
Roast at high heat, then lower
Roast at 450°F (232°C) for 15 minutes to set the skin, then reduce the oven to 350°F (175°C) and continue cooking until the thermometer reads 165°F in the breast and 170–175°F in the thigh.
Tip: Use the thermometer early and often; don’t rely only on time for doneness. - 5
Check doneness and rest
Once the internal temps are reached, remove the pan from the oven and transfer the chicken to a cutting board. Let it rest for 10–15 minutes before carving to redistribute juices.
Tip: Resting is when the juices reallocate, producing juicier slices. - 6
Carve and serve
Carve the chicken into equal portions, starting with the breast then the thighs. Serve with pan drippings or a simple pan sauce if desired.
Tip: Carve against the grain for tender slices and present with a light drizzle of pan juices.
Quick Answers
Can I roast a chicken from frozen?
Roasting from frozen is possible but will take significantly longer and may cook unevenly. It’s best to thaw the chicken completely in the fridge before roasting for even heat distribution.
Roasting from frozen works, but thawing first gives you even cooking and better texture.
What is the safe internal temperature for cooked chicken?
The safe internal temperature for cooked chicken is 165°F (74°C) when measured with a properly inserted thermometer. Check in the thickest part of the breast and the thigh.
Cook the chicken to 165 degrees Fahrenheit at the thickest part to be safe.
Should I brine or dry-brine the chicken before roasting?
Brining is optional but can improve juiciness and skin crispness. A dry-brine (salt rubbed on the skin and inside the cavity) is simple and effective for most home roasts.
Dry-brining is a quick, effective way to improve juiciness and browning.
Can I use a convection oven for this method?
Yes. Convection can yield crisper skin and faster cooking. If using convection, reduce the temperature by about 25°F and monitor doneness with a thermometer.
Convection helps crisp the skin; lower the temp a bit and watch the time.
How long should the roast rest after cooking?
Rest the roasted chicken for 10–15 minutes before carving. Resting helps juices redistribute for tastier slices.
Let it rest for about 10 to 15 minutes before carving.
Watch Video
Top Takeaways
- Start with high heat to crisp skin, then finish at moderate heat for even doneness.
- Always verify doneness with a thermometer, targeting 165°F in the breast.
- Rest the chicken 10–15 minutes before carving for juicier slices.
- Dry surfaces and thorough seasoning yield better flavor and texture.