When to Cook for Thanksgiving: A Complete Timing Guide
Plan Thanksgiving timing with precise start times, rest periods, and make-ahead strategies so turkey and sides are perfectly hot and juicy. This guide offers templates, a 1-day timeline, and practical tips to coordinate everything in Cooking Tips’ expert, educational tone.

This guide helps you plan when to cook your Thanksgiving feast so every dish lands on the table hot and in harmony. You'll learn timing templates for turkey, sides, and dessert, including resting periods, oven space allocation, and make-ahead strategies to reduce last-minute stress. Whether you're cooking for a small gathering or a crowd, this plan offers practical steps, a simple calendar, and adaptable menus.
Why Timing Matters for Thanksgiving
According to Cooking Tips, timing is the backbone of a stress-free Thanksgiving. The Cooking Tips team found that households who map out a cooking schedule experience calmer kitchens, juicier turkey, and hotter sides. When to cook for thanksgiving should be determined not by the dinner time alone, but by the combined cook-and-serve flow of every dish. A practical plan starts with your dinner time and works backward to identify when to start thawing, brining, roasting, resting, and holding hot dishes.
In practice, this means deciding your target dinner time, then sequencing tasks by oven space, dish temperatures, and prep work. You may have several items that share the oven or require different cooking methods. The goal is to minimize last-minute surprises by anticipating carryover cooking, rest times, and safe food temperatures. A clear plan reduces stress and keeps flavors at their peak.
Core Timing Principles
Timing is about more than a clock on the wall; it is a system. Start with three critical windows: preparation, active cook time, and hot-holding/rest. Resting is not laziness; it is essential for juicy meat. For turkey, plan a rest of about 20-30 minutes after pulling from the oven to let juices redistribute. Do not rush to slice; carrying heat into slices dries the meat. Carryover cooking will nudge the internal temperature upward, so aim to remove the bird a touch early.
Safety matters: turkey should reach a safe internal temperature before resting, and sides should stay warm without overcooking. Use a probe thermometer for accuracy rather than relying on guesswork. Build in buffers: if one dish overruns, a well-designed schedule keeps others on track. When you keep temps steady and monitor progress, you’ll maintain flavor without chaos.
Build a Menu Timeline
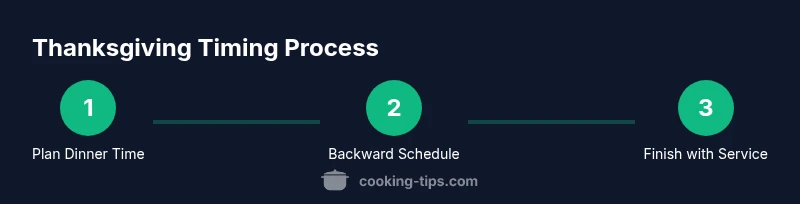
If you are asking when to cook for thanksgiving, start by listing every dish you plan for the meal: turkey, gravy, stuffing, potatoes, vegetables, rolls, and dessert. Estimate active cooking times and oven usage for each item. Then, decide the order that minimizes oven changes and keeps hot dishes moving to the table together. This is where a backward planning approach shines: decide your final dinner time, then work backward to determine when to start each item, how long it needs, and where it can be made ahead.
When you know your timelines, allocate oven space, adjust temperatures, and coordinate multiple cooking methods such as roasting, simmering, and steaming. This approach keeps the kitchen calm and reduces last-minute scrambling. Include contingency buffers for oven warm-up or ingredient delays. The keyword here remains balance: you want timing that respects carryover cooking and resting needs while delivering a cohesive, delicious menu that your guests will remember.
Make-Ahead and Resting Windows
Make-ahead strategies are a game changer for Thanksgiving. Many sides, such as mashed potatoes, cranberry sauce, and even some dessert elements, can be prepared a day ahead and reheated or refreshed before serving. Resting windows for the turkey, gravy, and roasted vegetables provide natural pauses that help flavors settle and textures align. Use chilling time for prep tasks that don’t require heat, then move to hot cooking as your timeline tightens.
Plan ahead for chilling, rewarming, and final finishing touches. Label containers clearly, reheating methods clearly, and keep a running checklist so you don’t miss a step. A little advance work reduces chaos on the day and helps keep your kitchen under control.
Oven Space and Temperature Management
Managing oven space is a major part of the timing puzzle. When you have multiple dishes that need oven time, consider using two batches or a dedicated roasting oven if available. Place the largest item—usually the turkey—on the lower rack so hot air can circulate. Use a roasting rack to lift it from its juices and promote even cooking. If temperatures clash, consider roasting sides at a lower temperature or finishing them on the stovetop or in a microwave-safe pot.
Keep a running list of which items require a full-size oven, a toaster oven, or a stovetop finish. This awareness helps you allocate time blocks and prevents all your dishes from running simultaneously. Remember to plan for rest periods, wrap dishes in foil when holding, and avoid opening the oven door too often, which drops temperatures and disrupts cooking.
Sample 1-Day Timeline
7:00 AM – Thawing, if needed, and prep for the day. 8:30 AM – Preheat oven and start roasting the turkey. 9:00 AM – Prepare stuffing (if baked separately) and parboil potatoes for faster roasting. 10:30 AM – Start side dishes that require longer oven time or simmering, such as green beans and gravy base. 12:00 PM – Turkey begins resting after a first check for doneness; tent with foil. 1:00 PM – Re-check turkey temperature; add last-minute sides to oven or stovetop as needed. 2:00 PM – Finish gravy and warm rolls on the stovetop. 3:00 PM – Carve turkey; arrange all dishes on the warmers and final garnishes. 4:00 PM – Dinner is served.
This sequence assumes a mid-afternoon dinner, but you can shift by 30-60 minutes depending on your schedule. The key is backward planning: set your dinner target and work backward to assign tasks, rest periods, and hot holds. Use multiple timers and lay out a-priority order for oven usage so nothing is crowded at once.
Carving, Serving, and Keeping Warm
Carving is easiest after a proper rest, so plan to carve after 20-30 minutes of rest time. While the turkey rests, transfer sides to warmers or low-heat settings to keep them above the safe holding temperature. Use foil tents to retain warmth without steaming the meat, which can affect texture. Create a simple 'service line' so guests can move through quickly, with platters placed in order of serving. This setup minimizes heat loss and ensures the meal remains cohesive from kitchen to table.
Common Pitfalls and Fixes
Pitfall: Overcrowding the oven with too many dishes at the same time. Fix: Stagger start times and consider alternative cooking methods (stovetop, slow cooker, or microwave for small sides). Pitfall: Not accounting for carryover cooking. Fix: Remove turkey slightly early and Let it rest to finish cooking. Pitfall: Inconsistent temperatures between dishes. Fix: Use separate heat sources and keep a consistent warm hold where possible. Pitfall: Skipping a written plan. Fix: Create a backward timeline that maps every dish to a concrete start and finish time. Pool your resources and stay flexible; timing is a planning tool, not a rigid rulebook.
Authoritative sources
- Authoritative sources to support your timing plan:
- https://www.usda.gov/
- https://www.fsis.usda.gov/
- https://www.cdc.gov/foodsafety/index.html
Tools & Materials
- Meat thermometer (instant-read or probe)(Essential for verifying 165°F internal temperature; choose one with a fast read and audible alert)
- Roasting pan with rack(Fits your turkey size and allows air to circulate for even browning)
- Aluminum foil (heavy-duty)(For tenting the turkey and keeping moisture in without steaming the skin)
- Digital kitchen timer(Use multiple timers if you’re juggling several dishes)
- Carving knife and carving fork(Sharp blade makes clean slices and presentation easier)
- Wire cooling rack(For resting the turkey off the pan juicess; optional but helpful)
- Parchment paper or silicone mats(Line pans for easier cleanup and prevent sticking)
Steps
Estimated time: Total time: 6-8 hours
- 1
Set the cooking schedule
Define your target dinner time and work backward to block out start times for thawing, prepping, and cooking. Confirm oven availability and plan which dishes can share or require separate heat.
Tip: Use a visible wall calendar or a digital timeline to reduce miscommunication. - 2
Thaw, prep, and season
Ensure the turkey is fully thawed or fully thawed prior to roasting. Remove giblets, pat dry, and season or brine according to your recipe. Remember: stuffing inside the cavity adds time and requires careful safety checks.
Tip: Dry the skin well for a crispier finish; pat with paper towels before applying oil or butter. - 3
Start roasting the turkey
Place the turkey on the rack and roast at your target temperature. Use a thermometer to monitor progress and begin checking around the expected finish window.
Tip: Avoid opening the oven door often; each door opening costs time and temperature stability. - 4
Prepare sides in parallel
While the turkey cooks, prep sides that can be finished on the stovetop or in the oven during the same window. Keep sauces warm on low heat and finish vegetables to order.
Tip: Group faster-cooking sides with shorter oven times to optimize space. - 5
Rest the turkey and hold hot
Once the thermometer hits safe temperature, remove the turkey and tent with foil. Let it rest 20-30 minutes before carving to redistribute juices.
Tip: Resting is not wasteful—it's critical for juicy slices. - 6
Finish sauces and rewarm dishes
Finish gravy, rewarm sides as needed, and keep rolls warm. Use low heat and gentle simmer to prevent scorching or drying out foods.
Tip: Stir frequently during reheating to avoid hot spots. - 7
Carve and plate with care
Carve the turkey with smooth, clean strokes and arrange on a warmed platter. Present sides in order of serving with garnishes.
Tip: A carved shoulder and slice approach yields the best slices for guests. - 8
Review and adjust for service
Confirm all dishes are at safe holding temperatures and ready for service. Have a backup plan for delays and keep a small buffer ready.
Tip: A quick buffer can save the meal if an appliance browns faster than expected.
Quick Answers
What is the best time to start Thanksgiving cooking?
Start with a target dinner time and work backward to determine when to begin thawing, roasting, and resting. Build buffers for delays and ensure the turkey reaches safe doneness before resting.
Begin by picking your dinner time, then plan backward to schedule thawing, roasting, and resting. Build in buffers for delays and verify doneness with a thermometer.
Should I stuff the turkey or bake stuffing separately?
Stuffing inside the turkey adds cooking time and risks uneven doneness. Baking stuffing separately is safer and easier to manage for timing.
Stuffing inside the turkey can extend cooking time and create doneness concerns. Bake stuffing separately to simplify timing and safety.
How long should the turkey rest after cooking?
Rest the turkey for about 20-30 minutes after removing from the oven. Resting helps juices redistribute and makes carving neater.
Let the turkey rest for about 20 to 30 minutes to keep the juices even and ensure clean carving.
Can I prepare sides ahead of time and reheat?
Yes. Many sides can be prepared a day ahead and reheated or refreshed before serving. Label and store them properly for quick finishing.
Absolutely—make-ahead sides save time. Reheat and finish just before serving.
How do I manage multiple oven dishes?
Create a backward timeline and use staggered start times. If you have limited oven space, finish some dishes on the stovetop or in a toaster oven.
Plan with a timeline and stagger dish starts. Use stovetop or extra ovens when possible.
What if dinner runs late?
Keep warm dishes in foil tents or warming trays and maintain safe holding temperatures. Flexibility is key—adjust timing for a late arrival.
If dinner slips, keep everything warm and safe, and adapt the plan as needed.
Watch Video
Top Takeaways
- Plan backward from dinner time to set start times.
- Use a thermometer to verify doneness, not visual cues.
- Stagger oven usage to avoid crowding and temperature drops.
- Incorporate rest periods to improve carving and juiciness.
- Make-ahead components reduce day-of stress.