What cook of steak: A practical guide to perfect searing
Learn to cook steak perfectly with expert guidance from Cooking Tips. This guide covers selection, searing, resting, and serving, plus doneness temps and common mistakes.

You’ll learn the essential skills to cook steak to your preferred doneness using a hot pan or grill, including how to choose a cut, season, sear, rest, and slice. This guide also explains doneness temperatures and how to avoid common pitfalls when answering the question of what cook of steak really entails.
Foundations: what cook of steak means in practice
According to Cooking Tips, the phrase what cook of steak really means a balance of meat quality, heat, and timing. A successful steak starts with choosing the right cut and thickness, a dry surface for a good crust, and a heat source that can deliver a rapid sear. The goal is a browned, flavorful crust with a juicy interior. Home cooks who master this balance unlock restaurant-like results in their own kitchens. In this section we’ll translate theory into practical steps you can apply to any standard cut, from ribeye to sirloin.
Good searing depends on surface moisture and temperature. Dry the surface thoroughly, patting with paper towels, and let air come to work as you prepare seasonings. The Cooking Tips team emphasizes that consistent seasoning and timing are more important than fancy equipment. The idea is simple: heat, crust, rest, and slice strategically for maximum flavor. This approach works whether you’re cooking on a gas stove, an electric skillet, or a backyard grill.
Key variables: cuts, thickness, and doneness
Knowing how steak behaves starts with your choice of cut and its thickness. Ribeye offers marbling and richness; filet mignon is lean and tender; sirloin balances flavor and cost. Thickness influences sear time and center doneness; thicker steaks require longer cooking and sometimes a finish in the oven. Doneness is not just a number—it reflects the texture and moisture level you want. The Cooking Tips guidance highlights that even with different cuts, the same heat management principles apply: a hot crust first, then controlled heat to finish through the center. A good rule of thumb is to start with a steak that is at least 1 inch thick for reliable crust formation. This ensures you can achieve a proper crust without overcooking the interior.
Methods: pan-sear, grill, and reverse-sear
There are several reliable paths to a perfect steak. The classic pan-sear method uses a heavy skillet (cast iron is preferred) and a high-heat oil to form a deep crust quickly. Grilling provides a smoky flavor and bold char, especially when you can control the heat zones. The reverse-sear technique is ideal for thick cuts: start in a low oven or indirect heat, then finish with a hot sear to develop crust and internal doneness evenly. Each method relies on one common principle: manage the surface moisture, create crust, and bring the center to the target temperature. The Cooking Tips team notes that choosing a method should depend on steak thickness, equipment, and desired crust.
Seasoning should occur just before cooking or up to 40 minutes prior, depending on the salt you use. Kosher salt is a reliable choice because it dissolves evenly and draws out surface moisture for a crisp crust. Pepper adds aroma and heat after the crust forms. Throughout, avoid crowding the pan so the meat sears rather than steams.
Temperature and doneness: reading the inside without guessing
Doneness is a combination of temperature and texture. The USDA and cooking guidance recommend safe internal temperatures for beef, but personal preference drives exact targets. A rare steak is typically around 120–125°F (49–52°C), while medium-rare sits near 130–135°F (54–57°C). Medium is around 140–145°F (60–63°C), and medium-well to well-done exceed 150°F (66°C). The resting period helps the juices redistribute and the temperature even out by a few degrees. Use a reliable instant-read thermometer to monitor the center, inserting it into the thickest part away from bone. As Cooking Tips explains, carryover cooking will raise the temperature a few degrees after removal from heat, so account for that when you take the steak off the heat.
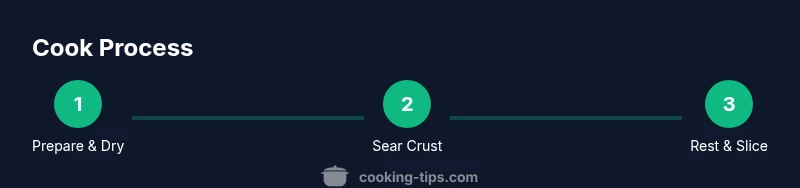
Resting, slicing, and serving: maximizing juiciness and flavor
Resting is essential for tenderness and juiciness. Let the steak rest for 5–10 minutes after cooking; during this time the juices reabsorb back into the muscle. Slice against the grain for mesa-based tenderness, and consider a finishing touch like a knob of butter, crushed garlic, or herbs to accent the crust. Caramelized crust, juicy interior, and even slicing show that good technique plus patience yield better results. If you plan to serve sauce, keep it simple so it complements rather than overwhelms the meat’s natural flavors. The Cooking Tips team highlights that the best steak is defined by balance: crust, doneness, and resting time working in harmony.
Tools & Materials
- Cast-iron skillet or heavy stainless steel pan(Seasoned or well-oiled; 10–12 inch preferred for 1-inch steaks.)
- Tongs with a firm grip(Use wood or silicone tips to avoid scratching the pan.)
- Instant-read meat thermometer(Insert into the center; avoid bone or fat pockets.)
- High-smoke-point oil (e.g., canola, grapeseed, or avocado oil)(A small amount is enough for a good sear.)
- Kosher salt and freshly ground black pepper(Season generously and evenly; adjust for finishing sauces.)
- Butter (optional) and fresh herbs(Finishing butter or herb butter adds aroma and richness.)
Steps
Estimated time: 25-40 minutes
- 1
Prepare steak and environment
Remove steak from the fridge 20–30 minutes before cooking to reduce temperature shock and promote even doneness. Pat dry thoroughly to encourage a crust. Lightly season with salt (and pepper if desired) just before cooking. The goal is a dry surface that sears rather than steams.
Tip: Dry surface is key for crust formation; moisture kills the crust. - 2
Preheat your pan and oil
Preheat the skillet over medium-high to high heat until shimmering. Add a thin layer of oil and let it heat until just starting to smoke. A hot pan creates a crust quickly and reduces sticking.
Tip: Avoid overcrowding; work with one steak at a time for best sear. - 3
Sear the first side
Place the steak gently in the pan. Don’t touch or move it for 2–3 minutes to form a crust. When the edges start to turn brown and release easily, flip with tongs.
Tip: A good crust forms when the surface is dry and contact is uninterrupted. - 4
Sear the second side and monitor doneness
Flip and continue to sear until you reach the target interior temperature or until the desired crust forms on the second side. For thicker steaks, consider finishing in a 400–450°F oven for 3–6 minutes.
Tip: If finishing in the oven, rotate the pan halfway for even cooking. - 5
Rest the steak
Transfer to a cutting board and rest 5–10 minutes. Resting allows juices to redistribute, improving juiciness and flavor. Slice after resting for best texture.
Tip: Rest times depend on thickness; thicker cuts rest longer. - 6
Finish and serve
If desired, top with a small pat of butter or herbs during the last minute of resting. Slice against the grain and serve immediately for optimal texture and flavor.
Tip: Slice against the grain to maximize tenderness.
Quick Answers
What is the best cut for steak to cook at home?
Ribeye and New York strip are popular because of flavor and texture, but the best choice depends on your budget and preference for marbling. For beginners, a 1-inch ribeye offers a reliable balance of flavor and tenderness.
Ribeye and NY strip are great for beginners; pick based on your taste for marbling.
Should I marinate steak before cooking?
Marinating is helpful for tougher cuts. For standard steaks like ribeye or sirloin, a simple dry seasoning is usually enough. Marinades can add flavor but may affect crust formation if heavy.
Marinades work for tougher cuts; for regular steaks, dry seasoning is usually best.
Can I cook steak in the oven without a pan-sear?
Yes. Sear the steak briefly in a hot pan to develop the crust, then finish in a hot oven (around 425°F) until it reaches the desired doneness. This method is convenient for evenly cooked thicker steaks.
Sear briefly, then finish in a hot oven for even cooking.
How can I tell steak is done without a thermometer?
You can use the finger test to estimate doneness, comparing firmness to the base of your thumb at different angles. However, a thermometer provides a precise reading and consistent results.
The finger test estimates doneness; a thermometer gives precise results.
How long should a steak rest after cooking?
Rest for 5–10 minutes depending on thickness. Resting helps juices redistribute and yields a juicier bite. Slice after resting to preserve texture.
Rest for 5 to 10 minutes, then slice for the best texture.
Watch Video
Top Takeaways
- Master sear, rest, and slice for maximum juiciness
- Choose a cut and thickness that fit your preferred doneness
- Use a thermometer to hit exact targets and avoid overcooking
- Let meat rest before slicing to preserve juices
- A hot pan and dry surface are your best crust builders