How Long to Cook Hard-Boiled Eggs: A Practical Guide
Discover exact times for hard boiled eggs from stove to shell. This practical guide covers yolk doneness, cooling, peeling, and fridge storage with simple steps from Cooking Tips.

This quick guide shows you exactly how long to cook hard boiled eggs to reach your preferred yolk texture, from jammy to fully set. You’ll learn boiling time, water amount, egg size, and the cooling step to stop cooking. Follow the steps for reliable, repeatable results every time.
Understanding the basics of timing hard boiled eggs
Timing is the single most controllable factor in achieving the yolk you want. The phrase to cook hard boiled eggs how long is answered by your target doneness, egg size, and whether you start from cold water or a pre-boiled pot. According to Cooking Tips, a clear, repeatable process beats guesswork every time, especially when you’re cooking for routine lunches or family meals. In this guide we’ll outline reliable time ranges and practical steps that work in most home kitchens. By focusing on a simple sequence, you’ll reduce overcooking, undercooking, and peeling frustration. Remember that even small variables—egg start temperature, pan shape, or whether you cover the pot—can shift results. The goal is consistency, not perfection in a single trial. As you practice, you’ll refine your own timings for your stove and your eggs, while keeping the fundamental approach the same. Now let’s address the common question many home cooks ask: to cook hard boiled eggs how long will it take from start to finish, including the cooling step? The simplest answer is a repeatable framework you can trust.
Variables that affect timing
Several factors influence how long you should cook hard boiled eggs. Egg size matters: extra large eggs typically require slightly more time than medium eggs for the same yolk texture. Starting temperature also changes timing: cold eggs straight from the fridge will take longer to reach a safe, uniform doneness than eggs at room temperature. Altitude and pot size matter too; at higher elevations, water boils at a lower temperature, which can extend the necessary contact time. The shape and material of your pot, the amount of water, and whether you start with a boil or a cold start will all adjust the exact minutes you rely on. For best results, identify your target yolk texture first (jammy, medium, or fully set) and then map that texture to a time window that suits your eggs and stove. Cooking Tips analysis shows that consistency comes from a repeatable method, not from guessing.
Timing templates: jammy, medium, and fully set
Most home cooks aim for one of three outcomes: jammy yolk with a slightly soft center, a creamy middle, or a fully set yolk. Timings are commonly expressed as ranges to account for small variations:
- Jammy yolk: about 5–6 minutes once the water returns to a gentle boil and the eggs are in the pot. This yields a soft center with the white fully cooked.
- Medium yolk: about 7–8 minutes for a custardy center that’s still cohesive.
- Fully set yolk: about 9–12 minutes for a firm, hard center. Depending on egg size and altitude, adjust by 1–2 minutes. The key is to keep the white firm and protect the yolk from overcooking by cooling promptly. Reviews of technique indicate that precise timing matters far more than the exact minutes, especially when you’re cooking multiple eggs at once.
The stove-top method: water, heat, and timing
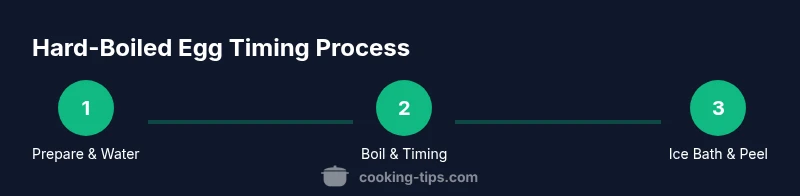
A reliable stove-top approach emphasizes three phases: water setup, controlled heating, and immediate cooling. Start with a pot large enough to accommodate your eggs in a single layer and at least 1 inch of water above them. Bring water to a full boil, then lower the eggs gently with a slotted spoon. If you’re aiming for jammy yolks, begin timing after the water returns to a boil and the eggs are fully submerged. If you prefer a harder yolk, lengthen the timing within the listed ranges. Turning off the heat and covering the pot allows residual heat to finish cooking, which helps prevent overcooking when you’re dealing with larger batches. Keeping a timer is essential here; rely on steady, repeatable timing rather than eyeballing the clock.
Cooling and peeling: ice bath and peeling technique
Immediately after the timer ends, transfer the eggs to an ice bath or cold water. Cooling stops the cooking process and makes peeling easier by contracting the egg membranes away from the shell. Leave them in the ice bath for 5–10 minutes. Gently tap the shell and roll the egg to crack the membrane before peeling under running water. Peeling under water reduces shell fragments and protects the delicate egg white. If you’re peeling multiple eggs, do them in stages to avoid heat buildup that can affect texture.
Troubleshooting common issues and adjustments
If the yolk appears too green or gray, you’ve overcooked the eggs or left them too long in the hot water. To fix this, shorten the post-boil timing by 1–2 minutes next time and ensure a rapid ice bath. If the shells resist peeling, use slightly older eggs or add a pinch of salt to the cooking water to help loosen the shell. If you’re cooking at altitude or with a high-output burner, you may need to add 1–2 minutes to the jammy or medium ranges. Practice with a small batch to dial in your exact timings for your stove and eggs.
Size, storage, and practical tweaks
As eggs vary by size, you may want to establish a quick reference table: XL eggs might need +1 minute; medium eggs might need -1 minute. After cooking, store peeled eggs in a covered container in the refrigerator for up to one week, or keep unpeeled eggs in their shells for longer shelf life. For recipes that call for peeled eggs, plan to peel only what you’ll use within a few days and keep the rest in the shell. Always label leftovers with the date. A small notepad next to the stove can help you track what works best on your stove over time.
Quick reference plan: a practical cheat sheet
Use this as a mental model when you’re pressed for time:
- Jammy yolk: 5–6 minutes after return to a boil, ice bath 5–10 minutes.
- Medium yolk: 7–8 minutes, ice bath 5–10 minutes.
- Fully set yolk: 9–12 minutes, ice bath 5–10 minutes.
Adjust by 1 minute for very large or extra-large eggs. Always end with a cold-water shock and test a single egg first to calibrate for your equipment. The goal is predictable results you can repeat every time.
Practice plan and quick reference
With a standard dozen large eggs, start by testing a single egg to dial in your exact times. Once you’re confident, cook in small batches to maintain even cooking. Keep a simple log of your times and any little tweaks you made to tailor the result to your preference. The combination of precise timing and a fast ice bath is what makes the difference between guesswork and reliable, delicious eggs every time.
Tools & Materials
- Stovetop pot(Large enough to hold eggs in a single layer with at least 1 inch water above them)
- Kitchen timer(Set for the chosen yolk texture window (5-12 minutes))
- Slotted spoon(To lower eggs gently and lift them without cracking shells)
- Ice bath bowl(Wide, shallow bowl with cold water and ice for quick cooling)
- Cold water supply(Cold tap water or ice bath for rapid cooling)
- Eggs (large or specified size)(Freshness affects peeling; older eggs peel more easily)
- Optional salt or vinegar(Can help with peeling and shell retention during boil)
Steps
Estimated time: 15-25 minutes hands-on + 5-10 minutes cooling
- 1
Gather eggs and gear
Place eggs in a single layer in a pot and assemble timer, spoon, and ice bath. This minimizes surprises and keeps timing consistent.
Tip: Take eggs from the fridge 10–15 minutes before cooking to reduce temperature shock. - 2
Fill pot with water
Add enough cold water to cover eggs by at least 1 inch. A little extra water helps maintain even heat during boiling.
Tip: Use a pot with a tight-fitting lid for efficient heating. - 3
Bring water to a boil
Heat on high until the water reaches a rapid boil. Once boiling, reduce heat to maintain a gentle boil.
Tip: Avoid a vigorous boil that can crack eggs. - 4
Lower eggs into water
Carefully lower eggs into the water using a slotted spoon to prevent cracking from dropping.
Tip: Keep eggs in a single layer for even cooking. - 5
Start timing post-boil
As soon as the water appears to return to a simmer after adding eggs, start the timer for your chosen yolk texture.
Tip: For jammy yolks, don’t overshoot the top end of the 5–6 minute range. - 6
Turn off heat and cover
Cover the pot and let residual heat finish the cook. This avoids overheating while batches cook together.
Tip: If you’re cooking multiple eggs, keep the lid on but switch to a gentle heat. - 7
Ice bath and peel
Immediately transfer eggs to the ice bath and cool for 5–10 minutes. Peel under running water for easier removal.
Tip: Cooling is essential to stopping the cooking process and preserving texture. - 8
Store or use
Peel and use within a few days, or store peeled eggs in an airtight container in the fridge up to a week.
Tip: Label date to track freshness and plan ahead.
Quick Answers
How long should I boil eggs for a jammy yolk?
For a jammy yolk, start timing after the water returns to a gentle boil and boil for about 5–6 minutes depending on egg size. Immediately transfer to an ice bath.
For a jammy yolk, boil five to six minutes after the water returns to a gentle boil, then cool in ice water.
Does altitude affect boiling time?
Yes. At higher altitudes, water boils at a lower temperature, so you may need to extend the timing by a minute or two and verify with a test egg.
Yes, altitude can affect timing. You may need to add a minute or two and test with one egg first.
Should eggs be at room temperature before cooking?
Bringing eggs to room temperature can reduce cracking and provide more even cooking, but it’s not strictly required. If using cold eggs, expect a slight adjust in timing.
Room temperature eggs cook a bit more evenly, but you can start from cold if you adjust timing.
Can you reuse cooking water for another batch?
Reusing water is fine if it’s fresh and clean. For consistency, start with fresh water for each batch to avoid off flavors or inconsistent heat.
You can reuse water, but start with fresh water to keep timing predictable.
Why do eggs crack during boiling?
Cracks usually come from sudden temperature changes or sloppy placement. Use a spoon to lower eggs gently and avoid overcrowding.
Cracks happen if eggs hit the pot or are dropped in. Lower them gently with a spoon.
Is microwave cooking a good alternative?
Microwave methods exist but are less reliable due to uneven heating. For consistent results, the stove-top method with a timer is recommended.
Microwaving can work, but it’s less reliable than the stove method. Use the stove for consistent results.
Watch Video
Top Takeaways
- Follow a repeatable timing framework for reliability
- Choose yolk texture first, then map to time
- Shock in ice bath to stop cooking instantly
- Older eggs peel more easily than fresh eggs
- Cool and store properly to maintain freshness