Slow-Cook Chicken for Shredding: A Step-by-Step Guide
Learn how to slow cook chicken for shredding with precise temps, liquids, and timing. This step-by-step guide from Cooking Tips helps you achieve tender, pull-apart chicken every time.

By following this guide, you’ll learn to slow cook chicken for shredding so the meat pulls apart easily and evenly. You’ll need chicken, a small amount of liquid, seasonings, and a slow cooker or Dutch oven. The method emphasizes gentle heat, adequate moisture, and safe handling to deliver tender, flavorful shredded chicken every time.
Why slow cook chicken for shredding matters
Slow cooking is a friend to home cooks who want tender, pull-apart chicken without constant attention. When you set out to slow cook chicken for shredding, you’re aiming for a texture that can be torn into light shreds rather than sliced. According to Cooking Tips, low, moist heat preserves moisture and breaks down connective tissue, resulting in juicy meat that shreds easily for sandwiches, tacos, enchiladas, and salads. This approach minimizes the risk of overcooking on high heat, which can dry out the lean parts of white meat while giving the dark meat a silky, fork-tender texture. The key is balance: time, temperature, and moisture must align. If you trap too little steam, the meat dries; if you flood it with liquid, the flavor can dilute. By planning ahead, you can pre-season and build a base that carries through to multiple meals. You’ll learn how to read doneness cues, how to adapt for bone-in versus boneless cuts, and how to scale the method for larger families or meal-prep days.
Choosing the right cut and size
For shredding, bone-in portions (such as thighs or drumsticks) generally yield more flavor and moisture than boneless breast meat, which can dry if cooked too long. A practical starting point is 2–4 pounds (1–1.8 kg) of chicken, with a mix of white and dark meat if possible. If you’re feeding a crowd or meal-prepping for the week, bone-in thighs are a reliable workhorse because they stay juicy even after long cooking. If you only have boneless skinless chicken breasts, plan for shorter cooking times and richer liquids to compensate for leaner meat. Trim excess skin and fat, then pat the pieces dry to promote browning or even moisture distribution in a braise.
The base: liquids and flavoring
Liquid is essential in slow cooking because it conducts heat and keeps meat moist while allowing flavors to penetrate. A typical base uses 1–2 cups of chicken stock or water, enough to come halfway up the chicken pieces in the cooker. You can mix in aromatics like onions, garlic, bay leaves, and fresh herbs for depth. Salt is important, but avoid over-salting before you taste the finished product; the liquid will concentrate a bit during cooking. For a richer result, substitute a portion of the liquid with a small amount of white wine or a splash of coconut milk, depending on your flavor profile. The goal is a braising environment where the meat steams gently, rather than dries out on a hot surface.
Low, slow, and safe: temperature ranges
The magic of shreddable chicken happens when you heat slowly and maintain moisture. Most methods use a low setting for 6–8 hours or a high setting for 3–4 hours. Internal temperature for shredding should reach 165°F (74°C) for safety, but many cooks prefer pulling the meat at 170–175°F (77–79°C) to ease shredding. If your cooker runs hot, aim for the lower end of times and check frequently during the last hour. Do not lift the lid frequently; each opening can add 15–20 minutes to the total cook time and introduce heat fluctuations. A meat thermometer is a must for consistency.
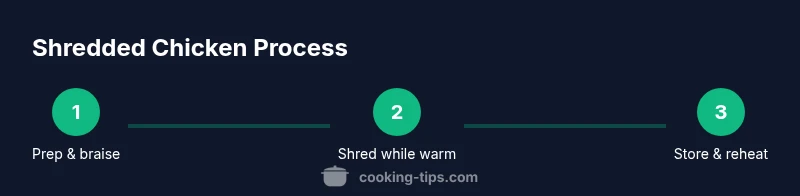
Step-by-step overview of the basic method
The core method is simple: season, add liquid, cook low and slow, then shred. You’ll want the chicken submerged or nearly submerged in braising liquid so all pieces cook evenly. After cooking, allow the meat to rest briefly so juices redistribute before shredding. Shred while warm using two forks—the meat will separate easily when it’s hot. Return the shredded meat to the braising liquid to soak up more flavor, then portion for meals. This overview establishes a reliable baseline before you experiment with marinades and add-ins.
Variations: seasonings, marinades, and add-ins
Seasonings can range from classic garlic powder and onion powder to chili powder, cumin, and a pinch of paprika for a smoky finish. For a citrus twist, add lime zest and a splash of orange juice to the braising liquid. For a richer profile, stir in a little cream cheese, yogurt, or shredded cheese after shredding, letting it melt into the hot meat. You can add vegetables like sliced bell peppers or ½ an onion to the braising liquid for extra aroma. The key is to balance moisture with flavor so the chicken remains versatile for multiple recipes.
Troubleshooting common issues
If the meat comes out dry, you likely used too little liquid or cooked too long. Ensure there’s enough moisture and verify the temperature with a thermometer. If the texture is stringy rather than shreddy, it may have braised too aggressively; in the future, shorten cooking time slightly or reduce the cooking temperature. If you notice a bland flavor, increase salt and add aromatics or a splash of stock at the end. For very large cuts, consider cutting into uniform chunks so they cook evenly.
Finishing touches: shredding technique and storage
Shred the meat while it’s still warm for the easiest pull-apart texture. Use two forks or stand mixer blades set on low to break the meat into shreds of your preferred size. Return the shredded meat to the cooking liquid to keep it moist and flavorful. Cool quickly and store in airtight containers in the fridge for up to 4 days or freeze in portions for longer storage. Reheat gently in the microwave or on the stove with a splash of the braising liquid to prevent dryness.
Quick test: evaluating doneness without shredding
If you’re unsure whether the chicken is ready, perform a quick test by pulling apart a small piece with a fork. It should shred easily and release juices without resistance. If it resists, give it another 20–30 minutes in the cooker and check again. Doneness is not only about the ability to shred; it’s also about achieving a moist, evenly flavored result across all pieces.
Tools & Materials
- Chicken (bone-in or boneless, 2–4 pounds / 1–1.8 kg)(Bone-in portions yield more flavor and moisture; can use a mix of white and dark meat)
- Liquid for cooking(1–2 cups (240–480 ml) chicken stock or water; add more if needed to cover the meat partially)
- Seasonings(Salt, pepper, garlic powder, onion powder; optional bay leaves or dried herbs)
- Slow cooker or Dutch oven(Low setting is ideal; use oven-safe braising pot if you don’t have a slow cooker)
- Meat thermometer(Essential to confirm doneness and prevent overcooking)
- Tongs and forks(For handling hot meat during shredding)
- Optional aromatics(Onion wedges, garlic cloves, carrots for extra aroma)
Steps
Estimated time: 6–8 hours on low or 3–4 hours on high
- 1
Gather ingredients and prep chicken
Gather all ingredients and pat the chicken dry with paper towels. Pat-drying helps with even browning if you choose to sear, and it helps the meat hold onto moisture while cooking. Cut larger pieces into uniform sizes so they cook evenly.
Tip: Pat-drying the surface reduces steam inside the cooker, promoting better texture. - 2
Optional: brown the chicken for deeper flavor
If you have time, sear the chicken in a hot skillet with a little oil until the outside develops a light crust. This step adds depth of flavor but is not required for shredding.
Tip: Searing is optional; skip if you’re short on time and rely on the braising liquid for flavor. - 3
Add chicken to slow cooker with liquid
Place the chicken in the slow cooker and pour in 1–2 cups of stock or water. Add aromatics and seasonings as desired. The liquid should come up to about halfway on the meat so it braises rather than steams.
Tip: Ensure all pieces are in contact with liquid; stacked pieces can cook unevenly. - 4
Set heat and cook time
Cook on low for 6–8 hours or on high for 3–4 hours. Avoid opening the lid during cooking, as this can extend the time needed and chill the meat.
Tip: If your cooker runs hot, start on the lower end of the time range. - 5
Check tenderness and internal temperature
When the meat is fork-tender, check that the internal temperature has reached at least 165°F (74°C). If not, continue cooking in 30-minute increments until done.
Tip: Avoid overcooking past 185–190°F (85–88°C) if you plan to shred; this can dry lean parts. - 6
Shred while still warm
Use two forks to pull the meat apart into shreds of your preferred size. Warmer meat shreds more easily and stays juicier.
Tip: Work in batches if needed to ensure even shredding. - 7
Return shredded meat to braising liquid
Toss the shreds back into the liquid to absorb more flavor and moisture, then let them rest briefly before serving or storing.
Tip: Rest 5–10 minutes to redistribute juices. - 8
Store and reheat safely
Cool quickly, then refrigerate in airtight containers for up to 4 days, or freeze in portions for longer storage. Reheat gently with a splash of the braising liquid.
Tip: Reheat evenly to steaming hot; don’t microwave in a single dense mass.
Quick Answers
Can I use a mix of chicken breasts and thighs for shredding?
Yes. A mix of white and dark meat yields balanced texture and flavor. Thigh meat stays moist, while breasts cook faster and can dry if overcooked. Adjust cooking time accordingly.
Yes. A mix of white and dark meat gives better texture; thighs stay moist, breasts cook faster.
Is searing before slow cooking strictly necessary?
No, searing is optional. It adds depth of flavor, but you can achieve tender shredding without it if you season well and maintain moisture.
Not required. Searing adds flavor, but you’ll still get tender shreddable meat without it.
How can I prevent dry shredded chicken?
Ensure enough liquid is present and avoid overcooking. Shred while warm, and consider using a breast–thigh mix for moisture balance.
Keep enough liquid and don’t overcook. Shred while warm for best texture.
Can I cook frozen chicken for shredding?
It's better to thaw first. If you cook from frozen, add time and verify doneness with a thermometer to 165°F.
Better to thaw first; if you cook from frozen, extend time and check doneness.
How long will shredded chicken keep in the fridge?
Store in airtight containers for 3–4 days. Reheat gently with a splash of braising liquid to avoid dryness.
3–4 days in the fridge; reheat gently.
Can I freeze shredded chicken for later use?
Yes. Portion into freezer bags or containers; it freezes well and reheats quickly in soups, tacos, or salads.
Yes. Freeze in portions and reheat as needed.
Watch Video
Top Takeaways
- Choose bone-in or mixed meat for best flavor and moisture.
- Maintain enough braising liquid to keep meat moist.
- Shred while warm for easiest texture.
- Use low-and-slow heat to maximize tenderness.
- Store shredded chicken properly to preserve moisture.