Slow Cook a Ham: Easy, Juicy Results for Dinner
Learn a reliable, hands-off method to slow cook a ham that stays moist and flavorful. This guide covers selection, seasoning, glaze, timing, and safe handling for perfect results.

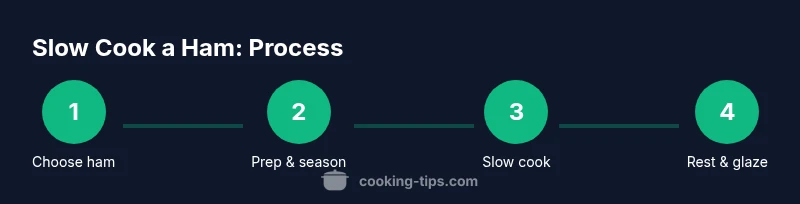
You will slow cook a ham to a tender, juicy finish using low, steady heat and a simple glaze. This guide covers preparation, flavoring, cooking times, and safe handling. Baseline equipment and tips ensure reliable results. You'll learn how to select a ham, brine options, how to monitor progress without opening the oven, and how to rest and glaze before serving.
Why slow cook a ham yields moist, flavorful meat
From a practical standpoint, slow cooking a ham delivers tenderness and moisture that faster methods often miss. When you use low, steady heat and ample moisture, the fat renders gradually, basting the meat from the inside and helping prevent dry edges. According to Cooking Tips, patience pays off with ham, and the slow-cook approach keeps natural flavors intact while reducing the risk of overcooking the exterior. The Cooking Tips team found that resting briefly after cooking allows the juices to redistribute, yielding juicier slices and more even texture. Bone-in cuts tend to stay moister than boneless ones because the bone conducts heat in a way that moderates the cooking pace. Size and shape matter too: a uniformly shaped ham cooks more evenly, which reduces the chance of overdone outer layers before the center is tender. If you’re starting with a larger ham, plan for a longer, uninterrupted period in the oven; for smaller hams, you can shorten the time slightly without sacrificing moisture. Expect a gentle aroma that fills your kitchen as the glaze begins to form and the surface takes on a subtle shine. By keeping heat gentle and the pan covered or tented when needed, you create a reliable climate where slow cook a ham becomes an approachable, weekday-friendly technique rather than a special-occasion event.
Choosing the right ham for slow cooking
Choosing the right ham is the foundation of a successful slow-cooked result. For best moisture retention, bone-in hams are often preferred, though boneless cuts cook more predictably in compact ovens. Pre-cooked hams simplify the process, since you’re primarily heating through while achieving tenderness; raw hams require more time to reach texture and flavor depth. Consider the weight and shape: a uniform, oval or rectangular ham cooks more evenly than a tall, uneven piece. If you can, select a ham with a visible layer of fat on top to aid self-basting, and check whether you want the ham with skin on or skinless. A smaller ham will finish sooner and can be gentler to your oven’s steady heat. For a crowd, a larger ham offers generous slices and leftovers. Finally, ensure the ham is labeled as suitable for slow cooking or braising if available. The choice you make sets the stage for a juicy, evenly cooked centerpiece that shines in any menu.
Flavoring, brining, and glaze options
Flavoring options for a slow-cooked ham range from simple to sophisticated. A light dry rub with salt, pepper, garlic, and dried herbs can boost the natural pork flavor without masking it. Brining the ham beforehand adds moisture and salt balance, but you’ll want to adjust any additional salt in your glaze accordingly. For a glaze, a combination of sweet and tangy elements—such as honey or maple with mustard or citrus—provides a glossy finish that complements the meat’s richness. If you prefer a more savory profile, incorporate soy, balsamic, or a touch of ancho chili into your glaze. Regardless of the glaze, apply it in the final phase so sugars don’t burn during the long cook. Keep the glaze light at first; you can add a second coat toward the end for a deeper shine. These flavoring options let you tailor the ham to different cuisines while keeping the technique simple and approachable.
The slow-cook method: timing, temperature, and technique
The core of the slow-cook method is steady heat and moisture management. Place the ham on a rack in a roasting pan with a small amount of liquid to create steam and baste from the pan juices. Cover the pan loosely with foil to shield the meat from direct heat, then keep the oven at a calm, consistent temperature. Throughout the process, monitor progress with a meat thermometer inserted into the thickest part of the ham; aim for a tender texture rather than a specific number, and remember that residual heat will continue to cook the ham after you remove it from the oven. If your oven runs hot or cold, adjust the foil tent or add more liquid to the pan to maintain even humidity. The goal is to slow the cook a ham so the meat stays moist inside while the exterior doesn’t dry out.
Finishing touches and serving ideas
Finish with a glaze during the last portion of cooking for a glossy, caramelized surface, then let the ham rest before carving to redistribute juices. Transfer the ham to a cutting board and tent loosely with foil for 15-20 minutes to continue the juiciness redistribution. Slice against the grain for tenderness, and pair with classic sides like roasted potatoes, green beans, or a bright relish to balance the richness. For leftovers, slice thinly and reheat gently with a touch of glaze or pan juices. A slow-cooked ham pairs well with citrusy sauces or mustard-cream dressings, and the meat can anchor sandwiches or a comforting brunch spread. The slow cook a ham approach creates a reliable, crowd-pleasing centerpiece with minimal hands-on attention.
Food safety and leftovers handling
Safe handling is essential when cooking ham. Keep raw ham separated from ready-to-eat foods, wash hands and surfaces after contact, and store any uneaten slices in a shallow container in the refrigerator. Reheat leftovers until hot all the way through, and consider freezing portions for longer-term storage. When in doubt, rely on visual cues and texture; the meat should be tender and juicy, not dry or rubbery. Proper cooling and timely refrigeration help preserve flavor and texture for days to come.
Tools & Materials
- Meat thermometer(Prefer instant-read; ensure it can stay in the roast during cooking)
- Roasting pan with rack(Wide enough for the ham; rack keeps meat elevated)
- Aluminum foil(To tent the ham if needed and prevent over-browning)
- Basting brush(For applying glaze or butter if desired)
- Sharp carving knife(For clean slicing after rest)
- Glaze ingredients(Honey/maple, mustard, citrus, herbs, or your favorite combo)
- Oven mitts / pot holders(To handle hot pan safely)
- Large container (if brining)(For brining the ham ahead of time)
Steps
Estimated time: 3-5 hours
- 1
Choose the right ham
Select bone-in for moisture advantages if available. Decide if you want a fully cooked or raw ham, and check weight and shape for even cooking. Consider how much you’ll cook and plan leftovers accordingly.
Tip: A uniform shape reduces hot spots; bone-in cuts often yield juicier results. - 2
Prep the ham
Remove packaging, pat dry the surface, and decide whether to brine or rub. Bring the ham toward room temperature for even cooking, and trim excess fat if you prefer a leaner finish.
Tip: Even surface contact helps heat distribute evenly across the meat. - 3
Season or brine
If brining, submerge the ham in a simple salt solution ahead of time and rinse lightly before cooking. For seasoning, apply a light dry rub that enhances flavor without creating a crust that blocks moisture.
Tip: Avoid heavy salt on already salted or cured hams; adjust glaze salt accordingly. - 4
Set up the slow-cook setup
Place the ham on a rack in a roasting pan with a small amount of liquid to generate steam. Cover loosely with foil to shield from direct heat and monitor the oven for stability.
Tip: A gentle steam environment helps keep the interior moist. - 5
Cook and monitor
Cook the ham slowly, checking occasionally. Use the thermometer to assess tenderness and watch for juices that run clear when pressed. Remove from heat when the texture is pleasantly soft in the center.
Tip: Minimize opening the oven; every opening drops oven temperature and increases cook time. - 6
Rest, glaze, and serve
Let the ham rest under foil for a short period to redistribute juices. Apply glaze in the final phase so it adheres and shines, then carve against the grain and serve with complementary sides.
Tip: Resting is essential for juiciness; don’t skip it.
Quick Answers
Can slow cooking a ham be done with any ham cut?
Both bone-in and boneless hams work for slow cooking; bone-in often yields more moisture, while boneless cuts cook more evenly in compact ovens.
Yes—bone-in and boneless hams work well; bone-in tends to stay moister.
Should I brine the ham before slow cooking?
Brining adds moisture and salt balance, but you can skip it if using a pre-salted or fully cooked ham. Adjust any extra salt in the glaze accordingly.
Brining can help, but it’s not required if your ham is already salted or pre-cooked.
Is glaze safe during slow cooking?
Yes, glaze during the final phase to prevent sugars from burning and to achieve a glossy finish.
Apply glaze near the end to avoid burning.
How do I know when the ham is done without overcooking?
Check tenderness with a fork or thermometer; the center should be soft and the juices clear. Remember, residual heat continues cooking after removal.
Test for tenderness; the center should feel soft, with clear juices.
Can I cook a frozen ham in a slow cooker or oven?
It’s best to thaw a frozen ham before slow cooking to ensure even heat and thorough cooking. Cooking from frozen risks uneven texture.
Thaw first for even cooking.
What’s the best way to store leftovers?
Cool leftovers quickly and refrigerate in shallow containers. Reheat gently to preserve moisture and texture.
Cool and refrigerate promptly; reheat gently.
Watch Video
Top Takeaways
- Choose bone-in or uniform shapes for even cooking.
- Control moisture with pan liquids and gentle heat.
- Rest and glaze at the end for juicier, glossy slices.
- Cook times are flexible; rely on texture, not just time.