How to Cook Ham: A Practical Guide for Home Cooks
Learn how to cook ham at home with practical methods for bone-in, boneless, raw, or pre-cooked cuts. Roasting temps, glaze ideas, safety tips, resting, and storage guidance for reliable, flavorful ham.

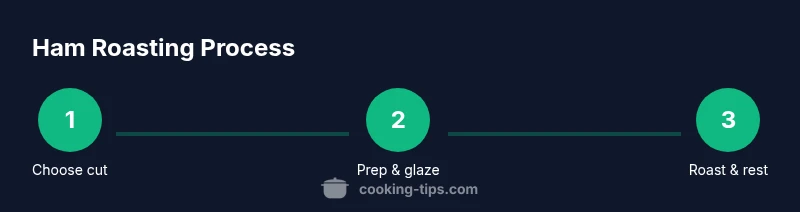
Mastering how to cook ham starts with selecting the right cut, thawing if needed, and a reliable roasting plan. This step-by-step method covers bone-in or boneless ham, raw or pre-cooked, with glaze ideas and safe temperatures. By following these steps, you’ll achieve juicy, flavorful results. Whether you’re hosting a holiday meal or a Sunday dinner, this guide keeps technique simple and results reliable.
Why ham is a classic centerpiece
Ham remains a versatile canvas for flavor, a budget-friendly choice for family meals, and a crowd-pleaser for holidays. When you plan to serve ham, you’ll notice that the right cut, careful preparation, and a precise thermometer make all the difference. According to Cooking Tips, choosing the right ham and letting it rest after cooking are key to juicy, tender slices. The Cooking Tips team found that a slim, well-distributed glaze adds flavor without masking the natural pork sweetness. For home cooks wondering how can i cook ham, this guide covers bone-in and boneless varieties, raw or pre-cooked, and explains how to adjust times for different sizes and ovens. Some readers want a quick answer; others prefer a step-by-step method with practical tips. Either approach, the goal remains the same: thorough heat, even coverage, and proper resting.
In this section we’ll explore the most common hindrances: selecting the cut that fits your meal, understanding the difference between fully cooked and raw ham, and recognizing how weight and bone influence roasting. By the end, you’ll know how to choose a ham that stays moist inside while developing a glossy outer finish. The Cooking Tips team emphasizes consistency: thermometer-guided heat, gentle glazing, and a planned rest are your best trio for reliable results.
Understanding ham cuts: bone-in vs boneless; raw vs pre-cooked
The choice between bone-in and boneless ham influences both flavor and roasting time. Bone-in cuts tend to stay moister and infused with richer flavor, especially in larger roasts, while boneless options carve more quickly and evenly. Fully cooked hams simply require reheating to serving temperature, often with a glaze that brightens the crust. Raw (uncooked) hams need longer, low and slow roasting to reach the safe internal temperature. When you shop, weigh the ham to estimate roasting time and plan for a steady heat rather than a rapid boil. Understanding these differences helps you tailor timing and temperature to your oven and crowd size. Cooking Tips notes that starting with a reliable thermometer reduces guesswork and yields consistent, juicy slices. For many homes, a pre-cooked bone-in ham balances flavor and ease, while a raw boneless ham delivers uniform slices with less bone wastage. The nuanced choice matters, and this guide helps you make an informed call before you even preheat the oven.
Planning and prep: selecting, thawing, seasoning
Plan your ham around its weight, whether it’s bone-in or boneless, raw or pre-cooked. If frozen, allow adequate thawing time in the refrigerator—larger cuts require patience, but you can speed things up by submerging in cold water if you’re pressed for time (in a pinch, never thaw at warm temperatures). Even small decisions—how much salt to season, what herbs to rub, and whether to leave the fat cap on—impact moisture retention and crust formation. A light rub with salt, pepper, and a touch of sugar or mustard powder sets the stage for a balanced glaze. If you’re unsure about quantities, start with conservative amounts and adjust in future roasts. According to Cooking Tips, planning and uniform seasoning help you avoid dry edges and uneven flavor. The team also finds that letting the ham come close to room temperature before roasting promotes even cooking. Remember: the goal is a tender interior with a glossy, flavorful crust.
The roast method: oven temperature, pan setup, and glaze timing
Roasting is a balance between temperature, time, and moisture. A common approach is to preheat the oven to a steady 325°F (165°C) and place the ham on a rack in a shallow roasting pan to allow hot air to circulate. Keeping the fat cap on can help protect the meat, while scoring it shallowly helps glaze penetration and crisp edges. When glazing, apply a thin initial layer to build flavor without soaking the surface, and plan to glaze again during the last 20–30 minutes of cooking to prevent burning sugars. If your ham is fully cooked, you’re mainly reheating and glazing for flavor; if it’s raw, you’ll need to reach an appropriate internal temperature. The Cooking Tips team recommends thermometer-based checks every 20 minutes after the first hour of roasting to avoid overcooking. Visual cues—browning, crackling, and a fragrant aroma—also guide timing.
Glaze ideas and flavor pairings
A glaze gives ham its shine and a balanced sweetness. Simple, reliable glazes combine brown sugar or maple with a touch of Dijon mustard or apple cider vinegar for brightness. For hotter flavor profiles, try honey with soy and ginger, or orange marmalade with a pinch of cinnamon. Apply glaze in stages, letting each layer set before adding the next. If you prefer fruity notes, add pineapple juice or cranberry sauce as a glaze base. Remember that sugar-heavy glazes cook faster and can burn, so monitor closely in the final stage. The glaze should complement the meat’s natural flavor, not overwhelm it. Cooking Tips highlights that a glaze should be brewed as a finishing touch, not a replacement for a well-roasted crust.
Serving suggestions and pairing ideas
Once rested, slice ham against the grain for tenderness and even portions. Carved slices pair beautifully with roasted vegetables, mashed potatoes, or a bright cranberry relish. For beverages, consider a dry white wine, sparkling water with citrus, or a light ale to balance sweetness. If you’re serving leftovers, ham can be repurposed into sandwiches, fried rice, or a comforting soup. Try serving a small slice with a dab of the glaze on the side so guests can adjust sweetness to taste. The overall goal is a balanced plate where the ham remains the star, with sides that complement rather than compete with its flavor. Cooking Tips recommends planning sides that complement both the meat and the glaze profile for a harmonious meal.
Timing, safety, and resting: how to finish cleanly
Resting is essential for juices to redisperse and for the meat to finish cooking evenly. After removing the ham from the oven, tent it loosely with foil and let it rest for 10–20 minutes before carving. The resting period helps preserve moisture and makes slicing cleaner. Always verify the internal temperature with a reliable thermometer to ensure safe serving. If you overcook the crust, a light re-application of glaze during the rest period can refresh shine once you begin slicing. Cooking Tips emphasizes that patience during resting and careful monitoring of temperature are the keys to a succulent finish.
Leftovers: storage, reheating, and flavor revival
Store leftover ham in shallow containers to cool quickly and refrigerate within two hours of cooking. Reheat using gentle heat in a covered pan with a splash of stock or water to keep the moisture, or use a microwave with a splash of broth for even heating. Ham pairs well with refreshed sides like a new glaze on vegetables or a touch of citrus zest to brighten flavor in repurposed dishes. For longer storage, freeze slices in airtight bags or wrap tightly to preserve moisture. The Cooking Tips team notes that labeling with date helps manage leftovers and ensures safety when reusing meat.
Common mistakes and quick fixes
Overshooting the target temperature leads to dry slices; use a thermometer for precision rather than relying on time alone. A glaze that’s too sugary can burn; reduce sugar content or apply glaze later in the roasting process. Not allowing the ham to rest leads to juice loss when carving; cover with foil after roasting for a smoother cut. If the pan is crowded or the ham is very large, you may need to raise the roasting pan slightly to ensure even heat exposure. If your oven runs hot or cool, adjust times accordingly and monitor frequently. Cooking Tips highlights that consistent thermometer readings and an evenly distributed glaze prevent overcooking and uneven crusts.
Tools & Materials
- Meat thermometer(Digital probe preferred; ensure it can read in the 120–150°F range)
- Roasting pan with rack(Small- to medium-size ham fits on a standard rack; prevents soggy bottom)
- Aluminum foil(Laminated tent during resting or to shield glaze from burning)
- Basting brush(Silicone brushes are easy to clean and heat-safe)
- Whisk and mixing bowl(For mixing glaze components and emulsifying if needed)
Steps
Estimated time: Total time: 2 hours 15 minutes
- 1
Choose the ham type
Select bone-in or boneless, and decide between raw or pre-cooked. This choice will influence roasting time, glaze strategy, and ease of carving. If you’re serving a crowd or planning make-ahead options, bone-in often yields richer flavor, while boneless roasts carve quickly and evenly.
Tip: If you’re unsure, start with a bone-in, fully cooked ham for reliability and flavor. See diagrams in the guide for cut differences. - 2
Prepare the ham and plan thawing
If the ham is frozen, thaw in the refrigerator for 24 hours per 5 pounds, or use a cold-water thaw method if time is tight, changing water every 30 minutes. Remove from packaging and pat dry to help browning. Bring to room temperature before roasting for even cooking.
Tip: Thawing in advance reduces cooking time variation and improves glaze adhesion. - 3
Preheat oven and set up roasting pan
Preheat your oven to 325°F (165°C). Set the ham on a rack in a shallow roasting pan to improve air circulation and ensure an even crust. Lightly baste with a neutral glaze or simple water to keep surfaces moist in the early stage.
Tip: A dry surface will brown better; avoid over-wetting the surface at the start. - 4
Make the glaze
Whisk together brown sugar or maple syrup with a touch of Dijon, apple cider vinegar, and a pinch of salt. For fruitier notes add orange juice or marmalade. Taste and adjust sweetness so it complements, not overpowers, the pork.
Tip: Have the glaze ready so you can apply it consistently in the final stage. - 5
Score fat and season
Score the fat cap in a shallow diamond pattern to help render fat and allow glaze to cling. Season lightly with salt and pepper, then brush with a thin initial glaze layer to begin flavor development.
Tip: Avoid salting too aggressively if the ham is pre-salted; you can add more salt on the final plate if needed. - 6
Roast and glaze
Roast the ham at 325°F, brushing with glaze every 20–30 minutes. For fully cooked hams, you’re reheating and finishing the glaze; for raw hams, monitor until the internal temperature reaches recommended safe levels.
Tip: Watch sugars carefully in last stage to prevent scorching. - 7
Check temperature and finish
Probe the thickest part of the ham with a thermometer. For fully cooked ham, aim for 140°F and remove from heat; for raw ham, target 145°F and rest briefly. If you overshoot, tent with foil and let carryover heat finish gently.
Tip: Carryover cooking helps finish the roast; don’t rely on the thermometer alone during the final minutes. - 8
Rest and carve
Let the ham rest 10–20 minutes before carving to retain juices. Slice thinly across the grain for tenderness and arrange on a warm platter. Serve with extra glaze or pan juices for dipping.
Tip: Resting is as important as timing for juicy slices. - 9
Serve and store leftovers
Offer slices with brushed glaze and a bright side like roasted vegetables or a citrus salad. Refrigerate leftovers in shallow containers within two hours and reheat gently to maintain moisture. Freeze excess slices if you won’t eat them within 3–4 days.
Tip: Label dates to track freshness; reheat with a splash of stock to refresh moisture.
Quick Answers
What internal temperature should ham reach for safety?
Fully cooked ham should be heated to 140°F (60°C) and allowed to rest before serving. Raw ham needs to reach 145°F (63°C) for safe consumption; always rest at least 3 minutes. Use a reliable thermometer to verify.
Heat fully cooked ham to 140 degrees and let it rest; raw ham should reach 145 degrees. Use a thermometer to check.
Should I glaze ham during cooking?
Yes. Apply a thin glaze during the early phase and reapply in the last 20 to 30 minutes to build a glossy, flavorful crust without burning sugar.
Yes, glaze in stages—early on and again in the last 20 to 30 minutes.
Can I cook ham from frozen?
You can, but you’ll need more time. Thaw in advance if possible, or plan for longer roasting. Ensure you reach the proper internal temperature with a thermometer.
You can cook from frozen, but expect longer time and make sure you reach the right internal temperature.
Bone-in vs boneless: which is better?
Bone-in delivers more flavor and moisture for larger roasts; boneless cooks faster and is easier to carve. Your choice should match the event size and carving preference.
Bone-in for flavor and moisture; boneless for faster cooking and easier carving.
How long should ham rest after cooking?
Rest the ham for 10–20 minutes after roasting. Resting helps juices redistribute, producing juicier slices.
Rest 10 to 20 minutes before you slice.
What glaze combinations work well?
Try brown sugar with mustard for a classic crust, or maple with orange zest for a brighter finish. Balance sweetness with acidity to avoid overpowering the pork.
Brown sugar with mustard is classic; maple with orange zest is bright. Balance sweet and acid.
Watch Video
Top Takeaways
- Choose the right ham for your crowd and plan thawing in advance.
- Use a thermometer to hit safe temperatures without overcooking.
- Apply glaze in stages to achieve shine without burning.
- Rest before carving to lock in juices.
- Store leftovers promptly and reheat gently.