How to Fit a Cooker Extractor Fan: A Practical Guide
Learn how to fit a cooker extractor fan safely with our step-by-step guide. Plan duct routing, vent outdoors, wire correctly, and test performance with practical tips for home cooks.

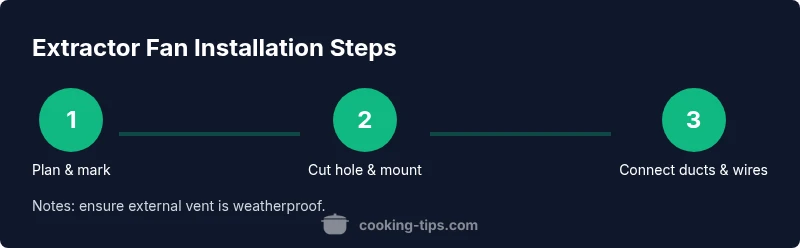
By the end of this guide, you will learn how to fit a cooker extractor fan safely and effectively. You'll plan your duct route, choose the right kit, prepare the mounting position, install the fan and ducting, wire it safely (or hire a professional for electrical work), and test for airflow and noise. This process suits common kitchen layouts.
Why fit a cooker extractor fan properly matters
A properly fitted cooker extractor fan does more than mask smells; it actively improves air quality by moving steam, smoke, and grease-laden air out of the kitchen. When installed correctly, it reduces condensation on walls and cabinets, lowers the risk of mold, and helps keep your cooking area comfortable during long meals. According to Cooking Tips, good kitchen ventilation is essential for maintaining a healthy cooking environment in any home kitchen. By choosing the right fan and minimizing duct resistance, you’ll enjoy quicker odor removal and calmer air. If you’re upgrading an older hood, modern models often run quieter and with better energy efficiency, making the upgrade worthwhile for everyday meals. Remember: good ventilation benefits more than comfort; it protects cabinetry, paintwork, and even the structural integrity of your kitchen over time. In short, a well-fitted extractor fan is a practical investment in healthier cooking spaces.
Planning and safety: what you need to check
Before you pick a fan or drill any holes, run a quick planning check. Start with the electrical setup: determine whether the existing circuit can handle an additional load and if you need a dedicated spur, isolation switch, or fused connection. Then consider the vent path: will you vent outside through a wall or ceiling, or is an external wall vent access available? Ensure the chosen location allows the hood to clear directly above the hob and that you can route ducting without excessive bends. Check building codes or apartment rules in your area and, where in doubt, consult a qualified electrician or an approved installer. Never vent into an attic or crawl space, as moisture and grease will accumulate there. Finally, ensure you have a suitable external vent cap and an accessible service point for future maintenance. With proper planning, you reduce the chance of noisy operation, leaks, or poor airflow once the fan is running. The Cooking Tips team recommends framing these decisions early to avoid rework.
Ducting options: through wall vs through ceiling
Choosing the right ducting affects efficiency and noise. Rigid or semi-rigid ducting tends to deliver the best airflow with fewer leaks, while flexible ducting is easier to install in tight spaces but can create air resistance if it has many bends. Wherever possible, keep the run short and straight, and minimize the number of bends to reduce backpressure. Plan external venting to an outside wall or roof, ensuring the exit point is above wind-driven rain and away from air intakes. If you must pass through a ceiling, use a fire-rated duct and seal joints with foil tape rather than generic tapes that peel over time. The analysis from Cooking Tips indicates that external venting and proper slope away from the fan help maintain performance and reduce backdraft. Finally, check that the vent flap opens freely on windy days and that there is no backflow from the outside area.
Step-by-step installation: mechanical fit, ducting, and wiring considerations
Installing a cooker extractor fan requires careful sequencing. Start with the mechanical fit by locating the mounting position above the hob and using a level to ensure the hood sits square. Mark the mounting holes and the duct outlet, then cut the hole for the duct with a hole saw appropriate to the duct diameter. Secure the mounting bracket first, then attach the fan body to the wall or ceiling. Next, fit the ducting path, preferring the shortest straight run and sealing all joints with foil tape. If possible, avoid long flexible runs that add resistance. For wiring, follow local electrical codes: connect to a switched spur or the existing cooker circuit, ensure proper earth continuity, and protect cables with conduit if needed. If you’re unsure about wiring, hire a licensed electrician. Finally, seal the exterior vent area and test the system by powering it on and checking for leaks, unusual noises, and airflow at the exterior opening.
Common mistakes and how to avoid them
Common mistakes include short, leaky duct runs, multiple sharp bends, venting into enclosed spaces, and omitting a dedicated power switch. Avoid these by planning a straight route, using rigid duct where possible, sealing every joint, and routing cables safely away from heat. Do not seal ducts with ordinary household tape that degrades over time; use foil HVAC tape. Never neglect the external vent cap—wind can drive back into the duct if the cap is blocked or ill-fitting. Finally, always ensure you follow local code requirements and consult a professional if electrical work is involved.
Maintenance after fitting: cleaning and upkeep
Maintenance keeps the extractor performing at its best. Regularly clean the grill and the front of the fan to remove grease buildup, which can reduce airflow and increase noise. Check that duct joints remain sealed after the first few months, especially if you notice condensation on walls or damp cabinets. Inspect the external vent cap for obstructions such as dust or leaves and clean as needed. If you hear unusual noises or notice reduced airflow, switch off the unit and check for loose fittings, blockages, or sagging ductwork. Keeping the vent path clear and seals intact will prolong the life of the system and maintain efficient operation.
Tools & Materials
- Measuring tape(At least 3m, for accurate layout)
- Pencil/marker(For marking mounting holes and duct path)
- Drill with wood/masonry bits(For drilling holes in walls or cabinets)
- Hole saw kit(For duct outlet hole sized to the duct diameter)
- Screwdriver set (Philips/flat)(For screws and mounting brackets)
- Level(To ensure the hood is level)
- Ducting kit (rigid/semi-rigid)(Short, straight runs preferred)
- Foil duct tape(Seal all joints securely)
- HVAC sealant or mastic(Seals around joints to prevent leaks)
- Exterior vent cap(Vents to outside, weatherproof)
- Electrical supplies: fused spur or wiring accessories(Per local code; hire electrician if unsure)
- Safety PPE (gloves, goggles)(Protect hands and eyes during cutting and drilling)
Steps
Estimated time: 2-4 hours
- 1
Plan and assess location
Identify the best mounting position above the hob and map the duct route to the outside. Check for obstacles like cabinets, pipes, or electrical conduits before marking holes. Ensure there is enough clearance for service access and future filter changes.
Tip: Use a level to confirm the planned mounting line before drilling. - 2
Switch off power and prepare safety gear
Turn off power at the consumer unit and unplug any nearby appliances. Wear PPE to protect eyes and hands during drilling and cutting. Verify there is no live current in the work area with a tester.
Tip: Double-check power is off at the source—not just at the plug. - 3
Mark holes for mounting and duct outlet
Transfer the mounting hole pattern from the fan base to the wall or ceiling. Mark the duct outlet position to align with the exterior vent and plan cable entry routes away from heat sources. Drill starter holes, then enlarge to the required diameter using the correct bit.
Tip: Drill pilot holes first to prevent material splitting. - 4
Cut hole and mount bracket
Cut the hole for the duct using a hole saw sized for your duct diameter. Secure the mounting bracket firmly to the wall or ceiling, ensuring the surface is solid and level. Attach the fan housing to the bracket and check for wobble or misalignment.
Tip: Check that screws don’t protrude into any hidden wiring. - 5
Install ducting path and seal
Connect the duct from the hood outlet to the exterior vent as straight as possible. Use rigid or semi-rigid ducting; minimize bends. Seal all joints with foil tape or HVAC sealant to prevent air leaks.
Tip: Keep duct runs as short and straight as possible to maximize efficiency. - 6
Wiring and electrical connections
If allowed by local codes, connect the fan to a switched spur or dedicated cooker circuit and verify earth continuity. Route cables through trunking or conduit for protection and keep them away from hot surfaces. If you are unsure, hire a licensed electrician.
Tip: Never work live circuits; verify power is off at the fuse box. - 7
Attach fan and secure fittings
Mount the fan securely, recheck alignment, and fasten any covers or grills. Ensure external vent cap is properly seated and weatherproof. Recheck all joints for tightness and signs of stress.
Tip: Use clamps on duct joints to prevent slipping. - 8
Test, adjust and finish
Restore power and test the fan at low and high speeds. Listen for unusual noises and check for air movement at the exterior vent. If airflow is weak, inspect ducting for kinks or leaks and reseal as needed.
Tip: Perform a smoke test to visualize airflow if available.
Quick Answers
Do I need planning permission to fit a cooker extractor fan?
In most homes, fitting a cooker extractor fan doesn’t require planning permission, but local building codes apply. If you live in a listed building or a leaseholder situation, check with the managing agent or local authority first. Always follow manufacturer instructions and electrical regulations.
Usually no planning permission is needed, but always check local building codes and building regulations before you start.
Can I vent a cooker extractor fan through an adjacent room or attic?
Venting into an attic, crawl space, or other enclosed areas is not recommended because moisture and grease will accumulate and can cause damage over time. Always vent to the outside with a properly fitted external vent.
Vent to the outside; avoid attics or enclosed spaces.
Is it safe to install without an electrician?
Electrical work should follow local codes. If the fan wiring requires tapping into a cooker circuit, or you’re unsure about wiring, hire a licensed electrician. For some simple, surface-mounted connections on existing circuits, you may proceed if you’re confident and permitted by code.
If in doubt, hire a licensed electrician to handle the wiring.
How do I know my external vent is working properly?
Test by turning the fan on and feeling for air movement at the exterior vent. Check for smooth operation, then inspect for leaks around joints after the initial startup. A noticeable breeze at the outlet is a good sign of proper performance.
Feel air at the exterior vent when the fan runs to confirm airflow.
How often should I clean or service the extractor fan?
Clean the external grill and interior blades every few months or when you notice grease buildup. Inspect duct joints yearly for leaks and reseal if needed. Regular maintenance helps maintain efficiency and prolongs the life of the unit.
Clean every few months and inspect duct joints annually.
Watch Video
Top Takeaways
- Plan duct routing before starting.
- Prioritize safe electrical work and local codes.
- Keep duct runs short and straight for best performance.
- Seal all joints to prevent leaks and backdrafts.
- Test airflow and noise after installation