How to Cook on a Blackstone: The Ultimate Griddle Guide for Beginners
Learn safe, practical methods to master grill-top cooking on a Blackstone griddle—from setup and seasoning to searing, sautéing, and cleaning. A home-cook friendly, step-by-step guide.

With this guide you will learn how to cook on a Blackstone griddle—from setup and safety to searing, sautéing, and finishing. You’ll master heat control, oil tuning, and timing, plus simple cleanup. By the end you’ll confidently cook breakfast, lunch, and dinner on a flat-top griddle with reliable, tasty results. This article from Cooking Tips offers practical, home-cook friendly steps.
The Blackstone Advantage: Why a flat-top griddle makes cooking easier
According to Cooking Tips, the flat, continuous surface of a Blackstone griddle provides uniform heat distribution and generous cooking space, which helps with even browning and efficient meal prep. The Cooking Tips team found that the lack of grill grates reduces sticking and makes turning items quick. On a typical outdoor cookout, a Blackstone can handle proteins, vegetables, and starches in parallel, saving time and cleanup. This section explains how its design translates to reliable results: a wide, uninterrupted surface, easily accessible control knobs, and the ability to run multiple small tasks at once. You’ll also learn why a properly heated surface matters for searing and sautéing, and how different sizes suit different kitchens and outdoor setups.
A key benefit is heat zoning: you can keep a hot zone for searing and a cooler zone for vegetables or delicate proteins. That zoning is easier on a flat-top than on a traditional grill grate, because you’re not moving food between grates with limited surface area. Keep in mind that every Blackstone model has its own quirks, so a quick read of the user manual helps you maximize consistency right away. Remember, the goal is even color, not burnt patches, and consistent timing across your entire cook.
For home cooks, the Blackstone’s versatility is a major advantage. You can toast tortillas, scramble eggs, crisp bacon, sear chicken, and finish with quick pan sauce, all without swapping cookware. As you experiment, you’ll discover which foods pair best with your preferred heat level and how to sequence tasks so nothing waits too long. In short: practice, patience, and a few simple rules will unlock your griddle’s full potential.
Safety and Setup: Preheat, season, and organize
Safety first is the baseline for any griddle session. As Cooking Tips analysis suggests, a calm, organized setup reduces mistakes and speeds cooking time. Before you fire up the burner, check propane connections for leaks, clear the area of flammable materials, and keep a spray bottle of water handy for flare-ups. Ensure you have a clean, dry surface, heat-resistant gloves, and a sturdy spatula at the ready. When you light the burner, start with a low setting and gradually raise the heat to your target zone. Always keep the hood or a windbreak in mind if you’re cooking outdoors, as wind can shift heat unexpectedly. After you’ve confirmed ignition, test a small amount of oil to verify the surface is properly heated and not smoking aggressively.
For organization, group like foods together and plan your sequence. Start with proteins that take longer to cook, then move to vegetables and quick-cooking sides. This minimizes cross-contamination and helps you manage time effectively. Advertising claims aside, the best way to learn is by doing: a couple of simple, safe practice runs will help you understand how heat behaves on your specific Blackstone model. Remember that consistent practice builds muscle memory and reduces the likelihood of scorching or sticking.
Essential prep and seasoning for longevity
Prepping a Blackstone griddle begins with a clean slate. If you’re using a new surface, wipe it down and apply a thin layer of high-heat oil to form a protective polymerized coating. This initial seasoning doesn’t have to be perfect, but repeated use will strengthen the patina over time. A well-seasoned surface resists sticking and produces that characteristic savory crust. Regular maintenance means re-oiling after cooking, especially if you’ve used acidic ingredients or a lot of moisture. A clean scrapper, some paper towels, and a light wipe-down are all that’s needed after each cook to maintain the finish. Throughout the process, avoid harsh soaps on the cooking surface; instead, rely on heat, scraper, and a light oil to preserve seasoning. In addition to oiling, consider keeping a small jar of oil handy near the grill for quick touch-ups during a session.
The longevity of your Blackstone improves with routine cleaning and timely seasoning. If you notice dull spots or increased sticking, perform a quick re-season: heat the grill, scrub away residue with a metal scraper, wipe clean, and apply a fresh coat of oil. This habit pays off during longer cooking sessions and makes cleanup faster in the future. It also helps your griddle stay rust-free in outdoor conditions, where humidity and rain can be unforgiving. The goal is a smooth, dark coating that repels moisture and flavors your food in every cook.
Temperature control and fuel management
Mastering temperature control on a Blackstone means understanding how to balance heat across zones. Start by preheating with the left or right side of the surface to reach your target level; then, if possible, use dual-zone settings to keep a hot searing area while maintaining a cooler zone for vegetables or delicate proteins. If your model has multiple burners, adjust each knob to create a gradient of heat across the surface. Remember that surface temperature is not the same as air temperature, so you’ll need to gauge progress by color and aroma. A handy trick is to monitor the first few minutes closely and adjust as needed to prevent scorching. Over time, you’ll notice how long different ingredients stay on high heat before browning becomes too intense.
Fuel management is also about efficiency. Avoid running at full blast for extended periods if you don’t need that much heat. Instead, plan your sequence to use residual heat and avoid waste. If you’re cooking outdoors in cold weather, you may need to extend the preheat time to ensure consistent performance. The more comfortable you become with the griddle’s heat profile, the more confident you’ll be in delivering evenly cooked meals across a range of foods.
Pro tip: when searing, you want direct heat contact for a crust; when finishing, you can back off the heat and let ingredients finish with residual warmth. Flare-ups can happen if oil hits a hot surface too aggressively, so keep your spatula ready to move ingredients out of the hottest zone quickly.
Core cooking techniques: searing, sautéing, and finishing
Searing on a Blackstone begins with a properly preheated surface. Pat proteins dry, season generously, and place them carefully onto the hot zone. You should hear a satisfying sizzle as the crust begins to form. Resist the urge to move the food too soon—allow a crust to develop before flipping. Use a broad, flat spatula to lift and turn items with minimal disruption to the crust. For vegetables, a quick toss or stir in a small, controlled batch helps them achieve an even roast without steaming. When sautéing, keep ingredients moving to prevent sticking, and adjust heat to avoid scorching.
Finishing touches often involve a light glaze, butter basting, or a quick rest off heat to redistribute juices. A gentle, even finish across items helps plates look and taste better. If you’re cooking multiple components, time your finish so everything lands on the plate hot and ready. Also, consider finishing with a splash of sauce or a squeeze of citrus to brighten flavors. Remember to clean and re-oil the surface after the cook to maintain seasoning and readiness for the next meal.
To expand your repertoire, experiment with simple sauces and marinades that pair well with a hot, fast-searing surface. A familiar crust can take center stage when you learn how to balance moisture and heat. With consistent practice, your ability to pick the right technique for each dish will improve, and weeknight meals will become both faster and tastier.
Breakfasts, lunches, and dinners you can master
A Blackstone griddle can streamline breakfast by delivering evenly browned eggs, pancakes, and potatoes side by side. For lunch and dinner, you’ll find it’s easy to plate a complete meal from a single surface: grilled meats, sautéed vegetables, and starches all in one go. Start with a simple breakfast like scrambled eggs and hash browns, then move to lunch with grilled sandwiches and quick veggie sides. For dinner, consider a one-pan theme—seared chicken with peppers, onions, and a side of rice or noodles—making the most of the large cooking area and the ability to move from high heat to gentler simmer without transferring food. The flexibility of the Blackstone makes it practical for weeknight meals and weekend gatherings alike.
If you’re new, begin with easy, reliable combinations: chicken and peppers with a quick soy glaze; salmon with lemon-butter and a bed of greens; or steak and mushrooms with a simple pan sauce. Use a timer or visual cues to maintain consistency across different batches, and don’t be afraid to step back and re-season if flavor or texture isn’t meeting expectations. With time, you’ll build a go-to set of recipes that play to the griddle’s strengths.
This approach also translates well to culinary experiments: try different marinades, spice rubs, or quick pan sauces. The outcome might surprise you with its simplicity and depth. As you gain confidence, you’ll be able to recreate favorites from memory, using your Blackstone as the central tool for reliable, repeatable results.
Cleaning, maintenance, and storage
After cooking, a clean surface is essential to prevent residue from building up and affecting future meals. Begin by turning the griddle to high heat with minimal moisture on the surface to burn away debris, then use a scraper to remove stuck bits while the surface is hot. Wipe with a dry paper towel, then apply a light coat of oil to protect the seasoning. Avoid harsh detergents as they can strip the patina; instead, rely on heat, steam with a little water, and careful scrubbing. If you notice rust, repeat the seasoning process to restore the protective layer.
Store your griddle in a dry, covered area if possible. Keeping it dry helps prevent rust and keeps the cooking surface in top condition. Periodically re-season according to your model’s instructions, particularly after long stretches of use or exposure to salty marinades. A well-maintained Blackstone not only lasts longer but also performs more consistently, ensuring that your meals taste as good as they look on the plate.
In addition to surface care, remember to inspect gas lines and regulators regularly for wear or damage. If any part shows signs of wear, replace it promptly to avoid leaks. Regular maintenance creates safer, more enjoyable cooking experiences and preserves your investment in a reliable outdoor cooking setup.
Authority sources
- For food safety basics: https://www.fsis.usda.gov
- For culinary guidance and home extension resources: https://extension.oregonstate.edu
- For general cooking safety and best practices: https://extension.psu.edu
Tools & Materials
- Blackstone griddle (any size, propane-powered)(Choose based on family size and storage space)
- Propane tank or alternative fuel source(Ensure you have a secure, compatible connection)
- Spatula set (wide, flat spatula and metal flipper)(Prefer heavy-duty stainless or cast iron)
- Griddle scraper(Card scraper or stiff metal scraper works)
- Oil with high smoke point (canola, grapeseed, or avocado oil)(Used for seasoning and cooking)
- Paper towels(For quick cleaning and drying surfaces)
- Heat-resistant gloves or mitts(Protect hands during high-heat handling)
- Tongs(For turning larger items without breaking crust)
- Thermometer (optional)(Helpful for checking internal temps on thicker cuts)
Steps
Estimated time: Estimated total time: 50-60 minutes
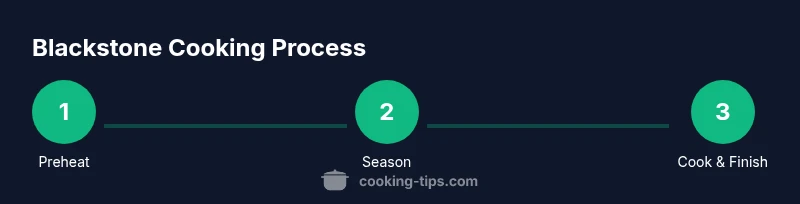
- 1
Preheat the griddle to medium heat
Light the grill and allow the surface to reach a steady medium temperature. This ensures an even sear and prevents food from sticking as soon as it hits the surface.
Tip: Estimate 5-7 minutes of preheat time; use a few drops of water to test the shimmer on the surface. - 2
Oil the surface lightly
Apply a thin coat of high-heat oil across the surface using a folded paper towel held with tongs. This protects the seasoning and helps food release more easily.
Tip: Wipe away excess oil to avoid pooling and smoking. - 3
Sear proteins on the hot zone
Place proteins on the hottest area of the griddle to establish a crust. Resist the urge to move them too soon; allow browning to develop before turning.
Tip: Use a broad, flat spatula to flip once for even crust formation. - 4
Sauté vegetables in a cooler zone
Move vegetables to a cooler section to finish cooking while proteins sear, ensuring even doneness and crisp-tender texture.
Tip: Keep vegetables in a single layer to prevent steaming. - 5
Finish and rest
Rest seared proteins briefly off the heat and add finishing sauces or aromatics to intensify flavor.
Tip: Resting helps juices redistribute for juicier bites. - 6
Clean and re-season after use
Heat to dry, scrape away residue, wipe clean, then apply a light coat of oil to maintain the patina.
Tip: Regular seasoning maintains non-stick performance and protects against rust.
Quick Answers
Do I need to season my Blackstone griddle before cooking?
Yes. A light seasoning builds a protective layer that reduces sticking and enhances flavor. Re-season as needed after heavy use or if you notice dull spots.
Yes. Start with a light seasoning to prevent sticking, and re-season whenever you notice dull spots or more sticking than usual.
Can I cook delicate foods like fish on a Blackstone?
Delicate foods can be cooked on a Blackstone by using lower heat and keeping them in a dedicated cooler zone. Use a wide spatula to handle fragile pieces gently.
Yes, but use lower heat and a cooler zone, and handle fragile items with care.
What temperature is best for searing?
Aim for a hot surface that browns quickly without smoking excessively. Read the food’s color and texture cues rather than chasing a single number.
Aim for a hot surface that browns quickly; watch color and texture cues instead of chasing a exact number.
How do I clean a Blackstone after cooking?
While hot, scrape off residue, wipe with a dry towel, then apply a light oil coating. Avoid harsh soaps that could strip seasoning.
Scrape while hot, wipe dry, and oil lightly. Avoid soap to protect the seasoning.
Is it safe to cook outdoors in windy conditions?
Yes, but position the griddle to shield flames from wind and monitor heat carefully to maintain even cooking.
Yes, just shield it from wind and watch the heat closely.
Can I use soap to clean the griddle after seasoning?
Soap can strip seasoning; use a scraper, warm water, and re-oil after cleaning. If stubborn residue remains, re-season afterward.
Avoid soap; scrub with water and a scraper, then re-oil and re-season as needed.
Watch Video
Top Takeaways
- Preheat properly to ensure even browning.
- Use two heat zones for versatile cooking.
- Season the surface regularly to preserve non-stick quality.
- Clean and oil after every cook to extend life.