How to Cook Chuck Roast: Tender Braised Beef Guide
Master how to cook chuck roast with braising, oven, or slow cooker methods. This guide covers searing, flavor building, doneness, safe handling, and smart leftovers.

By the end you’ll know how to cook chuck roast until fork-tender using braising, oven-roasting, or a slow cooker. You’ll learn how to sear for depth, build flavor with aromatics, choose the right braising liquid, and control doneness so the beef stays juicy. Essential tools include a heavy pot, a thermometer, and steady heat for a proper braise.
What makes chuck roast ideal for braising
Chuck roast comes from the shoulder area and is well marbled with intramuscular fat and connective tissue. When slow cooked, the tissue breaks down and the meat becomes tender and juicy while the fat renders, enriching the gravy. This cut shines in braises because the combination of moisture, heat, and time transforms tougher muscle into fork tender goodness. For home cooks, chuck roast offers a balance of flavor, cost, and forgiving texture. In this guide, you will see how to maximize tenderness with precise searing, an even braise, and careful resting. Cooking Tips recommends starting with a well trimmed roast and using a heavy pot to maintain consistent heat. If you finish with a quick glaze or an extra splash of stock, you can tailor the sauce to your family’s preferences.
Choosing and prepping chuck roast
Start with a roast that has even marbling and a firm, uniform shape. Look for a piece that weighs between 3 and 5 pounds depending on your family size. The marbling will melt during cooking, contributing to tenderness and flavor. Before cooking, pat the meat dry to promote browning. Salt generously at least 40 minutes before cooking or up to 24 hours if you plan to roast, which helps flavor penetration. Trim only excess hard fat; you want some fat for moisture. Bring the roast to room temperature for even cooking. Season with kosher salt and a mix of pepper and optional aromatics such as garlic powder or paprika. If you have time, a quick brush of olive oil helps the surface brown better in the pan. This prep stage sets up all the subsequent browning and braising steps.
Searing for flavor: the essential step
Heat a heavy pot or Dutch oven over medium high until the surface shimmers. Add a small amount of oil with a high smoke point and lay the roast in, leaving ample space so the surface browns instead of steaming. Do not move the meat too soon; let it form a deep brown crust before turning. Searing seals in juices and creates complex flavors that will carry through the braising liquid. After a crust forms on all sides, remove the roast and set aside. The browned bits on the bottom of the pot will deglaze into your braising liquid later, enriching the sauce. If your kitchen smells of burnt bits, start again with a clean pan and new oil. This step is crucial for depth and color in the finished dish.
Braising fundamentals: heat, liquid, and time
Return the roast to the pot and add aromatics such as onions, garlic, bay leaves, and carrots if desired. Pour in a braising liquid that will gently simmer and cover most of the meat; common choices include beef stock, red wine, or a combination. The goal is a steady, gentle simmer rather than boiling, which would toughen the meat. If necessary, add enough liquid so the roast sits at least halfway submerged. Maintain a low but steady temperature in the oven or on the stovetop. Plan on a total braising time of about 2 to 3 hours for a 3 to 4 pound roast, checking tenderness after the first 1 1/2 to 2 hours. Remember that as collagen converts to gelatin, the meat becomes progressively more tender. Patience here pays off with a succulent sauce and juicy beef.
Flavor boosters: aromatics and liquids
Aromatics are the secret to a rich final dish. Classic mirepoix of onions, celery, and carrots adds sweetness and body. Garlic, peppercorns, thyme, and a splash of tomato paste deepen the sauce. Liquids matter too: red wine adds acidity and brightness, while beef stock or even mushroom broth boosts body. If you want a heartier gravy, you can finish with a tablespoon of butter whisked in off the heat. For a lighter option, use more broth and a squeeze of lemon at the end to brighten the flavors. If you are cooking for kids, you can reduce the wine and rely more on stock. If your braise seems dry, tilt the pot to pool the liquid and spoon it over the meat. You want the roast bathed in flavorful steam without being completely submerged.
Oven braise vs stove top vs slow cooker
Oven braising in a covered Dutch oven provides even heat and hands off time. Preheat the oven to 325–350°F and maintain a gentle simmer in a covered pot. Stove top braising works if you monitor temperature and adjust heat to keep a light simmer; it gives you more hands-on control. A slow cooker is convenient for busy days, but you may need to finish with a quick stove top simmer to develop color and sauce. Each method yields very tender meat; the choice depends on your schedule, equipment, and how you want to conclude the sauce. If you start in the oven, plan for a final 20 to 30 minutes uncovered to reduce and glaze the sauce if desired. The key is low, steady heat and enough liquid to avoid scorching.
Temperature targets and resting
Tender chuck roast braises to the point where a fork slides through with little resistance. Target an internal temperature around 195–205°F when braising, which indicates collagen has sufficiently melted. After cooking, transfer the meat to a cutting board and tent loosely with foil for 15 minutes. Resting helps redistribute juices, making slicing easier and the texture more uniform. Slice across the grain to maximize tenderness. If you cut too soon, the juices will run and the meat may seem tougher. For servings with sauce, slice and return a few pieces to the pan to soak up more flavor before plating.
Troubleshooting common issues
If the meat is tough after 1 1/2 hours, return to braising and check the liquid level and temperature. If there is too much liquid, uncover for 15 minutes to reduce; if it’s too dry, add more stock and sear again for color. A dull, watery sauce means the aromatics were light or the pan didn’t deglaze well—re-scrape the fond and simmer longer. Overly fatty roasts can cause greasier sauces; trim excess fat but leave a thin layer. If you see gray, pale meat, it may have been cooked too hot or too quickly. The secret is low heat; patience will deliver the most consistent results.
Leftovers and uses
Leftover chuck roast makes excellent sandwiches, stews, or mixed into shredded beef for tacos. Reheating should be gentle to preserve moisture; warm slices in a skillet with pan sauce or rewarm in the braising liquid. Store in airtight containers for up to 3–4 days, or freeze portions for longer storage. The sauce can be strained and reduced to recoat leftovers or used as a base for a beef gravy. If you plan to repurpose the meat, consider adding fresh aromatics to revive the flavor.
Safety, equipment care, and cleanup
Handle raw beef with clean hands, utensils, and surfaces to prevent cross contamination. Keep perishable foods refrigerated and never leave meat at room temperature for more than two hours. When braising, ensure the lid fits tightly to keep moisture in and maintain safe temperatures. Allow pots to cool before washing; use warm soapy water and a scrub brush for the braising liquid residue, which can be sticky. If you used wine, never boil off alcohol completely, as some flavors remain even after cooking. After serving, clean tools and store leftovers promptly to avoid foodborne illness.
Quick reference cheat sheet
- Choose a 3–5 lb chuck roast with good marbling
- Sear 5–7 minutes per side until deep brown
- Braise in 325–350°F for 2-3 hours
- Use beef stock or wine as braising liquid
- Rest 15 minutes, slice across the grain
- Serve with potatoes or polenta and greens
Authority sources and further reading
- USDA FSIS Beef safety guidelines and cooking temperatures: https://wwwfsis.usda.gov
- Penn State Extension beef roast braising tips: https://extension.psu.edu
- Britannica overview on braising as a cooking method: https://www.britannica.com/food/braising
Tools & Materials
- Heavy-bottom Dutch oven or braising pot(4-6 quart capacity; prefer cast-iron or enameled cast-iron)
- Meat thermometer(Instant-read or dial; target 195°F+ internal for fork-tender when braising)
- Chef's knife and cutting board(For trimming and portioning)
- Tongs(For searing and turning the roast)
- Airtight containers or wrap(For resting and storing leftovers)
- Measuring spoons/cups(For seasoning and liquid amounts)
Steps
Estimated time: 2 hours 30 minutes to 3 hours
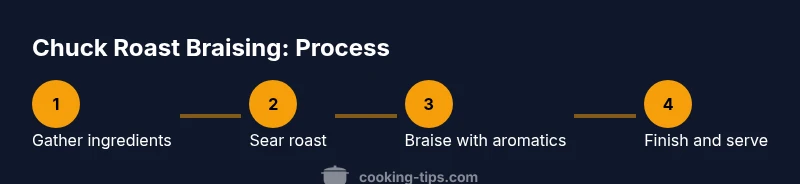
- 1
Gather and prep
Assemble the chuck roast, aromatics, and liquids. Bring the meat to room temperature, pat dry, and trim excess surface fat so browning is even.
Tip: Dry surface helps sear; pat dry with paper towels. - 2
Preheat and season
Preheat oven to 325-350°F. Salt the roast generously, pepper, and optional spices to build flavor; allow 20-30 minutes for better penetration.
Tip: Seasoning ahead improves depth. - 3
Sear the roast
Heat the pot, add oil, and sear roast on all sides until deep brown. Reserve the browned bits.
Tip: Don’t crowd the pan; brown in batches if needed. - 4
Add aromatics and deglaze
Add onions, garlic, bay leaves, and herbs; stir and deglaze with wine or stock, scraping fond.
Tip: Deglazing lifts flavor from the pan. - 5
Braise with liquid
Return roast, add liquid until halfway submerged; bring to a simmer, then cover and braise in oven or on low stove.
Tip: Maintain a gentle simmer to avoid toughening. - 6
Check tenderness and rest
After about 1 1/2 hours, test with a fork; continue until tender. Rest 15 minutes before slicing.
Tip: Rest helps juices redistribute. - 7
Finish and serve
Slice across the grain, spoon pan sauce over the meat, and serve with chosen sides.
Tip: A quick finish with butter can gloss the sauce.
Quick Answers
What is chuck roast best used for?
Chuck roast is ideal for slow, moist cooking such as braising or pot roasting. Its connective tissue breaks down with low, steady heat, producing tender meat and rich gravy.
Chuck roast is best used for slow braising or pot roasting, where it becomes tender and flavorful as the connective tissue breaks down.
Can I cook chuck roast in a pressure cooker?
Yes. A pressure cooker can shorten the time, but you’ll typically miss some of the depth from browning and longer braise flavors. Sear first, then pressure cook until tender.
Yes, you can pressure cook after searing, but you’ll lose some depth from a longer braise.
Should I trim fat before cooking?
Trim excess surface fat, but leave a thin layer for moisture and flavor. Fat renders during cooking and helps keep the meat juicy.
Trim extra fat but keep a thin layer for flavor while braising.
What sides pair well with chuck roast?
Potatoes, carrots, onions, and greens pair well. Starchy sides like mashed potatoes or polenta absorb the pan sauce nicely.
Pairs great with potatoes, carrots, and greens to balance the rich beef.
How should I reheat leftovers?
Slice the roast and gently rewarm in a skillet with some pan sauce or in the braising liquid to keep moisture.
Reheat by slicing and warming slowly in the sauce to stay juicy.
Can I freeze cooked chuck roast?
Yes. Cool, portion, and freeze in airtight bags. Thaw in the fridge before reheating to avoid uneven textures.
Yes, freeze in portions and thaw before reheating for best texture.
Watch Video
Top Takeaways
- Sear for depth before braising
- Choose a flavorful braising liquid
- Cook low and slow for maximum tenderness
- Rest and slice across the grain for best texture