How Long to Cook Steak in the Oven
Learn exact oven timings, temperatures, and resting steps to cook steak perfectly, from searing to doneness, with tips for thickness and thermometer use.

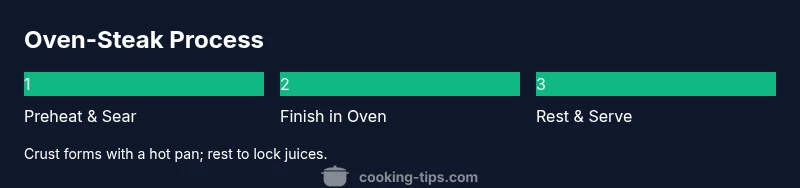
Goal: learn how long to cook steak in the oven for your preferred doneness, thickness, and starting temperature. This guide covers preheating, searing, finishing in the hot oven, and resting for juiciness. Expect times to vary with thickness; always verify with a thermometer for consistent results.
Why Oven Cooking Delivers Even Doneness
When you cook steak in the oven after a quick but thorough sear, the heat surrounds the meat more evenly than pan-only methods. This reduces hot spots and yields a uniform pink center across the cut. The secret is a hot start to develop crust, followed by controlled oven heat to finish without overshooting the edges. As you plan how long to cook steak in the oven, remember that thickness, starting temperature, and target doneness all influence the final time. The Cooking Tips team emphasizes thermometer-based accuracy for reliable results, especially when you’re balancing crust color with interior color.
Choose the Right Cut and Thickness
Thicker steaks (about 1.5 inches or more) require longer oven-finishing time than thinner ones. Ribeye, sirloin, and New York strip all perform well with sear-and-finish methods. Thickness directly affects cooking time, so measure at the center of the steak. For home cooks, a 1-inch steak is a practical test piece to dial in your oven's heat and your preferred doneness. Always start with well-marbled beef for flavor and juiciness.
Prepping for Oven Cooking: Searing, Seasoning, and Pan Prep
Pat the steak dry with paper towels to promote crust formation. Generously season with kosher salt and fresh ground pepper on both sides, letting the salt penetrate for 10–15 minutes if time allows. Preheat a heavy, oven-safe pan (cast iron ideal) to high heat, and add a thin film of high-heat oil. A good sear locks in juices and creates a flavorful crust before the steak meets the oven’s warmth. The short window of high heat also reduces the chance of a gray ring around the edge.
The Classic Sear-and-Finish Method: Timing and Technique
Searing 1–2 minutes per side in a screaming-hot pan forms a rich crust. Transfer the pan to a hot oven to finish cooking to your target doneness. Rather than chasing exact minutes, rely on an internal thermometer and target temperatures: 120–125°F for rare, 130–135°F for medium-rare, 140–145°F for medium, 150–155°F for medium-well, and above 160°F for well-done. Resting after removal allows juices to redistribute, making the steak tender and juicy.
Doneness Guide and Thermometer Cues
The most reliable way to manage doneness is with an instant-read thermometer. Insert into the thickest part of the steak for a stable reading. Remember that the steak will climb a few degrees while resting, so pull it from the oven a few degrees before reaching your final target. Visual cues (crust color and juice clarity) can guide you, but a thermometer prevents guesswork.
Troubleshooting Common Issues
If the crust browns too slowly, increase pan heat or extend searing time slightly but monitor closely. If the interior is underdone, return the pan to the oven for brief intervals rather than extending the sear time. Don’t crowd the pan; a crowded surface lowers heat and slows crust formation. Always rest the steak on a rack or plate, loosely tented with foil if needed, but avoid wrapping tightly which can steam the crust.
Tools & Materials
- Oven(Preheat to 425°F (220°C) for most medium-rare results; adjust for thickness)
- Cast-iron skillet or heavy oven-safe pan(Excellent for deep crust; ensure it's well-seasoned or seasoned with oil)
- Instant-read meat thermometer(Essential for accurate doneness without under- or overcooking)
- Tongs(For flipping without piercing the meat and losing juices)
- Paper towels(Pat steaks dry before seasoning for a better crust)
- Kosher salt(Use generous amounts; salt helps with crust formation)
- Freshly ground black pepper(Season right before searing to reduce moisture surface)
- Neutral high-heat oil (like canola or grapeseed)(High smoke point prevents rapid burning)
- Butter or optional herb butter(Add at finish for extra richness if desired)
- Aluminum foil(Lightly tent during resting if needed to keep warm)
Steps
Estimated time: 25-40 minutes
- 1
Preheat oven and warm pan
Preheat the oven to 425°F (220°C). Place the skillet in the oven for 5–7 minutes to warm if you prefer a more even finish, or heat the pan on the stove on high for a quick start. This ensures the finish is even from crust to center.
Tip: A hot pan from the start reduces the time in the oven and improves crust color. - 2
Pat dry and season
Thoroughly pat the steak dry with paper towels. Generously season both sides with kosher salt and pepper. Let rest 5–10 minutes to draw surface moisture away and optimize crust formation.
Tip: Dryness is the crust’s best friend; don’t skip this step even for thin cuts. - 3
Sear the steak
Place the steak in the hot pan with a light coating of oil. Sear for 1–2 minutes per side until a deep brown crust forms. Do not move the steak frequently; let it form a crust.
Tip: A crusty surface helps lock in juices and boosts flavor. - 4
Finish in the oven
Transfer the pan to the preheated oven and finish until the thermometer hits your target doneness. Check early and monitor closely; thick steaks will take longer than thin ones.
Tip: Use thermometer readings rather than time alone to avoid overcooking. - 5
Rest the steak
Remove from heat and tent loosely with foil. Rest 5–10 minutes to allow juices to redistribute, yielding a juicier, more flavorful slice.
Tip: Resting is non-negotiable for maximum juiciness. - 6
Slice and serve
Slice against the grain for tenderness. If desired, add a small pat of herb butter while resting for an extra layer of richness.
Tip: A short rest after slicing helps keep juices in the meat.
Quick Answers
Should I bring the steak to room temperature before cooking?
Bringing meat closer to room temperature helps cook more evenly, but it’s not essential. If you’re short on time, pat dry, season, and proceed.
Bringing steak closer to room temperature helps even cooking, but you can start right away if needed.
Is searing mandatory before oven finish?
Searing creates a flavorful crust and helps seal juices. It’s highly recommended for best texture, though you can finish in the oven with a different technique if you prefer no sear.
Searing is highly recommended for flavor and texture, but you can skip it if you need to.
What internal temps define doneness?
Common targets: rare 120–125°F, medium-rare 130–135°F, medium 140–145°F, medium-well 150–155°F, well-done 160°F+. Remember to let carryover heat finish after removing from oven.
Rare is around 120 to 125, medium-rare 130 to 135, and so on; rest will finish cooking a bit more.
Can I cook from frozen?
Cooking from frozen is possible but not ideal; it takes longer and may result in uneven doneness. Thaw for best results, or plan for extra time.
If frozen, expect longer cooking and less even doneness; thaw if possible.
How long should I rest after cooking?
Rest for 5–10 minutes after removing from the oven. This lets juices redistribute and improves slicing.
Rest 5–10 minutes for juicier slices.
Watch Video
Top Takeaways
- Preheat and sear for crust and flavor.
- Use a thermometer to hit exact doneness.
- Rest 5–10 minutes before slicing for juiciness.