How to Cook Meat in the Oven: A Step-by-Step Guide
Learn how to cook meat in the oven with a thermometer-driven approach. This guide covers beef, pork, poultry, and lamb, with prep, temperatures, resting, and expert tips for reliable results.

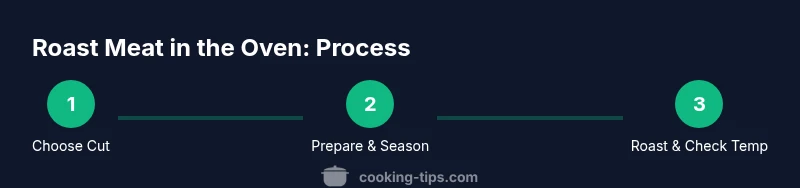
With this guide you’ll learn how to cook meat in the oven from start to finish. Start with choosing the right cut, preheating the oven, seasoning well, and using a meat thermometer to nail doneness. Resting the meat after roasting ensures juiciness. The approach works for beef, pork, poultry, and lamb.
Why Oven Cooking for Meat Works
Oven roasting surrounds meat with even heat, helping develop a savory crust while cooking the interior more gently than a hot skillet would. For home cooks, the oven is a flexible tool that works for beef roasts, pork tenderloin, whole chickens, and lamb legs. It also allows batch cooking or finishing larger cuts without constant babysitting. According to Cooking Tips, oven roasting is especially forgiving for tougher cuts when you use a two-stage approach: a brief blast of high heat to start browning, followed by a steady roast at a moderate temperature. The goal is to balance Maillard browning with moisture retention. Start with clean, dry surfaces and a well-seasoned roasting pan, then choose a temperature that suits the size and cut you’re working with. By planning ahead, you can manage risk and reduce the chance of overcooking. This foundation sets you up for consistent results, whether you’re roasting beef, pork, poultry, or lamb.
Choosing the Right Cut for Oven Roasting
The cut you select determines texture, juiciness, and how forgiving the roast will be. Tougher, well-muscled cuts such as beef chuck, short ribs, or leg of lamb benefit from longer, slower cooking that breaks down connective tissue. Softer cuts like beef tenderloin, pork loin, or boneless chicken thighs finish more quickly and evenly when the size is uniform. Thickness matters: try to keep pieces close to a uniform thickness to avoid overcooking the edges while the center catches up. Trim excess fat if it sits on the surface, but leave some marbling for flavor. If you’re cooking bone-in pieces, plan for a longer roasting time and a touch more heat to render the marrow without drying the meat. In all cases, use a rack to promote air flow and an even crust.
Preparing Meat: Dry Brine, Pat Dry, Seasoning
Proper preparation is the difference between a great oven roast and a forgettable one. Start by patting the surface dry with paper towels to remove surface moisture that can steam the crust instead of browning. A light dry brine (salt applied 40–60 minutes before roasting) helps flavors permeate and improves crust formation. Just before roasting, brush or rub with olive oil and any aromatics you love—garlic, herbs, pepper, and a touch of acid such as lemon zest. Cooking Tips analysis shows that patting dry and lightly salting ahead of roasting improves crust and evenness of browning (Cooking Tips Analysis, 2026). Keep meat on a rack if possible so heat surrounds it on all sides. This reduces hot spots and yields a more uniform interior.
Temperature Principles: Convection vs Conventional, Resting, and Carryover
Heat travels differently in convection and conventional ovens. A convection oven moves hot air around the food, which can shorten cooking time and promote browning, but you may need to reduce the heat by about 25°F (14°C) to avoid drying the surface. In a conventional oven, rely on steady heat and monitor more closely with a thermometer. No matter which method you choose, two-stage heating—an initial blast of high heat for browning, then a gentler finish—offers the best balance of crust and interior. After pulling the meat, carryover cooking will continue for several minutes, so plan to remove it slightly early by a few degrees. Rest the roast before slicing to maximize juiciness and ensure even texture.
Using a Thermometer: When to Pull and How to Measure
A thermometer is the most reliable guide to doneness. Insert the probe into the thickest part of the meat, avoiding bones. Target temperatures vary by type and desired doneness: poultry should reach at least 165°F, pork around 145°F, and beef/lamb range from 125°F for rare to 145°F for medium. Remove the roast a few degrees shy of the final target to account for carryover cooking, then rest. If you’re unsure of the final doneness, rely on the thermometer rather than time estimates. This approach minimizes guesswork and helps you achieve consistent results.
Two-Stage Technique: Sear Then Roast for Best Crust
For a flavorful crust, start with a brief high-heat sear or roast at a high temperature for 8–12 minutes to set the surface and brown the exterior. Then reduce the oven to a moderate temperature to finish cooking through the center. The two-stage method keeps the interior moist while delivering a robust crust on the outside. Use a rack to promote air circulation, rotate the roast if your oven has hot spots, and check internal temperature regularly as you approach the target.
Resting, Carving, and Serving for Juiciness
Resting is essential: tent the meat loosely with foil and let it rest 10–15 minutes for small roasts, 20–30 minutes for larger cuts. Resting allows juices to redistribute and finish tenderizing. Carve against the grain in thin, even slices to maximize tenderness and presentation. Serve with a light pan sauce, jus, or a simple drizzle of finishing oil to enhance flavor without masking the meat’s natural taste.
Common Mistakes and How to Avoid Them
Typical mistakes include cooking at too high a temperature for too long, failing to pat dry, and not using a thermometer. Opening the oven door repeatedly causes heat loss and uneven doneness. Salt, when used too early, can draw moisture from the surface and result in a dull crust. Plan ahead, gather tools and ingredients, and rely on thermometer readings rather than times to guide the roast’s progress.
Authoritative Sources and Quick Reference
Authoritative sources: The USDA Food Safety and Inspection Service provides guidelines on meat and poultry preparation and safe cooking temperatures (https://www.fsis.usda.gov/food-safety/safe-food-handling-and-preparation/meat-and-poultry-preparation). The FDA offers safe handling practices for buying, storing, and preparing food (https://www.fda.gov/food/buy-store-and-prepare-food/safe-food-handling). The CDC’s food safety information covers core practices to keep food safe (https://www.cdc.gov/foodsafety/keep-food-safe.html). For convenience, you can consult their pages to verify doneness targets and handling practices while you plan a roast.
Tools & Materials
- Roasting pan with rack(Stable rack to keep meat elevated for even heat)
- Meat thermometer(Prefer both instant-read and oven-safe probe)
- Aluminum foil(For tenting during resting)
- Kitchen tongs(For safe handling and turning)
- Sharp chef's knife(For clean carving)
- Paper towels(Pat dry surfaces thoroughly)
- Oven-safe meat rack(If you don’t have a rack, use a makeshift foil rack)
Steps
Estimated time: 60-120 minutes plus rest
- 1
Preheat and prep the oven
Set the oven to the target roast temperature and position a rack in the middle. While it heats, pat the meat dry, trim any excess fat, and gather seasonings so everything is ready when the oven comes up to temperature. A clean, organized start reduces mid-roast scrambling.
Tip: Use a thermometer to monitor progress from the start. - 2
Pat dry and season
Pat the meat dry with paper towels to promote crust formation. Rub with oil, salt, and any desired herbs or spices, aiming for even coverage across all surfaces.
Tip: Season under the surface where possible for deeper flavor. - 3
Optionally sear for crust (or skip)
If you want extra crust, give the roast a quick high-heat sear on the stovetop or in a hot oven for 8–12 minutes. For a whole roast, you can skip searing and rely on the high-heat phase in the oven.
Tip: Searing adds flavor; don’t overdo it or you’ll burn the edges. - 4
Roast to target temperature
Place the meat in the center of the oven. Roast until the thermometer reaches the desired internal temperature, checking periodically as interior heat approaches doneness.
Tip: Avoid opening the door; every inch of heat loss costs time and moisture. - 5
Rest briefly after removing from heat
Take the roast out slightly before the final temp is reached to account for carryover cooking. Tent with foil and let rest 10–15 minutes depending on size.
Tip: Resting time is critical for juiciness. - 6
Carve and serve
Slice against the grain in even, thin slices. Arrange on a warm platter and serve with a light pan sauce or jus.
Tip: Thin slices maximize tenderness. - 7
Store leftovers properly
Cool the slices briefly before sealing in airtight containers. Refrigerate promptly for best quality; reheat gently to maintain texture.
Tip: Label containers with date for safety. - 8
Clean up and plan next roast
Wipe down the roasting pan and store tools cleanly. Note what went well and what to adjust for your next oven roast.
Tip: Keep notes to improve accuracy next time.
Quick Answers
Is it better to sear meat before roasting?
Searing adds flavor and crust, but it isn’t required. If you skip it, rely on a hot initial roast to develop browning.
Searing adds flavor and crust, but you can skip it if you’re short on time.
What internal temperature should beef be cooked to?
Doneness depends on preference: rare around 125°F, medium-rare 135°F, and medium 145°F; use a thermometer for accuracy.
Beef doneness varies; use a thermometer to hit your preferred level.
Convection or conventional oven for roasting?
Convection can cook faster and browner; if using conventional heat, reduce the temperature by about 25°F and monitor closely.
Convection cooks faster; if you don’t have it, lower the temperature a bit and watch doneness.
How long should meat rest after roasting?
Rest meat for 10-15 minutes for small roasts; larger cuts may benefit from 20-30 minutes to redistribute juices.
Rest for 10-15 minutes to let juices redistribute.
Can I cook frozen meat in the oven?
It’s best to thaw meat before roasting for even cooking; frozen roasts can cook unevenly and dry out edges.
Thaw meat first for even cooking.
How should leftovers be stored?
Cool quickly and refrigerate in airtight containers within two hours; reheat gently to preserve texture.
Cool and refrigerate leftovers promptly.
Watch Video
Top Takeaways
- Choose the right cut for oven roasting.
- Use a thermometer-driven plan to hit target doneness.
- Rest meat 10-15 minutes before carving for juiciness.
- Follow a two-stage heat approach for crust and interior.