How to Cook Hard-Boiled Eggs in an Instant Pot
Master hard-boiled eggs in an Instant Pot with precise timing, easy peeling, and reliable results. This step-by-step guide covers water amount, pressure settings, release methods, peeling, and storage for consistent results.

You will learn how to hard-boil eggs in an Instant Pot with precise timing, safe handling, and reliable results. This guide covers water measurement, pressure settings, release methods, peeling, and storage. You’ll gain a simple, repeatable method to get creamy yolks or firm yolks, plus troubleshooting tips for common cracking and peeling issues.
Why Instant Pot is a great tool for hard-boiled eggs
According to Cooking Tips, the Instant Pot makes hard-boiled eggs easier by delivering consistent steam pressure with minimal handling. The hands-free cooking reduces the risk of cracking shells when compared with traditional boiling, and it gives you a repeatable result you can rely on for meal prep or school lunches. This section explores why this appliance excels for eggs and what to expect from texture and peeling. You’ll notice the steam produces gentle, even heat that surrounds each egg, helping to avoid overcooked yolks or undercooked whites. The goal is dependable results with a simple procedure you can repeat during busy weeks. Important caveats include keeping eggs in a single layer to prevent crowding, using enough water to generate steam, and avoiding high-altitude adjustments unless you’ve tested your specific model. Overall, the Instant Pot is a versatile tool for home cooks who want a hands-off approach to perfectly cooked eggs without babysitting a pot on the stove.
Timing and yolk texture explained
Texture is the key variable when boiling eggs, and timing determines whether you’ll end up with a hard yolk, a creamy center, or a slightly jammy center. In an Instant Pot, the steam and pressure create a uniform environment that helps achieve a consistent yolk across eggs. For most home cooks, a standard high-pressure cook time yields firm whites and yolks that are fully set but not chalky. If your preference is creamier yolks, you’ll want a shorter cook time or a shorter pressure cycle, and if you want a fully set, firm yolk, a longer cook can be used with careful timing. Cooking Tips Analysis, 2026 notes that pressure-based cooking in the Instant Pot yields reliable results across eggs when you manage the release method and cooling step. A quick-release path can lead to slightly drier whites, while a natural release completes cooking more gradually and tends to produce tender whites and evenly set yolks. Remember that altitude, egg size, and starting temperature can shift exact timing by a minute or two, so start with the recommended baseline and adjust in small increments for future batches.
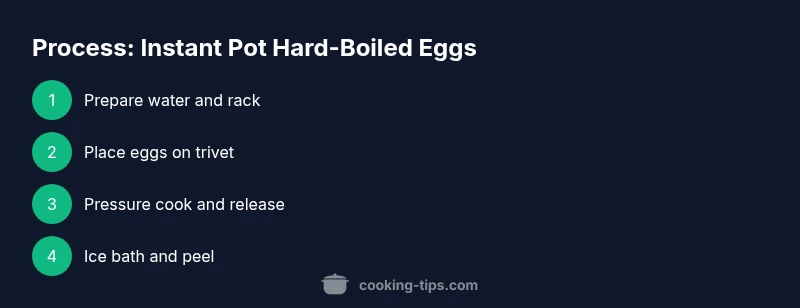
How this method works: setup, timing, and safety considerations
To achieve consistent hard-boiled eggs in an Instant Pot, you’ll use a rack or trivet, add a measured amount of water, and place eggs in a single layer. The pressure setting is high, and the cook time is short, which minimizes the chance of cracking and helps maintain even texture. Allowing a brief natural release after cooking helps prevent yolk overcooking and reduces the risk of shell cracking from a rapid temperature shift. The ice bath that follows halts residual cooking and makes peeling easier. Safety considerations include ensuring the silicone sealing ring is in good condition, avoiding overfilling the pot, and using tongs to handle hot eggs. By following these steps, you’ll get reliable results with minimal effort and cleanup.
Troubleshooting common issues
Cracked shells are often caused by temperature shock or overcrowding. If you notice cracking, ensure eggs are not crowded and consider letting eggs come to room temperature for a few minutes before cooking. Peeling difficulties usually stem from very fresh eggs; older eggs peel more easily. If shells cling to the whites, try an ice bath and peel under cool running water. If yolks appear gray or green, that’s usually a sign of overcooking; reduce the cook time by a minute or two next batch and/or shorten the cooling period. Finally, if you get undercooked whites, check your water level and ensure you are using a stable rack and proper sealing.
Variations and storage tips
You can tailor the yolk texture by adjusting the cook time and the release method. For jammy yolks, experiment with slightly shorter times and a longer ice bath to halt cooking quickly. For fully hard-set yolks, extend the time by a minute or two and rely on a careful NPR. Peeled eggs can be stored peeled or unpeeled; store in a covered container in the refrigerator for up to one week. If you plan to peel later, keep the eggs unpeeled and refrigerate to preserve freshness. Hard-boiled eggs also freeze poorly, so it’s best to consume or refrigerate within a week.
Peel, serve, and storage ideas
Peel eggs under cool running water to help the shell separate from the membrane. Serve immediately for best texture or refrigerate for later use in salads, deviled eggs, or snacks. For meal planning, cook a dozen at once and store in a covered container for up to a week. Labeling the eggs with the date helps you rotate your supply. If you’re peeling in advance for a party, consider keeping the peeled eggs in cold water to maintain moisture and prevent sticking.
Quick reference: baseline method overview
A common baseline method uses 1 cup water and a trivet, with 5 minutes on high pressure, followed by 5 minutes of natural release and then a 0-2 minute quick release. Transfer immediately to an ice bath for 5-10 minutes. This approach offers a dependable balance between yolk texture and ease of peeling, with the cooling step helping to stop the cooking process quickly.
Tools & Materials
- Eggs (large)(Cold from fridge; up to a full layer without stacking)
- Instant Pot (6-quart or larger)(With trivet/rack)
- Trivet or steam rack(Keeps eggs above water)
- Water, filtered(1 cup for a 6-quart pot; adjust for larger pots)
- Tongs(To handle hot eggs safely)
- Ice bath bowl(Cold water with ice)
- Timer(Track cook and release times)
- Kitchen towel or paper towels(Dry eggs after peeling)
- Optional: salt or vinegar(A pinch in the water can aid peeling for very fresh eggs)
Steps
Estimated time: Total time: 15-25 minutes (plus 5-10 minute ice bath)
- 1
Gather ingredients and prep
Collect all ingredients and set up the Instant Pot with the trivet inside. Place eggs in a single layer so they cook evenly. Having everything ready reduces on-the-spot scrambling and ensures a smoother process.
Tip: Arrange eggs in a single layer; crowded eggs cook unevenly. - 2
Add water and rack the eggs
Pour 1 cup of water into the pot and place the trivet in. Arrange the eggs on the trivet in a single layer, ensuring they don’t touch each other.
Tip: Water depth matters for steam generation—don’t skip this step. - 3
Secure the lid and set cook time
Close the lid, seal the vent, and set to high pressure for 5 minutes. Start the timer once the pot reaches full pressure.
Tip: Using a stable rack helps eggs stay in place during the pressurization. - 4
Natural release and quick release
Allow a 5-minute natural release, then perform a quick release to vent the remaining steam. This helps maintain texture and reduces cracking.
Tip: Avoid long quick releases right after heavy cooking, which can shock shells. - 5
Ice bath to stop cooking
Transfer eggs to the ice bath immediately after venting and let them sit 5–10 minutes. The cold shock stops cooking and makes peeling easier.
Tip: The shower of cold water on peeling helps separate shell from membrane. - 6
Peel, store, and serve
Peel under cool water or serve peeled. Refrigerate peeled or unpeeled eggs for up to 1 week in a sealed container.
Tip: Older eggs peel more easily than very fresh eggs.
Quick Answers
Can I cook more eggs at once in the Instant Pot?
Yes, as long as you keep the eggs in a single layer and don’t overcrowd the pot. If needed, cook in batches.
Yes, you can cook more eggs as long as you keep them in a single layer and don’t overcrowd the pot.
Do I need to use natural release after cooking?
Natural release helps prevent overcooking and cracking by letting pressure drop gradually. Quick release can work, but may yield tougher whites.
Natural release helps prevent overcooking; quick release can work but may toughen the whites.
Why did my eggs crack after cooking?
Cracks are usually caused by temperature shock or overcrowding. Ensure eggs are dry, in a single layer, and that you use the ice bath to stop cooking.
Cracks usually come from temperature shock or crowding. Keep them in a single layer and use the ice bath.
How can I tell if an egg is hard-boiled?
Spin the egg on a flat surface. If it spins smoothly and quickly, it is hard-boiled; if it wobbles, it’s not fully cooked. Peel and test if needed.
Spin the egg on a counter; a smooth spin means it’s hard-boiled.
How long can I store hard-boiled eggs?
Hard-boiled eggs, peeled or unpeeled, can be stored in the refrigerator for up to 1 week.
Store hard-boiled eggs in the fridge for up to a week.
Can I make soft-boiled eggs in the Instant Pot?
Yes. To get a softer center, reduce cook time to 2–3 minutes and adjust the release and cooling steps accordingly.
You can make soft-boiled eggs by shortening the cook time to 2–3 minutes.
Watch Video
Top Takeaways
- Use 1 cup water and a trivet.
- Cook on high pressure for 5 minutes.
- Natural release for 5 minutes, then quick release.
- Ice bath stops cooking and aids peeling.