What Cook of Steak Is Best: A Practical Home Guide
Learn how to choose, season, sear, and rest steak for juicy, flavorful results at home. This guide covers cuts, temperatures, and methods from pan-sear to reverse-sear with practical tips from Cooking Tips.

Ultimately, there isn’t a single ‘best’ cook of steak; the ideal approach depends on the cut, thickness, and your preferred doneness. For most home cooks, starting with a high-heat sear in a cast-iron skillet, finishing in the oven, and using a meat thermometer yields consistent medium-rare to medium results. Resting the steak is essential.
What makes a steak 'best' to cook?
There isn’t a universal one-size-fits-all method for steak because quality starts with the cut and thickness. The best cook hinges on achieving a deep crust quickly (Maillard reaction) while preserving a juicy, tender interior. Temperature control matters more than chasing a single technique. According to Cooking Tips, the most reliable home-cook approach blends a hot sear with oven finishing and a precise rest. This combination leverages browning for flavor and even heat for consistent doneness. In practice, you’ll tailor the method to the steak you have—thicker ribeye benefits from more oven time, while a thin flank tastes best with quick, intense heat. The goal is a crusty exterior and a warm, rosy center, not a gray, overcooked middle.
A practical mindset for home cooks is to start with quality ingredients, minimize handling, and plan your steps so you’re not scrambling at the stove. Good meat, dry patting, and patience during searing are your best allies. The Cooking Tips team emphasizes that getting to know your pan, skillet thickness, and oven behavior will dramatically improve results over time.
Cut size and thickness influence method
The thickness of a steak governs how you’ll use heat. A 1-inch ribeye or sirloin can reach a perfect medium-rare with a quick sear and a short oven finish; a 1.5- to 2-inch cut may need a longer sear and more oven time. Smaller or thinner cuts can overcook quickly if you rely solely on oven heat. For thicker steaks, reverse-searing—finishing in a hot oven after a long sear—often yields the most even doneness from edge to center. Remember that even a few minutes of resting after removing from heat makes a big difference in juiciness. Salting early or just before cooking helps with crust formation; both approaches work, so choose what fits your schedule and equipment.
In sum, thickness dictates the dual-phase approach: a strong crust with a gentle interior. The goal is to maximize surface browning while avoiding an overheated, gray center.
From pan-sear to oven finish: the classic route
Pan-searing is the workhorse technique for most home cooks. A hot cast-iron skillet provides the browning surface that imparts flavor, followed by oven finishing to gently bring the interior to the target temperature. Key steps include patting the steak dry, seasoning generously, and avoiding crowded pan space. Crowding lowers pan temperature and hinders browning. Finishing in the oven is especially helpful for thicker cuts or when you want precise doneness without overcooking the crust. Resting afterward is essential to allow juices to redistribute, yielding a juicier bite. The method balances speed with control and is resilient for weeknight cooking.
The major heat strategies: pan-sear, grill, and reverse-sear
Pan-searing builds crust quickly; grilling adds smoky flavor and a different crust texture; reverse-searing provides the most even doneness, especially on thick cuts. Each method has its ideal scenarios: searing alone is fast for thin steaks; grilling is great when you want outdoor flavor; reverse-sear is preferred for thick roasts or very thick steaks where you want a consistent interior without a burned crust. The best choice depends on your equipment, the cut, and your desired finish. Practice makes consistent results, and a thermometer will remove guesswork.
When you’re ready to experiment, start with a 1-inch ribeye to compare sear crust, internal color, and how rest time affects the final bite. You’ll notice differences in crust texture, moisture retention, and overall flavor; these are clues to fine-tune your approach over time.
Temperature and doneness: a quick guide
Doneness is defined by internal temperature. For reference, rare is around 120-125°F, medium-rare 130-135°F, medium 135-145°F, and medium-well 150-155°F. It’s best to pull the steak a few degrees below the final target and let carryover cooking finish the job as it rests. A digital instant-read thermometer is your best friend here. Seeing the temperature rise slowly gives you control and reduces the chance of overcooking. Resting for 5-10 minutes after cooking helps juices redistribute and keeps the center moist and flavorful.
Seasoning, butter finishing, and aromatics
Season generously with kosher salt and pepper before cooking. Salt draws out surface moisture, which then reabsorbs, aiding crust formation. Finishing with a pat of butter and aromatics (garlic, thyme, or rosemary) during the last minute of cooking adds richness and depth. If you’re watching sodium, cut back slightly on salt or use a lighter finish, but do not skip it completely. The finishing stage is where you can tailor flavor to your preference, from herbaceous to buttery and lush.
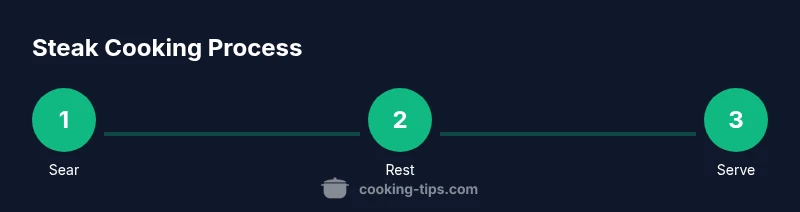
Resting, slicing, and serving
Resting 5-10 minutes after cooking is crucial for juiciness. Slice against the grain for tenderness, and serve promptly to enjoy the crust while it’s at its best. If you’re serving with sides, timing the rest to finish close to serving time keeps everything warm and balanced. A small amount of flaky salt over the sliced surface can enhance each bite. Consistency comes from practice, a thermometer, and careful attention to carryover heat.
Troubleshooting and common mistakes
Common errors include overcrowding the pan, which drops the pan temperature and prevents crust formation; using oil with a low smoke point, which can burn and carry flavors; not letting the pan heat enough before adding the steak; and cutting into the meat too early, which releases juices. To avoid these, pat dry thoroughly, preheat the pan until just smoking, and resist the urge to turn the steak too often. If the crust isn’t developing, increase the heat slightly and give the steak more time without moving it.
A practical sample cook plan for a 1.5-inch steak
Plan a realistic sequence: salt the steak 40-60 minutes before cooking; pat it dry again quickly; heat a heavy cast-iron skillet until it just begins to shimmer; sear for 2-3 minutes per side for a crust, then transfer to a 425°F oven for 3-6 minutes depending on thickness and desired doneness; rest for 5-10 minutes before slicing. This plan is adaptable: adjust times for thicker cuts or different doneness targets, but always prioritize a hot pan and precise temperature control.
Tools & Materials
- Cast-iron skillet(Preheat until surface is hot and shimmering; ideal for even browning.)
- Tongs(Use to flip without piercing the meat and releasing juices.)
- Instant-read meat thermometer(Target temps: rare ~125°F, medium-rare ~130-135°F, medium ~135-145°F.)
- Kosher salt(Season generously; salt helps crust and flavor; use 40-60 minutes ahead or just before cooking.)
- Freshly ground black pepper(Adds aroma and heat; can be added before or after searing.)
- Neutral oil with high smoke point (e.g., canola or avocado oil)(Lightly coat the pan to prevent sticking and promote even browning.)
- Butter (optional for finishing)(Add during the last minute for a rich, glossy finish.)
Steps
Estimated time: Total time: 25-40 minutes
- 1
Prepare the steak
Pat the steak dry with paper towels. Generously season with kosher salt and pepper. If you have 60 minutes, salt early to aid crust formation; otherwise season right before searing. Letting the meat come to room temperature for about 20-30 minutes improves oven finishing and crust color.
Tip: Dry surface moisture reduces crust formation; pat dry and avoid crowded seasoning. - 2
Preheat equipment
Place a cast-iron skillet on high heat and allow it to preheat until the surface is just shimmering. If finishing in the oven, preheat to 400-425°F as you prep the steak. Have tongs, thermometer, and a plate ready nearby.
Tip: A properly heated pan is essential for a bold crust and flavor. - 3
Sear the steak
Place the steak in the hot pan; do not move it for 1.5-3 minutes to develop a crust. Flip once and sear the other side for another 1.5-3 minutes. The crust should be dark golden; adjust time based on thickness.
Tip: Use a light amount of oil and avoid flipping too soon to prevent sticking. - 4
Finish in oven
Transfer the pan to the upper rack or finish in a preheated 400-425°F oven until the thermometer hits your target doneness. Thin steaks finish quickly; thicker cuts require more time. Use the thermometer to guide you rather than the clock.
Tip: Pull the steak a few degrees below the target to account for carryover cooking. - 5
Rest and flavor
Remove the steak from heat and rest on a plate for 5-10 minutes. Optional: baste with butter and aromatics during the last minute of resting to deepen flavor. Slice against the grain and serve.
Tip: Resting is as important as searing for juice retention. - 6
Serve and evaluate
Serve with simple sides; observe crust color and interior color to gauge doneness. Note any adjustments needed for future cooks, such as hotter pan, longer sear, or more resting time.
Tip: Taste reveals whether seasoning or crust development needs refinement.
Quick Answers
What cut is best for pan-searing?
Ribeye, New York strip, and sirloin are excellent for pan-searing due to fat content and tenderness. Filet mignon is leaner and benefits from careful heat control to avoid dryness. Start with one of these for reliable results, then experiment with others as you gain confidence.
Ribeye, New York strip, and sirloin work well for pan-searing because of their balance of flavor and tenderness.
Is reverse-searing better than a traditional sear?
Reverse-searing can be advantageous for thick cuts because it more evenly brings the interior to doneness while preserving a good crust. Traditional searing is faster and suits thinner steaks where finish in the oven isn’t necessary.
For thick steaks, reverse-searing gives a more even interior; for thin steaks, a quick sear may be all you need.
How thick should a steak be for best results?
Most home cooks achieve the best results with 1 to 1.5 inches for pan-searing, and 1.5 to 2 inches if you plan to finish in the oven or grill. Thicker cuts require more careful temperature control to avoid overcooking the exterior.
About 1 to 2 inches thick is ideal, depending on your method.
Should I rest steak before or after cooking?
Always rest after cooking. Resting helps juices redistribute, producing a juicier bite. Do not cut immediately; slice after the resting period.
Rest the steak after cooking to keep it juicy.
What internal temperature defines doneness?
Rare around 120-125°F, medium-rare 130-135°F, medium 135-145°F, and well-done above 155°F. Pull the steak a few degrees before reaching the final temp to account for carryover.
Doneness ranges from rare to well-done, with carryover cooking after you remove the steak.
Can you cook steak from frozen?
Cooking from frozen is possible but will take longer and risk uneven doneness. For best results, thaw the steak fully before cooking and dry well to maximize crust formation.
Cooking from frozen is doable, but thaw first for even results.
What finishing touch enhances flavor the most?
A small knob of butter tossed with thyme or garlic during the last minute of searing or resting adds richness and aroma that elevates the crust.
Finish with a little butter and herbs for extra richness.
Watch Video
Top Takeaways
- Choose cuts and thickness to guide method
- Use a hot pan + oven finish for crust and doneness
- Monitor with a thermometer for precision
- Rest the steak before slicing for juiciness
- Season generously and finish with butter/aromatics if desired