What to Cook Chicken Breast: A Practical Guide for Juicy Results
Master how to cook chicken breast for tender, flavorful results with sear-bake, poach, and skillet methods. Temps, resting, and safety tips from Cooking Tips.

You will learn how to cook chicken breast to juicy, safe perfection using sear-bake, poach, or skillet methods. Key requirements: an accurate thermometer, boneless skinless breasts, and time-control for even doneness. The guide covers proven temperatures, resting times, and common mistakes to avoid for dependable results. Whether you bake, pan-sear, or simmer, this answer-oriented approach includes step-by-step actions and safety tips.
What to know before you cook chicken breast
If you're wondering what cook chicken breast, this guide covers the essentials for turning a plain cut into a reliable weeknight staple. The Cooking Tips team emphasizes technique as much as timing, because poor methods can turn a lean breast into dry, chewy meat. We start by outlining what influences juiciness: thickness, surface moisture, and how you finish cooking. Keeping a clean workstation and handling meat safely reduce the risk of cross-contamination. In this context, the question becomes not just about temperature but about the whole process: preparation, controlled heat, and proper resting. According to Cooking Tips, getting these elements right makes all the difference between a bland plate and a dish you're proud to serve. By the end of this section you'll know exactly how to plan your cook and what to expect from each method. Keep in mind that portions vary; for even cooking aim for chicken pieces of similar thickness, and consider brining or marinating if you have a bit more time. This approach aligns with general food safety guidance to prevent bacteria growth and ensure delicious results. With the right tools and timing, you can transform a plain chicken breast into a star component for salads, bowls, tacos, or pastas.
Choosing the right cut and thickness
The size and thickness of chicken breast dramatically affect cooking. A standard boneless, skinless breast can vary in thickness from a thin strand to a thick block; if you cook it as is, your outer surface may dry before the center heats through. The key is to aim for uniform thickness, which reduces cooking time and creates even browning. If your breast is uneven, consider pounding it gently with a meat mallet to a uniform thickness about 3/4 inch to 1 inch. For quick meals, you can also split larger breasts into two thinner cutlets. For most home cooks, choosing breasts that are evenly shaped or sliced into similar thickness helps you predict cook time and texture. This consistency is especially important when you are using sear and finish methods, and it aligns with practical tips from Cooking Tips.
Preparing chicken breast for cooking
Before any heat touches the meat, pat it dry with paper towels to remove surface moisture that can hinder browning. Trim visible fat or sinew, then season or marinate as desired. If you plan to marinate, do so in the refrigerator for 15 to 30 minutes or up to 2 hours for deeper flavor. For pantry-friendly flavor, a simple rub of salt, pepper, and a drizzle of oil works wonders. With chicken, cleanliness matters; wash hands and keep raw chicken separate from other ingredients. If you use a marinade, discard leftover marinade or boil it first to kill any bacteria present. These steps create a better sear and set the stage for a juicy interior.
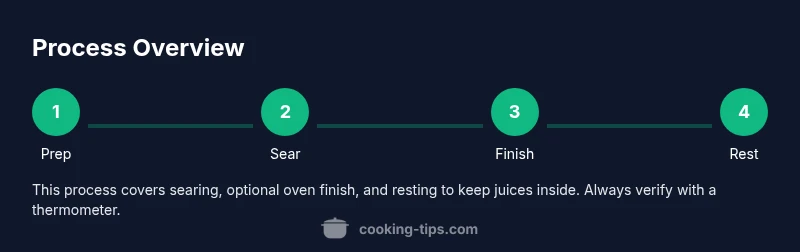
Methods at a glance: searing, poaching, and baking
There are three common approaches to cooking chicken breast, each with distinct advantages. Searing in a hot pan creates a flavorful crust that locks in juices. Poaching yields very tender, lightly seasoned meat that stays moist, ideal for shredding or salads. Baking or roasting is convenient when you are cooking multiple portions and want a hands-off method. For each method, the cooking objective is to bring the inner temperature to 165 F (74 C) without letting the surface burn or the meat dry out. Consider your timing, equipment, and how you intend to use the chicken in meals when choosing a method.
Sear then finish in the oven (cast-iron) method
Start by heating a heavy skillet over medium-high heat with a thin film of oil. When the pan is hot, lay the seasoned chicken gently in the pan and let it form a crust without moving for 2 to 3 minutes. Flip and sear the other side until browned. If the breast is thick, transfer the skillet to a preheated oven to finish cooking until the internal temperature reaches 165 F. Resting briefly after removal keeps the juices from running out when you slice. If you do not have an oven, you can finish on the stove by lowering the heat and cooking the chicken gently until done, but keep a close eye on the thermometer to avoid overcooking.
Poaching for moist, light chicken
Poaching is a gentle method that yields very tender chicken suitable for shredding and adding to soups or salads. Add chicken breasts to barely simmering stock or water, with a pinch of salt and aromatics if you like. Do not let the liquid boil vigorously, as that can toughen the meat. Maintain a gentle simmer until the thermometer reads 165 F in the thickest part. Remove the chicken promptly to prevent overcooking, then let it rest. Poached chicken remains juicy because the moisture stays in the meat rather than evaporating away during a harsh browning process.
Oven times and temperatures by thickness
Oven cooking is forgiving when you adjust heat and monitor doneness. A thinner breast cooks faster, a thick breast requires longer exposure to heat. The simplest approach is to bake at a moderate temperature and verify the center hits 165 F with a thermometer. Carryover cooking after removal will add a few degrees, so anticipate slight increases. If your oven runs hot or unevenly, rotate the pan halfway through and test at intervals to avoid overcooking.
Resting, slicing, and serving suggestions
Resting is a small step with big payoff. After cooking, tent the chicken loosely with foil and let it rest for about 5 minutes. Resting allows juices to redistribute and makes slicing easier. When you slice, cut against the grain for maximum tenderness. Serve with a bright salad, roasted vegetables, or a grain like rice or quinoa. A simple pan sauce or squeeze of lemon can elevate the dish without adding heavy fats. These finishing touches help you move from a basic protein to a memorable plate.
Flavor boosters: herbs, marinades, and sauces
To keep things exciting, vary flavor profiles. A lemon-garlic rub, paprika and cumin for a smoky note, or fresh herbs like thyme and parsley all work well. Marinades that include a splash of acid (vinegar or citrus) help break down muscle fibers for extra tenderness when you have a little extra time. A quick sauce, such as a mustard-lemon glaze or a light yogurt-herb drizzle, adds moisture and brightness without heavy cream. Remember that less is often more; restraint lets the chicken shine as the star.
Troubleshooting common problems
Dry chicken is often the result of overcooking or skipping resting time. If you notice dryness, try shorter cooking times next round, a thinner cut, or a quick rest before slicing. Under-seasoned meat tastes bland, so ensure salt is part of the process. If your crust isn’t browning, increase the heat briefly or pat the surface dry before searing. Uneven cooking can happen with uneven thickness; always aim for uniform pieces and consider pounding to equal thickness. Finally, avoid letting the pan sit with cold meat; it dips the sear and increases cooking time.
Meal ideas using cooked chicken breast
Cooked chicken breast is versatile. Slice into bowls with rice, beans, and salsa; cube for quick salads; or shred for tacos and wraps. Leftover chicken pairs well with simple sauces like garlic butter, pesto, or a bright vinaigrette. Freeze portions for future meals or keep in the fridge for up to 3–4 days. With a handful of pantry staples, you can turn a single chicken breast into multiple dinners without much effort.
Tools & Materials
- Boneless skinless chicken breasts (2 pieces, ~6 oz each)(Even thickness helps cook evenly)
- Kosher salt or fine salt(To season generously before cooking)
- Freshly ground black pepper(For aroma and heat balance)
- Olive oil or neutral oil(For coating and sear)
- Instant-read thermometer(Aim for 165°F (74°C) internal)
- Oven-safe skillet or cast-iron skillet(For sear-then-finish method)
- Baking sheet with rack (optional)(For oven finish without pan crowding)
- Aluminum foil (optional)(To tent and rest the meat)
Steps
Estimated time: 30-40 minutes
- 1
Gather and prep ingredients
Collect all ingredients and pat chicken dry with paper towels. Remove any excess fat and trim uneven edges so pieces cook evenly. Set out thermometer, salt, pepper, and oil while you preheat if using the oven.
Tip: Dry surfaces promote a better sear and crust. - 2
Pound to even thickness
Pat the chicken dry again after trimming. For uniform cooking, gently flatten thick parts with a meat mallet or the flat of a pan until pieces are similar in thickness.
Tip: Uniform thickness reduces hot spots and overcooking. - 3
Season generously
Season both sides with salt and pepper. If you’re using marinades or herbs, apply them now. A light coat of oil helps with browning.
Tip: Season early for deeper flavor. - 4
Sear the chicken
Preheat a skillet over medium-high heat with a thin layer of oil. Place chicken in the pan and sear until a golden crust forms on the bottom, about 2–3 minutes per side depending on thickness.
Tip: Avoid moving the meat too soon to form a crust. - 5
Finish in oven or on stove
If finishing in the oven, transfer the skillet to a preheated oven until the internal temperature reaches 165°F. If finishing on the stove, turn once and cook until done, checking temperature frequently.
Tip: Use a thermometer to avoid guesswork. - 6
Check internal temperature
Insert thermometer into the thickest part without touching bone. Remove when the reading hits 165°F (74°C) and avoid continuing to cook; residual heat will push the temperature a few degrees higher.
Tip: Carryover cooking matters; expect a small rise after removal. - 7
Rest before slicing
Let the chicken rest loosely covered with foil for 5 minutes. Resting lets juices redistribute and keeps slices moist.
Tip: Do not skip resting, or juices spill when cut. - 8
Slice and serve
Slice against the grain for tenderness and arrange on plates with your favorite sides or sauce.
Tip: If you’re serving cold, a light brush of olive oil helps keep moisture. - 9
Flavor ideas for serving
Pair with lemon, garlic, herbs, or a quick pan sauce to elevate the dish without adding heavy fats.
Tip: A splash of stock and a squeeze of lemon goes a long way. - 10
Safety and cleanup
Wash hands and all surfaces after handling raw chicken. Sanitize cutting boards and utensils to prevent cross-contamination.
Tip: Keep raw chicken separate from ready-to-eat foods. - 11
Repeat with confidence
Use this method for weeknight meals; once you master the timing, you can cook chicken breast by feel with the thermometer as your guide.
Tip: Practice makes perfect and reduces anxiety.
Quick Answers
Can I cook chicken breast from frozen?
Yes, you can cook from frozen, but thawing ensures more even cooking; expect longer total time.
You can cook from frozen, but thawing first helps. It may take longer.
What is the safe internal temperature for chicken breast?
The safe internal temperature is 165°F (74°C) according to food safety guidelines.
Cook to 165 degrees for safety.
Should I brine chicken breast?
Brining can improve moisture, especially for lean cuts. If you have time, a brief brine helps; otherwise, season well.
Brining can help, but it's optional.
How can I tell if chicken is done without a thermometer?
Color is not reliable; use a thermometer or cut to check juices run clear. Temperature is best.
Temperature is the reliable test.
Is resting chicken after cooking important?
Yes, resting for about 5 minutes allows juices to redistribute, keeping meat moist.
Resting helps keep juices in.
What methods work best for meal prep?
Searing for flavor and finishing in the oven or poaching for moisture both work well for meal prep.
Seared then finished or poached work for prep.
Watch Video
Top Takeaways
- Preheat, pat-dry, and season for flavor and even browning
- Use a thermometer to hit 165°F (74°C) safely
- Rest 5 minutes before slicing to retain juices
- Choose sear-then-finish methods for best texture
- Avoid overcrowding and handle raw chicken with clean hands