Pot Roast in Oven: Tender and Flavorful Braise
A practical, step-by-step guide to making a fall-apart pot roast in the oven. Learn cuts, searing, braising, timing, and serving tips with reliable guidance from Cooking Tips.

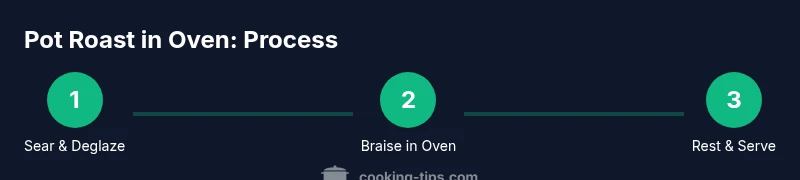
Goal: cook a fall-apart tender pot roast in the oven. Start with a well-marbled chuck roast, brown all sides, then braise in broth, wine, aromatics, and vegetables at 325°F (160°C) for about 2.5–3 hours until fork-tender. Rest before slicing for best texture. Use a heavy Dutch oven for even heat.
What pot roast in oven is and why it works
Pot roast in the oven is a classic method for turning tougher cuts into tender, deeply flavored meals. By searing first, you create a rich fond that dissolves into a braising liquid, while low, steady heat gently breaks down collagen. The result is a juicy roast with a silky sauce that coats potatoes and vegetables. According to Cooking Tips analysis, starting with a well-marbled chuck roast yields the best balance of flavor and tenderness. The technique emphasizes patience, proper moisture, and controlled heat—principles any home cook can master with a reliable plan. This approach shines when you want a comforting, crowd-pleasing dinner with minimal active cooking time. You’ll appreciate the way the meat stays moist, the sauce thickens into a glaze, and the leftovers adapt into simple weekday meals.
Choosing the right cut and ingredients for pot roast in oven
Selecting the right cut is the foundation of success. Chuck roast offers the best balance of fat and connective tissue for long braises, but blade roast is also optionable if you trim excess fat. Look for meat with visible marbling and a nice fat cap to render during browning. For the braise, assemble aromatics like onions, garlic, and carrots, plus a sturdy liquid base such as beef broth. A splash of red wine or a touch of tomato paste can deepen flavor, while potatoes or root vegetables add heartiness. Pantry staples like bay leaves, thyme, and a pinch of kosher salt complete the profile. Practical home cooks often find that a simple, well-rounded ingredient list yields dependable results without needing hard-to-find items. This emphasis on accessible ingredients aligns with Cooking Tips’ practical, everyday cooking guidance.
Searing and building flavor before braising
The flavor base begins with proper browning. Pat the meat dry to promote even color, then sear all sides in a hot pot until a deep brown crust forms. This Maillard reaction builds complex flavors that become the backbone of the final dish. After searing, remove the roast and deglaze the pan with a little liquid to lift the browned bits (fond). Return the meat to the pot, add aromatics, and keep the surface hot enough to maintain gentle sizzling. This step creates a concentrated flavor foundation that will infuse the braise as it cooks. Remember: your goal is color and fond, not a steamed, pale roast.
Building the braise: liquids, aromatics, and vegetables
Create the braising liquid by combining beef broth with aromatics such as onions, garlic, and herbs. Optional flavor boosters like a small amount of red wine, a spoon of tomato paste, or a dash of Worcestershire can add depth. The meat should sit at least halfway submerged in liquid to ensure even moisture and tenderness. Vegetables like carrots and potatoes not only flavor the sauce but also serve as a built-in side—saving you time at the table. If you prefer lighter sauces, you can strain and reduce the braising liquid after cooking. The key is balance: enough liquid to braise without becoming a watery disappointment, and enough aromatics to perfume every bite.
Oven braising technique: time, temperature, and tenderness
Preheat the oven to a moderate temperature (commonly around 325–350°F / 160–175°C). Place the sealed pot in the oven and braise for roughly 2.5–3 hours, checking tenderness with a fork after the initial period. If the meat feels resistant, continue braising in 15–20 minute increments. Maintain a gentle simmer inside the pot to keep the meat moist and prevent scorching. Once tender, remove the roast and let it rest for 15–20 minutes before slicing. Resting allows juices to redistribute, delivering a moister final slice. You’ll end with a succulent roast and a chunky, flavorful pan sauce that can be served straight over potatoes or vegetables.
Serving, leftovers, and safety tips
Slice the roast across the grain for maximum tenderness, and spoon generous amounts of sauce over each piece. Leftovers can be reheated gently or repurposed into beef sandwiches, stews, or casseroles. When storing, cool the braising liquid first, then refrigerate in airtight containers. Reheat gently on the stove or in a low oven to preserve moisture. For safety, refrigerate promptly, reheat to piping hot, and discard any meat that stays out at room temperature for more than two hours. This approach keeps the dish safe and delicious for days after the initial dinner.
Tools & Materials
- Heavy Dutch oven with lid(Cast iron or enameled; 5–7 quart is ideal for most roasts)
- Chef’s knife(Sharp for trimming and slicing; protects the roast’s texture)
- Cutting board(Stable surface for prep)
- Tongs(For turning the roast without piercing the meat)
- Meat thermometer(Probe to check doneness and avoid overcooking)
- Oven-safe rack (optional)(Elevates roast for even browning if your pot allows)
Steps
Estimated time: 2 hours 30 minutes – 3 hours
- 1
Gather ingredients and tools
Collect the roast, aromatics, liquids, and all equipment before you start. Having everything at hand reduces late-step interruptions and keeps the process smooth.
Tip: Check your oven rack height to ensure the Dutch oven fits comfortably inside. - 2
Preheat oven and pat dry
Heat the oven to 325–350°F. Pat the roast dry with paper towels to encourage browning; moisture inhibits crust formation and can steam the meat.
Tip: Drying surfaces is essential for a deep color on the initial sear. - 3
Season and sear the roast
Season generously and sear the roast on all sides in the hot Dutch oven until a deep brown crust forms. Searing locks in flavor and develops the Maillard reaction.
Tip: Do not crowd the pan; work in batches if needed to achieve even browning. - 4
Deglaze and add aromatics
Remove the roast, deglaze the pot with a splash of liquid, then sauté onions and garlic in the fond to build flavor.
Tip: Scrape up browned bits with a wooden spoon to maximize flavor transfer. - 5
Return roast and add braise liquid
Return the meat to the pot, add broth (and optional wine or tomato paste), and arrange any vegetables around the roast. The liquid should come about halfway up the sides.
Tip: Keep liquid at a gentle simmer to prevent scorching at the bottom. - 6
Braise in oven until tender
Cover and slide the pot into the oven. Braise for about 2.5–3 hours, checking tenderness with a fork after 2 hours. Add vegetables if not already present and finish until tender.
Tip: If the meat isn’t fork-tender after 3 hours, continue in 15–20 minute bursts. - 7
Rest and finish sauce
Remove from oven, rest the roast 15–20 minutes, then skim fat and reduce the sauce if needed for a glossy finish.
Tip: Resting helps retain juiciness; slicing too soon drains moisture. - 8
Serve and store
Slice against the grain and spoon sauce over the meat. Store leftovers promptly in airtight containers for safety and freshness.
Tip: Reheat gently to maintain moisture; avoid high heat that dries meat.
Quick Answers
What cut works best for pot roast in the oven?
A well-marbled chuck roast is the classic choice for oven braising. It holds moisture well and breaks down tenderly during cooking.
Chuck roast is the go-to cut for oven braising because it stays juicy and becomes tender with slow cooking.
How long should you braise in the oven?
Most pot roasts braise for about 2.5 to 3 hours at a moderate oven, until the meat is fork-tender. Times can vary with roast size and oven accuracy.
Braise for roughly two and a half to three hours until the meat is fork-tender.
Can I use a slow cooker instead of the oven?
Yes. You can transfer the browned roast to a slow cooker with braising liquid and cook on low for 8–10 hours, or until tender. The flavor builds similarly, though timing differs.
A slow cooker works, but timing and texture can vary from the oven method.
Should I add wine to the braise?
Many cooks add a splash of red wine or even a bit of tomato paste to deepen flavor. If using wine, let it reduce slightly after deglazing before adding liquid.
Wine adds depth; reduce slightly after adding it to the pan.
What should I serve with pot roast?
Classic pairings include mashed or roasted potatoes, carrots, and a simple green vegetable. The pan sauce ties everything together and makes the plate feel complete.
Potatoes and carrots are perfect sides to go with the pan sauce.
How should I store and reheat leftovers?
Cool leftovers promptly, store in airtight containers in the fridge, and reheat gently on the stove or in a low oven to preserve moisture.
Cool, refrigerate, then reheat gently to keep the meat juicy.
Watch Video
Top Takeaways
- Brown meat for rich flavor
- Maintain steady heat during braising
- Season well and deglaze for depth
- Test tenderness with a fork, not time alone
- Rest before slicing and serve with pan sauce