How to Fit a Cooker Element: Step-by-Step Guide for Homes
Learn to identify, replace, and test a cooker element safely with practical steps, tool lists, and testing tips to restore reliable kitchen operation and extend appliance life.

By the end of this guide you will successfully fit a replacement cooker element. You will learn how to identify the correct element, safety precautions, tools, and step-by-step installation. The instructions cover gas and electric cookers, how to disconnect power safely, test the element, and avoid common mistakes. Basic electrical work safety knowledge is assumed; consult a professional for complex wiring.
What is a cooker element and when to replace it
A cooker element is the heating coil or surface element that converts electrical energy into heat for your oven or hob. Over time it may burn out or fail to heat evenly, signaling replacement is needed. Symptoms include no heat at all, intermittent heat, strange noises, or visible damage. According to Cooking Tips, recognizing the right replacement starts with matching the model, voltage, wattage, and the physical diameter of the element. Always check the serial/model plate on the appliance and compare to the part you plan to buy. Consulting the manual is essential for compatibility and safety considerations.
Safety first: prep and risk awareness
Safety is the foundation of any electrical appliance repair. Before you touch anything, power is off, the cooker is unplugged or the circuit breaker is switched off, and you have verified there is no current at the terminal with a non-contact tester. Gas cookers add a layer of risk; if you smell gas or hear hissing, leave the area and contact the gas supplier. Wear heat-resistant gloves, tie back long hair, and work in a dry environment. Cooking Tips emphasizes strict adherence to safety protocols to prevent shocks, burns, or fires.
Tools and parts you’ll need (and why)
Having the right tools makes the job safer and quicker. A dedicated tools list ensures you don’t improvise with improvised devices that could damage wiring or the element. Essential items include a screwdriver set (Phillips and flat-head) for panel screws, a non-contact voltage tester to confirm power is off, a multimeter to check resistance if needed, heat-resistant gloves to protect hands, insulating tape for secure wiring, wire cutters/strippers for neat terminations, and the replacement cooker element itself that matches voltage, wattage, and diameter. Store screws and small parts in labeled containers to avoid mix-ups. Cooking Tips recommends checking the appliance manual or model plate before purchasing.
Matching the right element: ratings, sizes, and connectors
Choosing the correct element hinges on matching three core specifications: voltage, wattage, and physical fit. The element must match the appliance’s electrical rating and the diameter of the mounting hole and terminal block. Some cookers use straight terminals, others use angled or clip-on connectors. If you’re unsure, remove the old element carefully and photograph the terminal layout from multiple angles. Compare the photos with the replacement part and cross-check with the model number plate on the back or underside of the cooker. This step reduces the risk of overheating or poor contact.
Preparing the workspace and safety checks
Clear your workspace of cookware and clutter to prevent accidental contact with hot surfaces. Lay a soft mat to protect the cooker surface and gather tools in a bin or tray for easy access. Make sure you have adequate lighting and ventilation, especially when working near gas components. If the cooker is freestanding, move it away from walls so you can access the rear and sides. Finally, re-check that the power is off and the area is dry before you begin routing wires or removing covers.
Step-by-step overview before you start
Before diving into the hands-on work, review the layout of your appliance and the new element’s mounting points. Confirm that the new element matches the old one in electrical rating and connector type. Photograph key wiring connections as a reference, and plan a plan for reassembly to avoid missing screws or misrouted cables. This pre-check helps prevent common mistakes such as cross-wired connections or misaligned panels that can affect heat distribution and safety.
Common mistakes and how to avoid them
Common errors include buying the wrong wattage, mixing up terminal wires, or forcing connectors that don’t fit. Another mistake is neglecting to test for power after reassembly, which can lead to shocks or damage. Always label wires, keep screws organized, and use insulated connectors or heat-resistant tape on exposed conductors. If a connector feels loose, stop and re-seat it rather than forcing it into place. Following a methodical approach reduces rework and improves reliability.
Testing the new element and confirming operation
Testing should occur after reassembly and power restoration. First, visually inspect all wiring for neat routing and no pinched insulation. Reconnect the power at the breaker or plug in the cooker, then turn to a low heat setting to observe response. Check for uniform heating across the element and listen for any abnormal sounds or smells. If the element does not heat or you notice sparks, switch off immediately and re-check connections and ratings. Continuous operation should be smooth and warm without hot spots.
Aftercare and maintenance to extend element life
To extend the life of your cooker element, avoid minimal maintenance routine: clean regularly with non-abrasive cleaners, keep the area around the element dry, and promptly address loose connections or misaligned panels. Periodically inspect for signs of wear or corrosion on terminal posts and replace any worn insulation. Proper handling during installation reduces risk of future failure and keeps cooking performance steady.
Troubleshooting when things go wrong (quick checks)
If the new element fails to heat, verify that the correct part was used and that the circuit breaker is fully on. Inspect wiring for melted insulation or discolored connectors, and test for continuity with a multimeter. If you smell burning insulation, power down immediately and seek professional help. When in doubt about safety, pause and consult a certified appliance technician.
Tools & Materials
- Replacement cooker element (correct model)(Match the model, voltage, wattage, and physical size (diameter))
- Screwdriver set (Phillips and flat-head)(To remove panels and secure terminals.)
- Non-contact voltage tester(Check power is off before touching wires.)
- Multimeter(Test continuity and element resistance if needed.)
- Heat-resistant gloves(Protect hands when handling hot components.)
- Insulating tape or ceramic tape(Insulate exposed connections.)
- Wire cutters/strippers(Trim leads neatly if needed.)
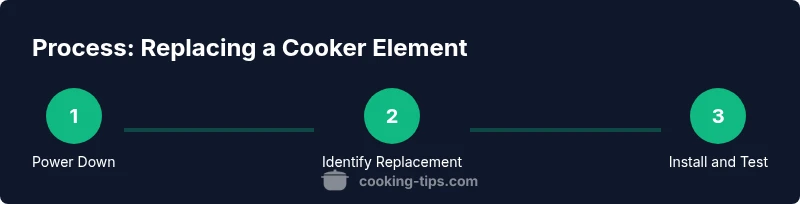
Steps
Estimated time: 60-90 minutes
- 1
Power off and verify zero volts
Turn off the circuit breaker and unplug the cooker if possible. Use the non-contact tester to confirm there is no live current at the terminal area before touching any wires. This reduces the risk of electric shock and protects you during disassembly.
Tip: Double-check the entire circuit is off; some ovens share circuits with other appliances. - 2
Identify the correct replacement element
Locate the model number plate on the cooker and note voltage, wattage, and diameter. Compare these specs with the replacement part and ensure terminal type matches. Take photos of the old element’s connections as a reference for reassembly.
Tip: Photographs make reassembly faster and less error-prone. - 3
Disconnect and remove the old element
Access the element by removing the back or bottom panel as required. Label wires and note their positions, then carefully disconnect each terminal. Remove mounting screws and slide the old element out without tugging on fragile wiring.
Tip: Keep screws in a labeled container to avoid mix-ups. - 4
Prepare and connect the new element
Attach any mounting brackets to the new element and connect the wires to the correct terminals. Use insulated connectors and secure with clips or heat-resistant tape. Ensure connections are tight but not overtightened to avoid damaging the terminals.
Tip: Avoid bending wires sharply; create a gentle curve to prevent future wear. - 5
Reassemble the cooker and restore power
Reinstall covers and panels, then reconnect the power supply. Make sure panels are seated properly to avoid snagging and ensure a neat wire layout.
Tip: Do not overtighten screws; misalignment can crack panels. - 6
Test the installation
Power the cooker back on and run a low-heat test to confirm reaction. Check for heat at the element and listen for unusual noises or smells. If everything is normal, gradually test at higher settings to confirm stable performance.
Tip: If you detect any abnormal heat or smells, power down and re-check connections.
Quick Answers
Can I replace a cooker element myself?
Yes, if you have basic electrical safety knowledge and the correct replacement element. Follow a step-by-step guide and disconnect power before starting.
Yes, you can replace it yourself if you follow safety steps and use the right part.
How do I know which element to buy?
Check the model number plate, voltage, wattage, size (diameter), and terminal type. Compare with the replacement part and consult the appliance manual for exact specifications.
Check model number, voltage, wattage, and size to choose the right element.
Is it safe to test the cooker while replacing?
Do not test while the element is disconnected. Test only after reassembly and power is restored to avoid shocks and damage.
Only test after you’ve reassembled and powered the cooker.
What if the new element heats slowly or inconsistently?
Ensure all connections are tight and voltage matches the rating. Check for damaged wiring or improper mounting that could affect heat distribution.
Make sure connections are tight and the voltage matches the part.
Who should I call if I can't do it safely?
If you’re unsure about wiring, ratings, or safety, contact a qualified appliance technician or electrician. Do not risk injury or fire.
If you’re unsure, call a pro for safety.
Watch Video
Top Takeaways
- Verify compatibility before buying.
- Power down safely before starting.
- Follow exact wiring connections and labeling.
- Test heat after installation to confirm operation.
- Seek professional help if unsure about safety or compatibility.