Cook Steak with Cast Iron: A Practical How-To
Master the cast-iron steak technique with a hot sear, crust, and juicy center. This step-by-step guide covers prep, searing, resting, and finishing touches for home cooks.

By the end you will cook a perfect steak using a cast-iron skillet: hot sear, crust, and juicy center. Gather a cold steak, a hot skillet, high-smoke-point oil, salt, pepper, and a thermometer. The guide covers prep, searing, basing, resting, and plating for restaurant-quality results at home.
Why Cast Iron Is Ideal for Steak
Cast iron is renowned for its heat retention and even browning. A well-seasoned pan creates a natural nonstick surface that develops a deep, flavorful crust when heated to the right temperature. Cooking Tips emphasizes that cast iron maintains consistent heat even when fat and juices hit the surface, which minimizes temperature spikes that can toughen meat. In practice, a properly preheated skillet yields a crust that stays intact as you flip and baste, helping your steak stay juicy inside while developing complex flavors on the outside. This is why many home cooks reach for cast iron as their default pan for steaks.
- Heavier pans store heat better, producing better crusts.
- A well-seasoned surface adds flavor and helps prevent sticking.
- Cast iron tolerates very hot temperatures for a quick, flavorful sear.
Choosing the Right Steak and Prep
Selecting the right cut and preparing it correctly are the foundations of a great cast-iron steak. Look for good marbling, which signals juiciness and flavor. Pat the steak dry with paper towels to remove surface moisture that could steam the meat instead of searing. Let the steak equalize to room temperature for a short period before hitting the pan to promote even cooking. The Cooking Tips team recommends avoiding overly wet surfaces and focusing on proper patting and dryness for a crisp crust. Remember that salt early can draw out moisture; salting again just before searing helps form that crust while preserving juiciness. In terms of seasoning, coarse salt and fresh ground pepper are reliable, simple enhancements that highlight the beef’s natural flavors.
- Marbling is a key indicator of flavor and juiciness.
- Pat dry to ensure a crusty surface.
- Let the meat rest briefly at room temperature for even cooking.
- Salt close to cooking time for optimal crust development.
Preheating and Seasoning for a Great Crust
Preheating the cast-iron pan is step one of achieving a flawless crust. Heat the pan until it is hot enough to shimmer and lightly smoke when oil is added. This signals the surface has reached the Maillard reaction zone, where amino acids and sugars browns proteins into that savory crust. Lightly oil the steak surface or the pan with a high-smoke-point oil, then season generously with salt and pepper. If you’re using butter for flavor, add it toward the end of cooking to avoid burning. The rationale behind the searing approach is simple: a hot surface locks in juices and creates a crust that adds texture and depth. Cooking Tips stresses the value of patience here—resist the urge to move the meat too soon. A proper sear requires uninterrupted contact.
- High heat is essential for crust formation.
- Oil choice matters for smoke points and flavor.
- Seasonings should be added with care to avoid burning.
- Patience during searing yields better texture and browning.
The Sear and Build Flavor: The Core Technique
Searing is the core technique for a cast-iron steak. Place the steak gently in the hot pan and let it cook undisturbed until a deep crust forms on one side. Flip and baste with melted fat and aromatics if you’re using them, which adds flavor and promotes even browning. The goal is to create a rich, caramelized crust while preserving a pink or warm center, depending on your preferred doneness. Use a thermometer to monitor internal temperature without cutting into the meat, which helps maintain moisture. If the steak is thick, you may finish in the oven briefly to ensure even doneness throughout. The Cooking Tips team notes that cast iron’s heat retention makes even thick cuts feasible without scorching.
- Let the first side form a crust before turning.
- Basting with fat and aromatics enhances flavor and moisture.
- A thermometer helps avoid overcooking.
- Finishing in the oven is an option for thicker cuts.
Finishing Touches: Basting, Rest, and Temperature
After reaching the desired crust, reduce heat and continue cooking while occasionally basting. Resting the steak is crucial; it allows juices to redistribute and the interior to finish cooking gently. Slice against the grain for maximum tenderness and serve promptly with simple accompaniments that let the steak shine. For flavor enhancements, finish with a small pat of butter, a squeeze of lemon, or a light sprinkle of finishing salt. The end result should be a well-balanced, juicy interior with a robust crust that resonates with the beef’s natural flavors.
- Resting improves juiciness and texture.
- Slicing against the grain increases tenderness.
- Finishing salt or butter can elevate the final flavor.
Common Mistakes and How to Avoid Them
Many home cooks stumble at the basics: not preheating long enough, crowding the pan, or turning the steak too early. Ensure your pan is hot before adding meat, and avoid overcrowding to keep the sear intense. Patience during the initial sear is essential; moving the steak too soon prevents crust formation. Keep a steady flame and have all tools ready before you begin. If your pan starts to smoke excessively, lift the pan momentarily to cool the oil and reduce heat. These small adjustments make a big difference in crust quality and juiciness.
- Preheat thoroughly and avoid crowding.
- Don’t rush the sear; let the crust form.
- Manage smoke and heat to prevent burning.
Authoritative Sources
For guidelines on safe handling and cooking temperatures, you can consult the following sources:
- https://www.fsis.usda.gov/food-safety/safe-food-handling-and-preparation/meat-and-poultry/meat-preparation
- https://www.fda.gov/food/buy-store-serve-safe-food/food-safety-connections
- https://extension.illinois.edu/food-safety/cooking-meat-cast-iron-skillets
Variations and Troubleshooting
If you prefer a butter-basted finish, add butter and garlic toward the end of cooking and tilt the pan to spoon the melted butter over the steak. For thinner cuts, reduce searing time and monitor the interior with a thermometer for your preferred doneness. If the crust isn’t as deep as you’d like, you can briefly re-crisp the surface on higher heat after resting the meat. For even more flavor, consider finishing with fresh herb sprigs or a light drizzle of pan juices over the plate.
- Butter basting adds aroma and richness.
- Adjust searing time based on steak thickness and desired doneness.
- Rest and re-crisp if needed for a deeper crust.
Tools & Materials
- Cast-iron skillet(Heavy, oven-safe skillet; well-seasoned if possible.)
- Tongs(Long-handled for safe turning and lifting.)
- Thermometer(Instant-read preferred for accurate doneness.)
- Oil with high smoke point(Avocado, refined peanut, or grapeseed oil.)
- Kosher salt(Coarse salt for crust formation.)
- Freshly ground black pepper(To taste.)
- Butter (optional)(For basting toward the end.)
- Paper towels(Pat the meat dry before searing.)
- Oven or rack (optional)(For finish if steak is thick.)
Steps
Estimated time: 30-40 minutes
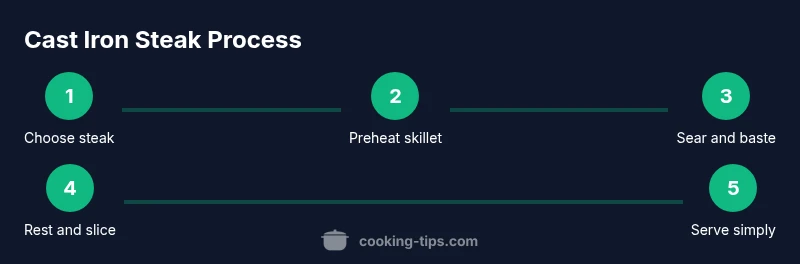
- 1
Choose and prep the steak
Select a well-marbled cut and pat dry with paper towels. Allow the steak to come closer to room temperature for even cooking. Season lightly with salt and pepper just before searing for a crisp crust.
Tip: Patience here pays off: a dry surface forms a better crust. - 2
Preheat the cast iron
Place the skillet on medium-high heat and let it come to a hot shimmer. You should see a slight sheen of oil on the surface before adding the meat.
Tip: A properly heated pan prevents sticking and builds crust faster. - 3
Season generously
Season the steak on all sides with coarse salt and pepper. If using, lightly oil the surface or the pan to aid browning.
Tip: Seasoning too early can draw moisture; season right before searing. - 4
Sear the steak
Lay the steak away from you in the pan for a clean crust. Do not move it for 2–3 minutes until a deep crust forms; flip and sear the other side.
Tip: A crusted surface seals juices and flavors in. - 5
Baste and finish
Optionally baste with butter and aromatics during the last minute or two to add richness. If the steak is thick, finish in a hot oven for even doneness.
Tip: Basting adds depth; keep heat controlled to avoid burning butter. - 6
Rest and slice
Let the steak rest briefly before slicing to redistribute juices. Slice against the grain for tenderness and serve promptly.
Tip: Resting is essential; skip it and you’ll lose juiciness.
Quick Answers
What makes cast-iron a good choice for steak?
Cast iron provides superior heat retention and an even sear, creating a crusty exterior while maintaining a juicy interior. A well-seasoned pan adds flavor and prevents sticking when properly heated.
Cast iron lasts a lifetime and helps you get a crusty steak with a juicy center. It holds heat so the surface browns evenly.
Should I bring the steak to room temperature before cooking?
Yes, letting the steak rest briefly at room temperature helps it cook more evenly and prevents a cold center from delaying searing.
Let the steak sit out briefly to take the chill off before you cook for a more even result.
Can I finish thicker steaks in the oven?
For thicker cuts, finishing in a hot oven helps ensure the interior reaches your desired doneness without overcooking the crust.
If it’s thick, finish in a hot oven so the inside cooks evenly without burning the crust.
What oil should I use for the sear?
Choose a high smoke point oil like avocado or refined canola. These oils tolerate high heat without smoking excessively and don’t impart strong flavors.
Pick a neutral oil with a high smoke point to get a clean sear.
Is butter safe with cast iron?
Butter adds flavor but can burn at high heat. If using butter, add it toward the end of cooking or baste after the initial sear.
Butter is great for flavor, just don’t let it burn; add later if needed.
How long should I rest the steak?
Rest the steak briefly after cooking to allow juices to redistribute. A 5–10 minute rest is common, depending on thickness.
Let it rest a few minutes before slicing so juices settle back in.
Watch Video
Top Takeaways
- Pat dry and season well for crust development
- Preheat the skillet to ensure a strong sear
- Sear, baste if desired, and rest before slicing
- Use a thermometer to hit desired doneness
- Finish with a simple plating approach to let the beef shine