Air Fryer Whole Chicken: A Complete Step-by-Step Guide
Learn to air fry a whole chicken with a reliable, step-by-step method. Prep, season, cook at the right temperature, and rest for a crisp-skinned, juicy main dish with minimal oil. Includes tips, FAQs, and safety notes.

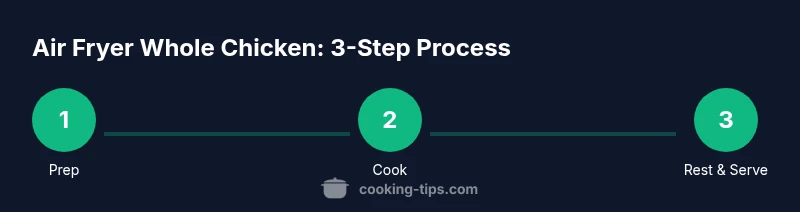
With this guide, you’ll air fry a whole chicken that stays juicy inside and develops a crisp skin. You’ll learn proper prep, seasoning, safe temperatures, and cooking times by weight, plus a step-by-step method and troubleshooting tips to avoid common mistakes. The result is a reliable, delicious main dish with minimal oil.
Why the air fryer whole chicken approach works
The air fryer makes weeknight poultry practical by delivering even cooking with significantly less oil than traditional roasting. When you aim for an air fryer whole chicken, you benefit from faster heat transfer, a shorter overall cook time, and skin that browns evenly rather than steaming from trapped moisture. The result is a juicy interior and a crisply browned exterior without the mess of a large oven. In short, this method gives home cooks a dependable, less fussy way to serve a crowd-pleasing centerpiece with minimal cleanup. Throughout this guide you’ll see how airflow, moisture management, and precise temperatures converge to make the air fryer whole chicken reliably delicious.
Choosing the right chicken and prepping for air frying
Start with a bird that fits your air fryer’s basket. Most models handle 3-4 pound chickens, which roast evenly in a single round of air circulation. If you own a smaller air fryer, consider a smaller bird or, for uniform browning and shorter cook times, a spatchcocked chicken that lays flat. Before you begin, remove the giblets, pat the chicken dry, and bring it to room temperature for 15-20 minutes. This short step helps achieve even cooking and a crisper skin. Finally, check the cavity for any residual moisture—this helps the seasonings stick and improves browning.
Seasoning, aromatics, and skin perfection
Flavor starts with a simple seasoning blend: kosher salt, black pepper, paprika, garlic powder, and a touch of onion powder. A light coating of olive oil or cooking spray helps the rub adhere and promotes browning. For extra aroma, stuff the cavity with a half lemon and a few sprigs of herbs like thyme or rosemary. The key to crisp skin is thorough surface dryness and an even oil rub, so don’t skip either step. If you love bold flavors, you can add chili powder or smoked paprika for a deeper color and warmth.
Doneness, safety, and resting for best texture
Cook the chicken until the thickest part of the breast or thigh reaches 165°F (74°C) on an instant-read thermometer. Temperature accuracy is more reliable than time alone, especially with small appliances. Once you reach the target temperature, remove the bird and let it rest for 5–10 minutes. Resting lets juices redistribute, keeping the meat moist while the skin remains crisp. If you’re cooking a very small bird, you may reach the temperature sooner; always verify with a thermometer to avoid undercooking.
Tools & Materials
- Raw whole chicken (3-4 lb)(Ensure internal cavity is clean; plan for 1 chicken per fryer basket)
- Paper towels(For drying skin and cavity surfaces)
- Olive oil or cooking spray(Light coating to aid browning)
- Kosher salt(Season generously but evenly)
- Black pepper(Freshly ground if possible)
- Paprika (sweet or smoked)(For color and flavor depth)
- Garlic powder / onion powder(Optional to boost savory notes)
- Lemon half or wedges(Flavorful aromatics for cavity)
- Fresh herbs (optional)(Thyme, rosemary, or sage)
- Meat thermometer (instant-read)(Confirm 165°F in the thickest part)
- Air fryer rack or trivet(Keep the chicken elevated for even air flow)
- Kitchen twine (optional)(To truss the legs for neat cooking)
- Tongs or spatula(To carefully place and remove the bird)
Steps
Estimated time: 75-110 minutes
- 1
Preheat the air fryer
Preheat the air fryer to 360°F (182°C) for about 5 minutes so the skin begins browning as soon as the chicken enters the basket.
Tip: A hot start improves skin texture and reduces overall cook time. - 2
Remove giblets and neck
Open the cavity and remove any giblets or neck pieces. Rinse briefly if needed and pat dry.
Tip: Discard giblets or save for stock; moisture inside the cavity hinders browning. - 3
Pat the chicken dry
Thoroughly pat the outside and inside surfaces dry with paper towels to promote crisp skin.
Tip: Moisture on the skin steams rather than browns. - 4
Season the cavity
Lightly salt the cavity and add optional aromatics like lemon halves and herbs.
Tip: Seasoning inside boosts flavor from all angles. - 5
Season the exterior
Brush with olive oil and rub evenly with salt, pepper, and paprika or your preferred spices.
Tip: Even coating ensures uniform browning across the bird. - 6
Truss and position
Tie the legs together with kitchen twine and tuck the wings under the bird to prevent flaring.
Tip: Trussing improves even cooking and keeps stuffing in place. - 7
Set up the air fryer basket
Place a rack or trivet in the basket so air can circulate under and around the chicken.
Tip: Avoid placing directly on the basket bottom for better crispness. - 8
Cook to safe temperature
Place the chicken on the rack and cook at 360°F (182°C). Flip halfway through and monitor until the thickest part reads 165°F (74°C).
Tip: Use a thermometer for precision; times vary by chicken size and fryer model. - 9
Rest and serve
Remove the chicken and let it rest 5–10 minutes before carving to redistribute juices.
Tip: Resting yields juicier meat and crisper skin after cutting.
Quick Answers
Is it safe to cook a whole chicken in an air fryer?
Yes. As long as the chicken reaches an internal temperature of 165°F (74°C) in the thickest part, it’s safe to eat. Use a meat thermometer to verify doneness and avoid undercooking.
Yes, air frying a whole chicken is safe when it reaches 165 degrees at the thickest part and you verify with a thermometer.
What size chicken fits in a typical air fryer?
Most home air fryers accommodate 3-4 pound birds for a single batch. For larger models or bigger birds, consider spatchcocking or roasting in batches.
Most air fryers handle a 3 to 4 pound chicken; for bigger birds, spatchcocking helps.
Should I brine the chicken before air frying?
Brining is optional but can help with juiciness. If you brine, keep it short (1-2 hours) and pat dry before seasoning to preserve crispness.
Brining is optional; if you try it, do a short brine and dry well before cooking.
Do I need to flip the chicken during cooking?
Flipping halfway helps the surface brown evenly on all sides. Ensure you flip safely to avoid burns or damage to the basket.
Yes, flipping halfway helps even browning. Be careful handling the hot basket.
What is the recommended internal temperature for cooked chicken?
The safe internal temperature for cooked chicken is 165°F (74°C) in the thickest part of the meat. Always verify with a calibrated thermometer.
Cook until the thickest part reads 165 degrees, verified with a thermometer.
Can I stuff the cavity of the chicken?
Stuffing can impede heat circulation and may not reach safe temperatures. It’s best to keep the cavity empty or use aromatics for flavor only.
Avoid stuffing the cavity when air frying; use aromatics instead.
Watch Video
Top Takeaways
- Preheat and dry the chicken for crisp skin.
- Season inside and out for deep flavor.
- Use a rack and thermometer to ensure even cooking.
- Rest before carving for juicy results.