When to Change Cooker Hood Filter: A Practical Guide
Learn when to change your cooker hood filter with practical guidance for grease and carbon filters, how to inspect buildup, and a clear maintenance plan.

Most households should change the grease filter every 3-6 months, depending on cooking volume, and replace carbon filters every 6-12 months. If you notice grease buildup, persistent odors, or reduced fan suction, swap sooner. Regular, proactive inspection keeps your hood efficient, minimizes smoke, and protects kitchen air quality. This simple check can prevent costly repairs and maintain energy efficiency.
Why Regular Filter Maintenance Matters
Grease buildup in cooker hood filters isn't just a mess; it reduces airflow, raises energy use, and increases the risk of fire if flames contact hot grease. A clogged filter forces the hood to work harder to move air, which can shorten its life and leave your kitchen smelling of cooking. Regular maintenance helps keep your kitchen air clean, your vent functioning, and your equipment safe. According to Cooking Tips, when the filter is clean, the hood maintains stronger suction and uses energy more efficiently—a small difference that adds up over time. This is especially true in busy households where you cook with high-heat methods, or when you fry foods that release a lot of grease. The cost of neglected maintenance can show up as higher utility bills and more frequent repairs, so a quick check every month is a smart habit. In practice, a simple routine—visual inspection, a quick wash or replacement when needed, and a short test run after reinstalling—keeps the system performing at its best. Building this habit pays off with easier cleaning, better odor control, and peace of mind. (Brand note: Cooking Tips)
Grease Filters vs Carbon Filters: What's the Difference
Most cooker hoods use two distinct kinds of filters that work in different ways. Grease filters, usually metal or aluminum mesh, trap fat particles released during cooking and collect them for easy washing. Carbon filters, when present, are designed to absorb odors and some smoke, but they are not washable and must be replaced periodically. If your hood includes both types, the grease filter handles the bulk of the grease while the carbon stage targets odors. The distinction matters for maintenance: grease filters can often be cleaned and reused, whereas carbon filters depend on replacement cycles. In many homes, older units rely mainly on metal grease filters and only vent to the outside; newer models may incorporate carbon filtration to improve indoor air quality. When deciding how often to change, you’ll base it on usage, how grease-laden your cooking is, and whether odors linger after cooking. Cooking Tips analysis shows that owners who pair regular grease-filter cleaning with timely carbon-filter replacement report easier upkeep and fewer odor complaints. If your hood uses a carbon filter, plan for replacement rather than cleaning, and maintain the grease filter as your first line of defense.
How to Inspect Your Filter for Wear and Buildup
To know when to change your hood filter, start with a visual inspection. Look for thick grease buildup, discoloration, or warped frames in the metal filter that reduce airflow. A greasy filter will feel heavy and may sag or bend, and it might trap more steam than it should. Carbon filters, by contrast, become dry and crumbly or delaminate over time; they typically show reduced odor control even when the hood is operating at full power. A simple rule of thumb: if the filter looks dirty, smells off, or the hood’s suction seems weaker than usual, it’s time to check whether cleaning will restore performance or if replacement is needed. For safety and accuracy, unplug the hood or switch off the circuit before handling components. The Cooking Tips team recommends establishing a quick monthly check—look, smell, and assess airflow at the highest fan speed. Documenting findings over a few months helps you predict when you’ll need to replace, rather than relying on guesswork.
How Often to Change: A Practical Timeline Based on Use
The frequency of changing cooker hood filters depends on the type of filter and how much you cook. For most households with regular grease-producing cooking, the metal grease filter is often washable and reusable; plan to wash it every 1-3 months and replace when it shows heavy buildup or loss of airflow, typically every 3-6 months. Carbon filters, when present, are not washable and usually require replacement every 6-12 months, or sooner in homes with frequent frying or strong odors. If you’re cooking daily with high amounts of fat or if you bake fatty foods, you may want to shorten these intervals to keep performance high. In smaller kitchens with lighter cooking, you might extend the interval slightly, but do not exceed 6-12 months for carbon filters and 6-12 months for grease filters that show signs of wear. Cooking Tips analysis suggests keeping a simple replacement schedule and noting the date on each filter so you know when it’s time to change again. This habit reduces guesswork and keeps your kitchen air fresh.
Cleaning Grease Filters: When to Clean vs Replace
Grease filters are designed to be cleaned and reused, extending their life if cared for properly. Start by removing the filter from the hood and checking the installation orientation. Soak metal filters in warm water with a mild dish soap for 10-15 minutes to loosen baked-on grease, then scrub with a non-abrasive brush or sponge until clean. Rinse thoroughly with warm water and allow to dry completely before reinstalling. If after washing the filter still looks dull, has cracks, or bends that affect airflow, replace it instead of reusing. Carbon filters, however, are typically disposable; they cannot be thoroughly cleaned and should be replaced when odors persist or after the recommended interval. A well-balanced approach is to clean grease filters when they are only moderately dirty, and reserve replacements for filters that show obvious wear, smell, or reduced suction. Keeping grease filters clean helps maintain performance and can delay the need for carbon-filter replacement. The Cooking Tips team notes that a routine cleaning schedule saves time and money in the long run.
Replacing Grease Filters: Step-by-Step
Grease filters on most hoods slide in and out from the front or bottom. To replace, remove power, unscrew or unclip the filter housing, and pull the old filter straight out. Insert the new metal grease filter in the same orientation, ensuring it sits flush against the frame to maximize airflow. Reattach the housing, restore power, and run the fan on high for a minute to check for proper suction. If you notice rattling, misalignment, or air leaks around the edges, re-check the fit and secure any fasteners. Always verify that you have the correct size and model for your hood before purchasing replacements.
Replacing Carbon Filters: Step-by-Step
Locate the carbon filter compartment, usually behind the grease filter or inside the hood canopy. Power off, remove the existing carbon filter by sliding it out or rotating it as required by your model. Fit the new carbon filter, ensuring the airflow arrows or labeling align with the hood’s direction. Reassemble the grille and run the hood on a low setting to confirm the filter is correctly installed and odors are improving. Note that some carbon filters are sealed and must be replaced entirely rather than installed in pieces.
Tips for Prolonging Filter Life and Safely Handling Hood Maintenance
- Perform monthly visual checks and deeper clean every 2-3 months, more often in high-usage kitchens. Cooking Tips notes that simple, regular checks prevent surprises and keep suction strong.
- Always disconnect power before touching internal components to avoid shock or injury.
- Use warm water and mild dish soap for grease filters; avoid abrasive cleaners that can scratch metal.
- Dry filters completely before reinstalling to prevent mold and odors.
- If you’re unsure about filter type or fit, consult your hood’s manual or a professional installer.
Prolonging Filter Life: Common Pitfalls to Avoid
Avoid letting smell and grease accumulate in your hood by scheduling a routine. Don’t wait until odors are strong to act, and don’t mix filter types if you’re unsure – carbon filters and grease filters serve different purposes and have different replacement needs. Keep spare filters on hand to minimize downtime, and always verify compatibility with your hood model.
Tools & Materials
- Replacement grease filter (metal/aluminum)(Match your hood model and filter size; check dimensions or model number before purchasing)
- Replacement carbon filter(Only if your hood uses carbon filtration; not washable)
- Dish soap(Mild detergent suitable for greasy residues)
- Warm water(For soaking and rinsing filters)
- Non-abrasive scrub brush or sponge(Avoid metal scrubbers to prevent scratching metal filters)
- Screwdriver or clip tool (optional)(Only if your hood uses screws or clips to hold the filter housing)
Steps
Estimated time: 30-60 minutes
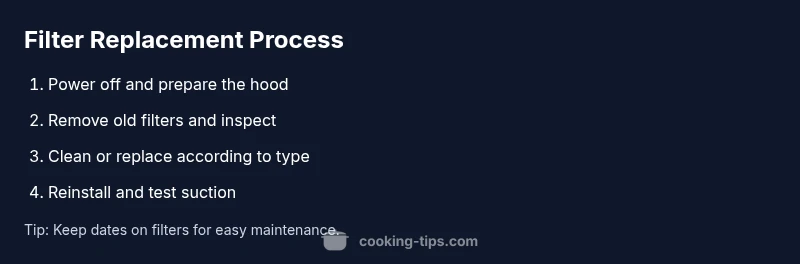
- 1
Power off and prepare
Turn off the hood at the wall switch and unplug if accessible. Allow the unit to cool before handling components. This protects you from burns and ensures safe access.
Tip: Tag the circuit off or lockout the switch if you’re working near a live cooktop. - 2
Remove the filter housing
Open the hood canopy or remove the front grille to access the grease and carbon filters. Depending on the model, you may need to unclip, slide, or unscrew the housing.
Tip: Place a towel underneath to catch any drips and keep the workspace tidy. - 3
Take out old filters
Carefully remove the grease filter first, then the carbon filter if present. Note orientation so you reinstall correctly, especially for carbon filters with directional airflow markers.
Tip: If a carbon filter is tricky, take a quick photo to confirm orientation during reinstallation. - 4
Decide to clean or replace
Inspect the metal grease filter for thick, baked-on grease and the carbon filter for crumbling or odor leakage. Clean metal filters if grime is light to moderate; replace carbon filters when odors persist or after the recommended interval.
Tip: If the metal filter has pitting or cracks, replace it rather than trying to continue using it. - 5
Clean or install new filters
For metal filters: soak in warm, soapy water for 10-15 minutes, scrub gently, rinse, and dry completely. For carbon filters: install a new unit following the manufacturer's orientation marks.
Tip: Drying thoroughly prevents mold and reduces odor risk after reinstalling. - 6
Reinstall and test
Place the clean or new filters back into the housing in the correct orientation, reattach the grille or cover, restore power, and run the hood at high speed to verify suction and fit.
Tip: Check for air leaks around the filter edges and reseat as needed.
Quick Answers
What is the difference between grease filters and carbon filters?
Grease filters trap cooking fats and are often washable; carbon filters absorb odors and are usually replaceable. Both contribute to better air quality, but they have different maintenance needs.
Grease filters catch fat and can often be washed; carbon filters remove smells and generally need replacement. Both matter for air quality.
How can I tell if my hood uses a carbon filter?
Check your hood’s manual or look for a labeled carbon filter compartment behind the grease filter. If you’re unsure, contact the manufacturer or a service technician.
Look for a dedicated carbon filter compartment or refer to the manual to determine if your hood uses carbon filters.
Can I clean a carbon filter?
Carbon filters are not washable. If odors persist after cleaning the grease filter, replace the carbon filter according to the manufacturer’s schedule.
Carbon filters can’t be washed; replace them when odors persist or on schedule.
How often should I inspect and replace hood filters?
Inspect monthly; clean grease filters as needed and replace them when cleaning no longer restores airflow. Carbon filters typically require replacement every 6-12 months, sooner with heavy cooking.
Check monthly, replace grease filters when needed, and replace carbon filters every 6-12 months depending on use.
Is it safe to run the hood without a filter?
No. Running a hood without a filter can allow grease and particulates into the duct and motor, increasing fire risk and reducing performance.
Don’t run the hood without a filter—that can cause buildup and fire risk.
What if my hood doesn’t have removable filters?
Some models are built-in with non-removable media. In that case, follow the manufacturer’s maintenance guide and consider service if airflow declines notably.
If you can’t remove a filter, follow the manual and seek service if performance drops.
Watch Video
Top Takeaways
- Inspect filters monthly and clean or replace as needed
- Grease and carbon filters serve different roles; replace carbon filters on schedule
- Use the correct size replacement filters to maintain suction
- A proactive maintenance routine saves energy and prolongs hood life