Easy Sugar Cookie Recipe: Quick, Soft & Delicious
Learn an easy sugar cookie recipe with simple ingredients, quick dough handling, and decorating ideas. Perfect for holidays, gifting, or everyday treats.

You will learn to make an easy sugar cookie recipe with a reliable dough, short chilling time, and practical tips. This guide covers simple ingredients, essential tools, step-by-step instructions, and pro adjustments for texture and flavor. By following these steps, you’ll produce bake-perfect sugar cookies suitable for decorating or gifting.
What makes this sugar cookie recipe easy
This sugar cookie recipe is designed for home cooks who want dependable results with minimal fuss. It uses pantry staples, a forgiving dough that tolerates slight overmixing, and a brief chilling step that helps the cookies hold their shape. By following a clear sequence of steps and measuring by volume or weight, you can achieve consistent texture without guesswork. According to Cooking Tips, simple recipes with a short process and predictable outcomes are especially appealing to busy households, holiday bakers, and novice cooks who want confidence in the kitchen. This guide emphasizes practical methods, not gimmicks, so you can reuse the same technique with other cookie recipes.
Core ingredients that yield reliable texture
The base of a great sugar cookie is a balance between fat, sugar, and flour. Use unsalted butter for flavor control and creaming to introduce air that keeps the cookies tender. Granulated sugar helps with spread and texture, while a touch of vanilla adds warmth. All-purpose flour provides structure, and a pinch of baking powder gives a gentle lift so the centers stay soft. Salt sharpens sweetness and enhances flavor. If you prefer a crisper edge, a touch more flour or a minute longer bake can help. For texture consistency, bring ingredients to room temperature before mixing, and weigh ingredients if you can for precision. According to Cooking Tips, room-temperature ingredients mix more evenly, producing a uniform dough.
Tools and pantry prep
Gather a kitchen-scale or measuring cups, a sturdy mixing bowl, an electric mixer or a wooden spoon, a rolling pin, parchment paper or silicone mats, and a couple of baking sheets. Preheat your oven to 350°F (175°C) and line sheets with parchment. Having tools ready minimizes interruptions and helps you maintain dough temperature. Keep ingredients measured and ready to go so you can move from wet to dry components smoothly. The right tools reduce cleanup time and improve consistency, which is something the Cooking Tips team emphasizes for home bakers seeking reliable results.
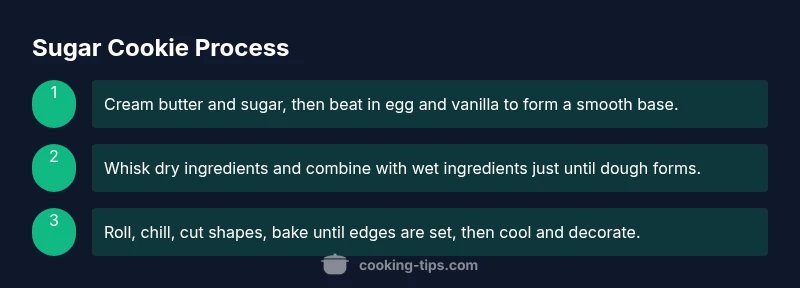
Shaping, chilling, and baking: practical steps
Begin by creaming butter and sugar until light and fluffy, then beat in egg and vanilla. In a separate bowl, whisk dry ingredients and combine with the creamed mixture just until a cohesive dough forms. Wrap the dough and chill for at least 30 minutes to prevent spreading. Roll to about 1/4 inch thick between parchment sheets, cut shapes, and place on prepared sheets. Bake 8–10 minutes until edges barely color. Cool on a rack before decorating. Chill time and proper thickness are key to clean edges and soft centers. Remember to avoid overworking the dough to maintain tenderness.
Decorating ideas and flavor variations
Once cooled, cookies can be decorated with royal icing, simple glaze, or colored sugar. For a classic look, use a light dusting of powdered sugar or a thin vanilla glaze. Flavor variations include lemon zest, almond extract in place of vanilla, or a pinch of cinnamon for a spiced note. You can also swap part of the sugar for brown sugar for a richer flavor and a slightly chewier texture. Store-bought sprinkles or homemade decorations both work well, but allow icing to dry fully before stacking.
Troubleshooting common issues
If cookies spread too much, ensure the dough is properly chilled and rolled to the correct thickness. Under-creaming can lead to grainy texture; if this happens, mix a bit longer to introduce more air. If the centers are pale and edges brown quickly, bake at a slightly lower temperature or shorten bake time. For dry, crumbly dough, add a teaspoon of milk or water to moisten and re-knead gently. If dough sticks to the rolling pin, chill a bit longer or wrap in plastic to reduce sticking. These fixes keep the process approachable for beginners and helpful for experienced bakers.
Make-ahead, storage, and gifting
Dough can be wrapped tightly and frozen for up to three months; thaw in the fridge before rolling. Baked cookies keep at room temperature in an airtight container for up to a week. Layer cookies with parchment to prevent sticking and maintain their shape for gift-giving or party trays. You can also bake large batches, freeze after cooling, then decorate later for flexible holiday planning. This approach saves time and keeps quality consistent for busy cooks.
Recipe variants: dairy-free, gluten-free options
To make dairy-free cookies, substitute softened dairy-free butter or coconut oil in place of butter. For gluten-free versions, use a 1:1 gluten-free flour blend with a touch more xanthan gum if needed to stabilize structure. Some blends behave differently; test with a small batch first to gauge spread and texture. Almond or oat milk can replace a portion of milk if needed for moisture balance. Each substitution changes the crumb slightly, but careful handling preserves the light, tender character of classic sugar cookies.
Authority sources
Reliable guidance for cooking safety and best practices comes from major public health and extension resources. The FDA outlines safe kitchen handling and labeling; the CDC provides food safety guidelines and cross-contamination considerations; the University of Maryland Extension offers practical home baking safety tips and recipe adaptation advice. Rely on these sources to inform approaches in your kitchen and adapt to dietary needs with confidence.
Tools & Materials
- All-purpose flour(2 1/2 cups (315 g) plus extra for dusting)
- Granulated sugar(1 cup (200 g) for dough; extra for rolling)
- Unsalted butter(1 cup (226 g), softened)
- Eggs(1 large egg)
- Vanilla extract(2 teaspoons)
- Baking powder(1/2 teaspoon)
- Salt(1/4 teaspoon)
- Parchment paper(For lining sheets)
- Rolling pin(Nonstick if possible)
- Cookie cutters(Assorted shapes)
- Milk or water(1-2 tablespoons for dough if needed)
Steps
Estimated time: 60-75 minutes
- 1
Cream butter and sugar
Beat butter and sugar until light and fluffy, about 2-3 minutes. Scrape bowl as needed to ensure even texture. This creates air in the dough for tender cookies.
Tip: Use room-temperature butter for best aeration. - 2
Add eggs and vanilla
Beat in egg and vanilla until fully incorporated and smooth. This base helps emulsify fat and water for a uniform dough.
Tip: Do not overbeat after adding eggs to avoid toughness. - 3
Whisk dry ingredients
Combine flour, baking powder, and salt in a separate bowl. Stir to ensure even distribution of leavening.
Tip: Sift for a lighter crumb if you want ultra-soft cookies. - 4
Combine wet and dry
Gradually mix dry ingredients into the creamed mixture until just combined. Do not overmix; stop when flour streaks disappear.
Tip: Dough should come together and look slightly glossy. - 5
Chill the dough
Pat dough into a disk, wrap, and chill at least 30 minutes. Chilled dough holds its shape and prevents spreading.
Tip: Chilling is key for defined edges and clean cuts. - 6
Roll and cut
Roll dough between parchment sheets to 1/4-inch thickness. Cut shapes and arrange on prepared sheets.
Tip: Dust flour lightly to prevent sticking but avoid over-flouring. - 7
Bake until edges set
Bake in a preheated 350°F (175°C) oven for 8-10 minutes, or until the edges are just lightly golden. Centers will look soft but firm up as they cool.
Tip: Avoid overbaking to keep cookies soft. - 8
Cool and decorate
Allow cookies to cool on sheet for 2 minutes before transferring to a rack. Decorate once completely cooled.
Tip: Decorating before fully cooled can cause smearing. - 9
Store for freshness
Store in airtight containers at room temperature up to 5-7 days or freeze for longer storage.
Tip: Place parchment between layers to prevent sticking.
Quick Answers
Can I freeze the dough for later?
Yes. Wrap dough tightly and freeze for up to 2-3 months. Thaw in the refrigerator before rolling and baking.
Yes, you can freeze the dough for later. Thaw in the fridge before rolling and baking.
Can I make this gluten-free?
You can substitute a gluten-free self-rising flour blend for the all-purpose flour, but results may vary. Start with a 1:1 substitution and adjust as needed.
You can try a gluten-free flour blend, but expect some texture differences.
Why did my cookies spread too much?
Butter that’s too warm or dough that’s too soft will cause spreading. Chill the dough and use the correct thickness for the best shape.
If they spread too much, chill the dough and ensure proper thickness.
Can I frost before cookies cool?
Frosting while warm can cause bleeding and smearing. Wait until cookies cool completely for best results.
Wait for cookies to cool before icing to avoid bleeding.
What if I don’t have vanilla extract?
You can omit vanilla or substitute almond extract in small amounts for a different flavor profile.
If you’re out of vanilla, a small amount of almond extract works, but start with a drop.
Watch Video
Top Takeaways
- Master an easy dough with simple ingredients
- Chill dough to prevent spreading
- Bake until edges are lightly golden
- Cool before decorating
- Store properly to extend freshness