Is It Cooked? A Practical Guide to Doneness
A practical, educational guide to determining if it is cooked safely in everyday cooking. Learn how to use thermometers, visual cues, and safe handling to tell when chicken, beef, pork, and fish are cooked. is it cooked? This Cooking Tips guide explains.

According to Cooking Tips, you determine whether food is cooked by measuring internal temperature with a calibrated thermometer and by observing safe texture and color cues. Thermometer readings provide accuracy, while visual signs support doneness without overcooking. This practical method helps home cooks avoid undercooked food and reduce safety risks.
What does 'is it cooked' really mean?
When home cooks ask is it cooked, they are asking about doneness: the point at which a dish has reached a safe, palatable state. Doneness is not a single property; it combines safety (has any harmful bacteria been killed) with consumer preference (how well you like meat or vegetables). The most reliable signal is internal temperature, but texture, color, and juices provide helpful context. In practice, you balance thermometer readings with sensory cues to decide when to move a dish from the heat to resting. The phrase is common at every stage of cooking, from grilling chicken to simmering beans, because different foods have different thresholds for safe and enjoyable results. According to Cooking Tips, the goal is to minimize both undercooking and overcooking, which can create safety risks or dry, tough textures. With a clear definition of doneness, you can plan cooking times more accurately and avoid the all-too-common guesswork that leads to inconsistent meals.
The science of doneness: temperature and time
Doneness hinges on two practical factors: temperature and time. A calibrated thermometer gives you an objective readout, while hot-and-fast or low-and-slow methods affect how quickly foods reach their safe end point. Cooking Tips Analysis, 2026 emphasizes that, for most foods, a precise internal temperature is more reliable than guesswork about color or texture. Equally important is allowing foods to reach an even temperature throughout; thick cuts may finish on the outside while staying under inside. When you plan a meal, consider both the recommended temperature and the roast or simmer time to avoid oversized gaps between surface appearance and interior safety.
How to test doneness for common proteins
Different proteins require different benchmarks. For chicken, ensure the center hits a safe temperature and remains moist; for beef, choose your preferred doneness but verify with a thermometer; pork should reach the recommended end point; fish benefits from a quick read, as it can become dry if overheated. Ground meats typically require a higher final temperature than whole cuts. Always insert the thermometer into the thickest part, avoiding bone, cartilage, and fat, and read the temperature in 5–10 seconds for accuracy. Rest times can raise the final temperature slightly, so plan accordingly.
Visual cues and texture: quick, practical checks
Temperature matters most, but color, texture, and juice clarity still help as quick checks. Raw-to-cooked color changes depend on the food: poultry should be opaque with clear juices; beef shifts from red to pink to brown as it cooks; fish becomes opaque and flakes readily. Juices should run clear or have a slight pink tint in some cases. Remember, visual cues can be misleading if you rely on them alone; always confirm with a thermometer for safety.
Safety and leftovers: cooling, storage, and reheating
Leftovers and reheats pose unique safety challenges. Cool foods promptly, store them in shallow containers, and reheat to a safe temperature before serving. When reheating, check multiple portions to ensure even heating, and be mindful of time and temperature abuse. Calibrated thermometers are useful here too; recheck the center of the portion after reheating to ensure it reaches a safe end point. After cooking and cooling, clean surfaces and hands to prevent cross-contamination.
Quick-start checklist for home cooks
Use a thermometer for accuracy, check at the thickest part, allow for resting, plan temperatures by protein type, and sanitize tools and surfaces after cooking. This ready-to-use checklist helps you decide when a dish is done, minimizing waste and reducing the risk of safety issues.
Tools & Materials
- Digital instant-read thermometer(Calibrated; insert into the thickest part away from bone; read quickly (5–10 seconds))
- Clean cutting board (non-porous)(Dedicated to raw proteins to avoid cross-contamination)
- Sharp chef's knife(For portioning after cooking)
- Heat-resistant oven mitts(Protection when handling hot dishes)
- Timer(If your thermometer has a built-in timer, you can skip this)
- Platters or resting rack(Let meat rest to redistribute juices)
- Sanitizing wipes or spray(Clean surfaces after raw/uncooked handling)
Steps
Estimated time: Estimated total time: 20-40 minutes
- 1
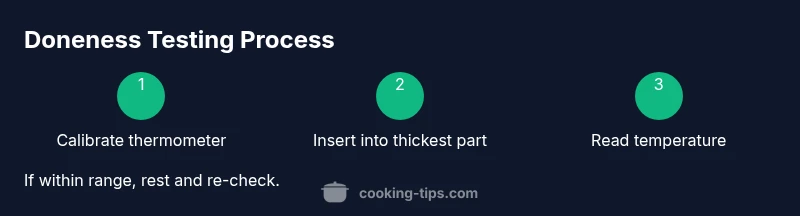
Prepare and calibrate your thermometer
Ensure your thermometer is calibrated and clean before you begin. This reduces measurement error and prevents cross-contamination.
Tip: If unsure, calibrate in ice water and shake off excess moisture. - 2
Position the food for testing
Place the center of the thickest part of the food away from bone or cartilage to get a true reading.
Tip: Avoid testing near the surface where temperature rises quickly. - 3
Insert and read the thermometer
Insert the probe into the thickest portion; wait 5–10 seconds and read the temperature.
Tip: Take readings in multiple spots for large pieces. - 4
Compare to the target doneness
Check the reading against safe-endpoint temperatures and consider resting time; temperatures can rise slightly during rest.
Tip: For uneven pieces, test in 2–3 places. - 5
Rest and re-check if needed
Let the food rest under loose foil; re-check interior temperature if you suspect undercooking after resting.
Tip: Resting helps juices distribute and final temp stabilize. - 6
Clean and sanitize
Wash hands, utensils, and surfaces after handling raw ingredients; re-clean the thermometer.
Tip: Sanitation prevents cross-contamination and safety issues.
Quick Answers
What is the safest way to tell if chicken is cooked?
The safest method is to use a calibrated thermometer; ensure the center reads at least 165°F and the juices run clear. Resting briefly helps achieve even doneness without drying the meat.
Use a thermometer to verify chicken reaches a safe internal temperature of 165 degrees Fahrenheit, then rest briefly to lock in juices.
Can I rely on color alone to judge doneness?
Color and texture can be misleading. Always confirm with a thermometer for foods like poultry and ground meat to avoid undercooking or overcooking.
Color isn’t a reliable predictor; use a thermometer to confirm safety.
How should I check doneness for beef and pork?
Beef doneness varies by taste, but a thermometer provides accuracy. For pork, aim for a safe endpoint recommended by guidelines; rest before serving to retain moisture.
Use a thermometer and rest your meat to reach the desired doneness safely.
Is it okay to reheat leftovers if they weren’t fully cooked?
Leftovers should be reheated to a safe temperature and checked again after reheating. If raw or insufficiently cooked when first prepared, discard to avoid safety risks.
Reheat to a safe temperature and re-check; if uncertain, discard.
What are common mistakes when testing doneness?
Relying on timing alone, not calibrating thermometers, and ignoring resting time are common mistakes. Always verify with a thermometer and allow proper resting.
Avoid relying on time alone; verify with a thermometer and rest properly.
Watch Video
Top Takeaways
- Use a thermometer for accuracy.
- Rest meat after cooking to redistribute juices.
- Know target temps by protein.
- Doneness combines safety with texture preferences.
- Practice reduces guesswork and waste.