How to Bake Chocolate Chip Cookies: The Complete Guide
Learn how to cook chocolate chip cookies from start to finish with dough prep, bake times, and troubleshooting to get soft, chewy, or crispy results.

You will learn how to bake chocolate chip cookies with a reliable, beginner-friendly method. This guide covers dough prep, measuring, preheating, and baking times to achieve soft, chewy, or crispy textures, plus troubleshooting tips for common issues.
Why Mastering how to cook chocolate chips cookies matters
If you want to know how to cook chocolate chips cookies, this guide breaks down the science behind a great batch: how fat, sugar, and flour interact to produce spread, texture, and flavor. You’ll discover practical steps that apply to a standard home oven and everyday ingredients. By understanding creaming, chilling, and timing, you’ll gain confidence to adjust texture—from soft and chewy to crisp and snappy—without a chef’s toolkit. With clear measurements, tested methods, and common-sense tips, this section sets the foundation for reliable results in your kitchen.
Beyond taste, cookies are about texture and timing. The choices you make in butter temperature, sugar balance, and bake duration directly affect how the cookies spread and set. Expect to learn how to read your oven, recognize when a batch is near perfection, and adapt the approach if your batches vary due to climate or ingredient differences.
Throughout, remember that small adjustments can yield big changes. If you’re new to baking, start with a straightforward dough, then gradually introduce tweaks to suit your palate. The goal is consistent cookies that you’re proud to share with family and friends.
Ingredient and Dough Structure Basics
A solid dough begins with balanced ingredients that support flavor and texture. Butter supplies richness and helps with spread; sugar influences browning and moisture retention; eggs add structure and moisture; vanilla provides subtle aroma. Most basic cookies rely on all-purpose flour to form the structure, with a touch of salt to balance sweetness.
In practical terms, you’ll typically use two kinds of sugar for texture: granulated sugar for spread and browning, and brown sugar for softness and moisture. The ratio between wet and dry components determines chewiness versus snap. For a consistent dough, mix dry ingredients separately to ensure even distribution, then fold them into the creamed butter and sugar.
Chocolate chips or chunks are the defining feature. Chips provide bursts of sweetness with pockets of melted chocolate, while chunks deliver more chocolate in each bite. Choose your favorite variety or a mix for depth. Salt preference varies by taste, but a light pinch enhances overall flavor without making cookies taste salty.
If you’re counting calories or watching sugar, you can experiment with half-sugar substitutions or using a portion of fat substitutes, but expect changes in texture. The aim is to maintain balance while achieving your preferred cookie profile.
Tools, Temperature, and Technique That Make a Difference
The right tools and heat control can elevate even a simple chocolate chip cookie recipe. An oven preheated to around 350°F (175°C) provides reliable browning without scorching the edges. Lining baking sheets with parchment paper or a silicone mat prevents sticking and promotes even spreading. A cookie scoop or rounded tablespoon helps keep uniform sizes for even baking.
Measuring ingredients accurately matters more for cookies than for many other dishes. Use measuring cups for dry ingredients and a liquid ruler or scale for butter and sugar if you want precise results. Room-temperature butter creams more evenly with sugar, producing a smoother dough that traps air and helps shape without excessive spreading.
If you routinely bake, consider an oven thermometer. Home ovens can run hot or cool by several degrees, which shifts bake time and texture. A calibrated oven ensures you consistently land on the right moment to pull the cookies from the heat.
Dough Preparation: Creaming, Chilling, and Mixing
Dough behavior is the heart of the cookie’s texture. Begin by creaming softened butter with sugars until light and fluffy; this introduces air and helps the structure set during baking. Add eggs one at a time and mix just until incorporated, then blend in vanilla for aroma.
Next, gradually fold in the dry ingredients—overmixing after adding flour can develop gluten and make the cookies tough. When dry ingredients are mostly combined, fold in chocolate chips or chunks with a gentle hand. For thicker cookies with more chew, chilling the dough before scooping reduces spreading in the oven.
If you’re short on time, you can skip chilling, but be prepared for thinner cookies with more spread. If you’re aiming for bakery-style thickness, chilling for 30 minutes or longer improves shape and flavor development. A practical constraint is that dough can be portioned and chilled in advance for a ready-to-bake batch later.
Baking, Cooling, and Storage for Freshness
Scoop dough portions onto the prepared sheet, spacing them adequately for expansion. Bake until the edges are golden and the centers look slightly underdone; cookies will finish setting as they cool on the sheet or a rack. If you prefer softer centers, pull them a few minutes earlier; for crisper cookies, extend the bake by 1–2 minutes.
Let the cookies rest on the baking sheet for a few minutes before transferring to a wire rack to cool completely. Once cooled, store in an airtight container at room temperature. For longer storage, cookies freeze well; portion dough balls or baked cookies in airtight bags and keep them for up to a couple of months.
A final note on texture: to maintain moisture and softness, avoid stacking hot cookies in a tight container. A parchment layer between layers prevents sticking and helps preserve the cookie’s shape.
Common Mistakes and How to Fix Them
A few common missteps can derail even a good batch. Overmixing after adding flour makes gluten develop too much, resulting in dense cookies. If dough looks dry, add a tablespoon of milk or water to loosen briefly, then proceed.
Undercreaming butter and sugar can yield flat, pale cookies that spread quickly. Ensure you achieve a creamy texture before adding eggs. If cookies spread excessively, try chilling the dough for 15–30 minutes before baking or use slightly more flour to balance moisture.
If you prefer a stronger chocolate presence, use a mix of chips and chunks; chunks melt more slowly and create varied bites. For gluten-free or alternative diets, explore compatible flours, but keep in mind that substitutions change texture and bake times.
End-to-End: One-Picture Summary and Next Steps
By following a structured approach from prep through cooling, you’ll consistently bake delicious chocolate chip cookies. Start with a simple base recipe, then consider small adjustments to tailor chewiness or crispness. Practice is the best teacher, and keeping notes on your oven and ingredient brands helps you replicate your favorite batch. When in doubt, revert to the core steps and re-adjust gradually for your preferred result.
Tools & Materials
- Mixing bowls(Large, one for dry ingredients and one for wet mixtures)
- Measuring cups and spoons(Accurate measurement is essential for texture)
- Whisk or wooden spoon(Use for dry mix and to combine wet ingredients)
- Mixer (hand or stand, optional)(Helps with creaming; not strictly required)
- Baking sheets(Prefer two sheets to rotate during baking)
- Parchment paper or silicone mat(Prevents sticking and eases cleanup)
- Cooling rack(Cool cookies evenly to maintain texture)
- Oven thermometer (optional)(Helps verify accurate baking temperature)
- Cookie scoop or tablespoon(Ensures uniform cookie size and bake time)
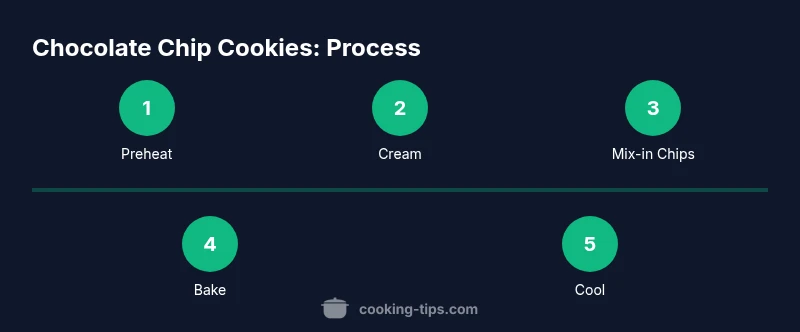
Steps
Estimated time: 35-40 minutes total
- 1
Preheat and prepare
Preheat the oven to 350°F (175°C). Line baking sheets with parchment or a silicone mat. This ensures even heating and prevents sticking.
Tip: Use a separate bowl to measure dry ingredients to avoid clumping. - 2
Whisk dry ingredients
Whisk flour, baking soda, and salt in a bowl until evenly distributed. This prevents pockets of leavening and salt in the dough.
Tip: Sift or whisk thoroughly for uniform texture. - 3
Cream fats and sugars
Cream softened butter with granulated and brown sugar until pale and fluffy to trap air for tenderness.
Tip: Cream until light in color and fluffy to improve texture. - 4
Add eggs and vanilla
Beat in eggs one at a time, then blend in vanilla. This builds flavor and helps with structure.
Tip: Room-temperature eggs distribute evenly. - 5
Combine wet and dry
Gradually fold dry ingredients into the creamed mixture until just combined. Stir in chips.
Tip: Avoid overmixing to keep cookies tender. - 6
Portion dough
Scoop dough portions onto the prepared sheets, spacing evenly for spreading.
Tip: Chill dough 15–30 minutes for thicker cookies. - 7
Bake and watch
Bake 9–12 minutes until edges are golden. Centers may appear soft but will firm as they cool.
Tip: Rotate pans halfway for even browning. - 8
Cool and store
Let cookies rest on the sheet briefly, then cool on a rack. Store airtight to maintain texture.
Tip: For the softest result, store with a slice of bread.
Quick Answers
Can I freeze cookie dough?
Yes. Shape dough into discs or logs and freeze for up to 2 months. Bake from frozen, adding 1-2 minutes to the bake time. Thawing is optional if you bake directly from frozen.
Yes, you can freeze dough. Shape it and freeze for up to two months, then bake directly from frozen with a few minutes extra.
How long should I bake the cookies?
Typically 9-12 minutes at 350°F (175°C), depending on thickness and chip size. Aim for golden edges with soft centers for a classic chewy texture.
Most cookies bake in 9 to 12 minutes at 350 degrees; adjust based on desired texture.
Why do my cookies spread too much?
Too much butter, over-creaming, or dough that’s too warm can cause excessive spreading. Chilling the dough helps control spread and shape.
Butter amount and temperature affect spread; chill the dough if you see too much spreading.
Can I substitute dark chocolate or chips?
Yes. You can use dark chocolate, milk chocolate, chips, or chunks. Chunks provide bigger bites and melt more slowly, while chips distribute evenly.
Absolutely—you can mix different chocolate types for varied flavor and texture.
Should I chill the dough?
Chilling improves flavor and texture and reduces spreading. If you’re short on time, even a 15-minute chill helps, but longer is better.
Chilling helps with flavor and shape; even a short chill is beneficial.
Can I bake on a stone or sheet pan with no parchment?
Using parchment or a silicone mat prevents sticking and helps even browning. If you must bake directly on stone, reduce batter density and watch closely to avoid scorching.
Parched lining is best; if you use a stone, watch bake time closely.
Watch Video
Top Takeaways
- Prep ingredients before you start
- Cream butter and sugar to trap air
- Avoid overmixing after flour addition
- Bake until edges are golden for best texture