How to Cook Bone Broth Soup: A Practical Guide for Home Cooks
Learn how to cook bone broth soup from scratch with a practical method. This guide covers selecting bones, simmer times, flavoring, storing, and kitchen tips for a nourishing broth.

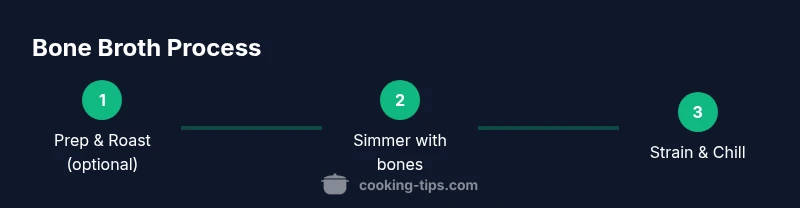
Goal: Learn how to cook bone broth soup from scratch using a simple, home-friendly method. You’ll gather bones, water, and a splash of acid, simmer gently for 8–12 hours, then strain and store the rich liquid. The guide includes flavor ideas, storage tips, and practical uses.
What bone broth is and why it matters
Bone broth is a slow-simmered infusion of bones, connective tissue, and aromatics that yields a deeply savory liquid rich in collagen, minerals, and gelatin. According to Cooking Tips, this traditional preparation can serve as a nourishing base for soups, sauces, and grains, while also supporting a comforting, warm palate on busy days. The goal is a balanced, clear, and flavorful stock that can be sipped neat or used as a cooking utensil in many recipes. A good broth should have a clean aroma, a slightly viscous mouthfeel from gelatin, and a depth of flavor that carries through when reduced for sauces. Understanding what goes into bone broth helps you troubleshoot common issues, such as cloudiness or a flat taste, and tailor the simmer to your kitchen equipment and bone choices.
When you start, plan for a flexible framework: choose your bones, add a modest amount of aromatics, and use a splash of acid to help pull minerals from the bones. With practice, you’ll gauge the right simmering time for your batch and learn how to balance richness with clarity. This foundation is essential whether you’re making a week’s worth of broth for meals or a single pot to enjoy alongside a comforting dish.
Tools & Materials
- Large stockpot or Dutch oven(6-8 quart (6-8 L) capacity for a standard batch)
- Fine-mesh strainer(For removing solids without losing broth)
- Chefs knife(Sharp blade for trimming bones and vegetables)
- Cutting board(Stable, wide surface for prep)
- Baking sheet (optional)(Roast bones for deeper flavor (optional))
- Apple cider vinegar or white vinegar(2–3 tablespoons per batch to help extract minerals)
- Cold filtered water(To cover bones completely)
- Storage containers(Glass or BPA-free plastic, labeled)
- Tongs(Handling hot bones safely)
Steps
Estimated time: Total time: 8-12 hours
- 1
Gather bones and prep
Rinse bones under cold water and trim any remaining tissue. This reduces impurities and yields a cleaner broth. Have aromatics ready if you plan to add flavor early.
Tip: Pro tip: use cold water to rinse and pat dry to minimize cloudiness. - 2
Optionally roast bones for depth
Spread bones on a baking sheet and roast at 400°F (200°C) for 30–45 minutes until browned. Roasting adds depth to the broth, particularly with beef bones.
Tip: Pro tip: roasting primarily enhances flavor; skip if you want a lighter stock. - 3
Combine bones with water and acid
Place bones in the stockpot and cover with cold water. Add 2–3 tablespoons vinegar to help extract minerals. Let the mixture sit 15–30 minutes before heating.
Tip: Pro tip: acid improves mineral extraction from connective tissue. - 4
Gently simmer and skim
Bring to a low simmer; avoid a rolling boil which can emulsify fats and create cloudiness. Skim foam and impurities from the surface every 20–30 minutes during the first hour.
Tip: Pro tip: a steady, gentle simmer yields clearer stock with better texture. - 5
Add aromatics and continue to simmer
Add onion, carrot, celery, garlic, and herbs if you like. Maintain a gentle simmer for 8–12 hours for chicken or 12–24 hours for beef. Check liquid level and top up as needed.
Tip: Pro tip: longer simmer increases gelatin content and depth of flavor. - 6
Strain the broth
Pour the hot stock through a fine-mesh strainer into a clean pot or heatproof container. For ultra-clear broth, run it through a cheesecloth lined strainer.
Tip: Pro tip: strain in stages to remove fine particles and achieve a pristine finish. - 7
Cool rapidly and store
Chill the broth quickly in the fridge or a cold water bath to congeal fat for easy removal. Transfer to storage containers and refrigerate up to 4–5 days or freeze up to 6 months.
Tip: Pro tip: separating fat after chilling helps you control the richness in future uses. - 8
Use and re-use thoughtfully
Use the broth as a base for soups, sauces, or grains. If you have bones left over from a roast, you can make a second, lighter stock, though gelatin content will be reduced.
Tip: Pro tip: label batches with date and batch to track flavor development.
Quick Answers
What bones are best for bone broth?
A mix of marrow bones, knuckles, and feet yields rich gelatin and depth. Chicken bones are affordable and quick to extract flavor, while beef bones deliver a deeper umami. Use what’s accessible to you and adjust simmer time accordingly.
A mix of bones gives the best texture; chicken bones are quick, beef bones add depth.
How long should bone broth simmer?
Chicken bones benefit from 8–12 hours of simmering; beef bones often require 12–24 hours for a rich gelatinous stock. Monitor temperature to keep a steady gentle simmer.
Aim for 8–12 hours for chicken, longer for beef.
Can I reuse bones or store-bought bones?
Bones can be reused for a second stock, but flavor and gelatin will be reduced. For strongest results, start with fresh bones and refrigerate the first batch before attempting a second stock.
You can reuse bones, but expect less gelatin the second time.
Can bone broth be frozen?
Yes. Freeze portions in airtight containers for up to 6 months. Thaw in the refrigerator or add directly to dishes from frozen if cooking remains appropriate.
Absolutely—freeze in portions for later use.
Is bone broth safe for kids or pregnant people?
Bone broth is generally safe in moderation, but monitor sodium content and consult a clinician if there are dietary restrictions or allergies. Avoid adding excessive salt for young children.
Generally safe in moderation; check with a clinician if there are concerns.
What is the difference between bone broth and stock?
Stock is typically simmered for flavor with bones but produces less gelatin. Bone broth simmers longer to extract more collagen and minerals, yielding a richer, more nourishing liquid.
Broth is richer in gelatin and nutrients than stock.
Watch Video
Top Takeaways
- Choose bones with connective tissue for gelatin.
- Acid helps extract minerals during the early stage.
- Maintain a gentle simmer for clarity and depth.
- Cool and store properly to maximize shelf life.