How Long Should Cook Beef Stew? A Practical Timing Guide
Learn how long to cook beef stew across stovetop, oven, and pressure cooker methods. This data-driven guide covers tenderness, timing, and practical tips for reliable, flavorful results.

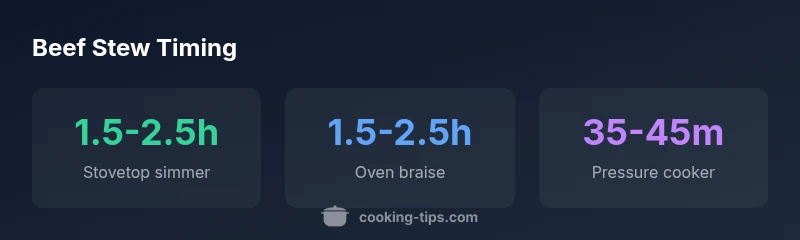
How long should cook beef stew? On the stovetop, plan about 1.5 to 2.5 hours of gentle simmer after browning the meat and vegetables, until the beef is tender and the sauce is thick. In a sealed oven braise, similar times apply. If you use a pressure cooker/Instant Pot, you can reach tender beef in about 35–45 minutes, plus prep. Adjust for cut size and altitude.
The core question: how long should cook beef stew
According to Cooking Tips, timing in beef stew is as much about texture as time. The search query how long should cook beef stew reflects a desire for predictable results: tender meat, thick, glossy sauce, and a comforting bowl that holds together on a busy weeknight. In practice, the total time depends on the cut of beef, the cooking method, and the vessel you use. Start by browning the meat to develop depth, then cook slowly at a gentle simmer or braise until the collagen breaks down and the meat becomes tender. The exact time will vary, but there are reliable baselines you can rely on across kitchens.
Altitude, batch size, and even the size of your beef chunks can tilt the clock. A 2-inch cube in a 6-quart pot behaves differently than the same piece in a 12-quart Dutch oven; filling the pot too deeply can reduce circulation and extend cooking time. In the sections that follow, you’ll find practical ranges for stovetop, oven, and pressure-cooker methods, plus tips to check doneness without sacrificing flavor.
Tenderness and collagen: what you’re aiming for
Beef stew gains its richness from properly broken-down collagen. The goal isn’t just soft meat but a mouthfeel where pieces offer a gentle resistance before melting. When you braise, the connective tissue converts to gelatin, which thickens the sauce and coats the vegetables. Tenderness is best judged by fork test: if the meat yields readily but still holds its shape, you’re in the sweet spot. Temperature alone isn’t the only guide; texture and sauce consistency matter equally. In practical terms, plan for a total window where the beef becomes fork-tender within the post-brown, simmering stage. This balance—meat tenderness with a glossy, concentrated sauce—defines a well-timed beef stew.
Key variables that alter cooking time
Different factors can shift your stew’s timeline: cut size, meat trim, pot material, lid fit, and the heat source. Cooking Tips analysis shows that larger chunks require longer braising, and cast-iron or heavy stainless pots maintain steady heat that facilitates collagen breakdown. The amount of liquid and density of ingredients also influence evaporation and simmer rate. Dull knives or uneven chopping can slow down browning, indirectly affecting overall time. A practical approach is to establish a baseline time, then adjust for batch size, altitude, and equipment.
Stovetop simmer times: guidelines and checks
On the stovetop, maintain a gentle simmer rather than a roaring boil. A steady bubble around 190–200°F (88–93°C) is ideal for collagen breakdown without turning vegetables mushy. Plan 1.5–2.5 hours after initial searing and aromatics, checking the meat every 20–30 minutes and adding broth or water as needed to keep the sauce at the correct thickness. Skim fat as it rises to ensure a clean, rich sauce. Toward the end, test a few chunks of beef with a fork; they should offer little resistance and fall apart with gentle pressure.
Oven braise times: even heat, even texture
Oven braising provides uniform heat, which can improve consistency across larger batches. Preheat a heavy, lidded dish to a steady temperature (around 325–350°F / 160–175°C). Braise for 1.5–2.5 hours, depending on meat size and your oven’s performance. Check tenderness in the final 30 minutes and adjust liquid levels to keep the meat submerged. Oven braising reduces scorching risk and encourages even collagen conversion, yielding a silkier sauce.
Pressure cooker/Instant Pot: faster routes
The pressure cooker dramatically reduces active cooking time. After browning the meat and sautéing aromatics, seal the cooker and bring to pressure, then cook for about 35–45 minutes before natural pressure release. This method relies on high moisture and pressure to tenderize connective tissue quickly. Let the pressure come down naturally for best texture, then adjust seasoning and consistency. If your chunks are very large, you may want an extra 5–10 minutes, but avoid overcooking to prevent mealy vegetables.
Ingredient prep and layering for consistent texture
Layer flavors by searing beef first, then sautéing onions, garlic, and aromatics before adding liquids. Carrots, potatoes, and other vegetables should be added in stages to prevent overcooking—potatoes go in with sufficient liquid for tenderness, while potatoes and root vegetables can tolerate longer braising. Salt and pepper should be adjusted toward the end, after flavors concentrate. This staged approach reduces the chance of overcooked vegetables and underdone meat, helping you hit the right timing every time.
Recipe timeline: a practical 2.5-3 hour plan
Here is a practical workflow you can follow: browning the beef (10–15 minutes), sautéing aromatics (5–10 minutes), adding liquids and vegetables, and bringing to a simmer (5–10 minutes). For stovetop or oven braises, estimate a total of 1.5–2.5 hours of braising time, with final 15–20 minutes of simmering to thicken the sauce. If using a pressure cooker, expect around 40–50 minutes total start-to-finish, including pressure build and natural release. The Cooking Tips team recommends tracking internal tenderness with a fork and adjusting liquid as needed for a glossy finish.
Beef stew timing by method
| Method | Total Time (approx) | Notes |
|---|---|---|
| Stovetop simmer | 1.5-2.5 hours | Best for larger cuts; monitor heat and add liquid as needed |
| Oven braise | 1.5-2.5 hours | Even heat; space to braise evenly |
| Pressure cooker/Instant Pot | 35-45 minutes | Quicker tenderness; deglaze well prior to cooking |
Quick Answers
What beef cuts work best for beef stew?
Chuck, brisket, and other shoulder cuts are ideal due to their connective tissue. Cut into 1.5–2 inch pieces for even braising. Trim excess fat but keep some marbling for flavor.
Use chuck or brisket, cut into chunks, and brown well for best flavor and tenderness.
Can I speed up cooking without sacrificing texture?
Yes, using a pressure cooker dramatically shortens the total time while still producing tender beef. For stovetop methods, keep heat low and use a tight lid to reduce evaporation.
Pressure cooking saves time; for stovetop, go slow and keep the lid on.
Should potatoes be added at the start or later?
Add potatoes partway through the braise so they become tender without disintegrating. If you prefer firmer potatoes, delay until the last 30–40 minutes.
Put potatoes in later so they don’t turn mushy.
Can beef stew be frozen after cooking?
Yes, beef stew freezes well. Cool completely, portion, and store in airtight containers. Thaw overnight in the fridge before reheating gently.
You can freeze beef stew; thaw in the fridge before reheating.
Is there a target internal temperature for doneness in stew?
There isn’t a fixed internal temp for beef in stew. Tenderness is the primary cue; meat should yield easily with a fork.
Cook until the meat is fork-tender, not a specific temp.
How does altitude affect cooking time?
Higher altitude can extend cooking times due to lower boiling temperatures. Plan for longer braise times and check tenderness frequently.
At higher elevations, expect longer braising times.
“Timing is as much about texture as it is about minutes. When beef stew is cooked slowly with proper heat and patience, collagen breakdown yields a rich, glossy sauce and melt-in-your-mouth meat.”
Top Takeaways
- Plan for 1.5–2.5 hours of simmer on stovetop or in the oven for fork-tender beef.
- Use a pressure cooker to cut total time to about 35–45 minutes.
- Brown meat well and layer aromatics to develop flavor quickly.
- Test tenderness with a fork toward the end to ensure perfect texture.
- Adjust liquid and seasoning after most of the cook time to finish the sauce.