How Do Cookies Look When Done: A Visual Doneness Guide
Learn to identify cookie doneness with clear visual cues. This guide covers edges, centers, textures, and common baking pitfalls for perfect cookies every time.

When cookies are done, they should be set around the edges and firm to the touch, with centers that look plump and slightly glossy but not wet. They should have light golden-brown edges and a soft, chewy center. Avoid pale, flat, or cracked edges.
Visual cues for how do cookies look when done
According to Cooking Tips, visual cues are your most reliable guide to cookie doneness. This article helps home cooks identify the signs you should look for rather than relying solely on a timer. By focusing on edges, centers, and texture, you can consistently bake cookies that are perfectly baked on the inside and just golden on the outside. Whether you bake a classic chocolate chip or a heavy oat cookie, the same visual principles apply and empower you to bake with confidence.
In practice, you’ll learn to read your cookies at a glance: the edges should be set, the centers may look slightly underbaked but should be set enough to hold their shape, and the surface should show a subtle sheen rather than a wet appearance. These cues apply across doughs with minor variations, and they become more reliable with a bit of hands-on experience.
Cooking Tips analysis shows that a crisp edge paired with a soft center is a strong, general indicator of doneness across many cookie styles. The key is to observe the transition from glossy dough to a matte surface and to notice how the cookies hold their shape as they cool.
Before you start, ensure your oven is properly heated and your baking sheets are prepared; consistent heat distribution makes doneness easier to predict.
note”:null},
toolsMaterials_name_exists_or_malformed?null
Tools & Materials
- Mixing bowls(Two large bowls recommended for beating and combining ingredients)
- Measuring cups and spoons(Accurate measurements prevent dough inconsistencies)
- Parchment paper or silicone baking mat(Line baking sheets for even baking and easy release)
- Baking sheets(Flat, rimmed sheets work best; avoid warped pans)
- Cooling rack(Cool cookies completely to stop carryover baking)
- Timer(Track bake times and avoid overbaking)
- Oven thermometer (optional)(Ensures your oven is at the correct temperature)
- Rubber spatula or silicone scraper(Scrape bowls and fold ingredients evenly)
Steps
Estimated time: 35-50 minutes
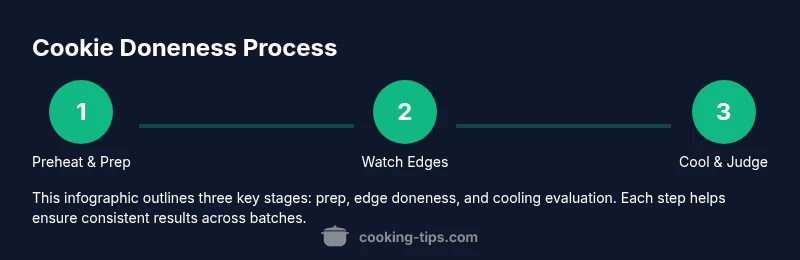
- 1
Preheat and prepare
Preheat oven to 350°F (175°C). Line baking sheets with parchment or a silicone mat and set out dough portions so you’re ready to bake in one pass.
Tip: Preheating ensures the oven atmosphere is ready for even baking from the first sheet. - 2
Cream butter and sugar
Beat softened butter with granulated sugar (and brown sugar, if your recipe includes it) until the mixture is light and fluffy. This introduces air that helps the cookies rise and spread evenly.
Tip: Do not overbeat; stop as soon as the mixture looks pale and creamy. - 3
Add eggs and flavorings
Beat in eggs one at a time, then add vanilla or other flavorings until fully incorporated. This helps emulsify fats and liquids for a uniform dough.
Tip: Scrape the bowl occasionally to incorporate all ingredients. - 4
Stir in dry ingredients
Fold in flour, baking soda, and salt until just combined. Overmixing develops gluten, which can make cookies tougher.
Tip: Stop mixing as soon as you see flour disappear into the dough. - 5
Add-ins and chill (optional)
Fold in chips, nuts, or oats as your recipe directs. If your dough is very soft, chilling for 15–30 minutes can improve shape stability.
Tip: Chilled dough holds its form better during baking, reducing spreading. - 6
Portion and space
Scoop dough into evenly sized portions and space them at least 2 inches apart on the prepared sheets to allow room for spreading.
Tip: Consistent portions bake more evenly and produce uniform cookies. - 7
Bake and adjust doneness
Bake until edges are set and centers appear just set or slightly underdone. Cookies should look matte rather than shiny and soft; edges will be lightly golden.
Tip: Start checking toward the end of the usual bake window; ovens vary in hot spots. - 8
Cool and judge
Remove from oven and cool on a rack; cookies will continue to firm slightly as they finish resting. Taste and texture will improve with cooling.
Tip: Never store cookies while they’re hot; steam trapped inside creates sogginess.
Quick Answers
What are the top visual cues that tell me cookies are done?
The edges should be set and lightly golden, while the centers remain soft-looking but not wet. The surface should be matte rather than shiny, and cookies should hold their shape as they cool.
Look for edges that are set and a soft center that’s not doughy; the surface won’t look glossy.
Do different doughs look different when done?
Yes. Chocolate chip and sugar cookies may brown at the edges, while thicker doughs retain softness inside. Oatmeal cookies can appear crinkled with darker edges but still soft centers.
Different doughs have unique cues, but the basic edge-set and center-soft rule still applies.
Can cookies finish baking after I take them out?
Yes. Cookies continue to set as they rest on the hot sheet and cooling rack. Remove them when the centers look slightly underdone to prevent overbaking.
Cookies keep cooking a bit after you remove them, so aim for a just-done look.
Why are my cookies flat or spread too much?
Butter that’s too warm or dough that’s too soft can cause excessive spreading. Chill dough or use a slightly cooler oven to control expansion.
If they spread a lot, chill the dough and check your oven temperature.
Should I refrigerate dough before baking?
Chilling helps control spread and improves shape, especially for cookies with sugar and butter-heavy doughs. Not all recipes require chilling, so follow the recipe guidance.
Chilling helps cookies hold their shape, but follow your specific recipe.
Is a thermometer necessary to test doneness?
Not usually. Visual cues are enough for most home-baked cookies. A leave-in thermometer is more common for meat, not cookies.
You don’t need a thermometer for cookies—watch the edges and centers instead.
Watch Video
Top Takeaways
- Observe edges for set, golden-brown color.
- Center should look lightly puffy and not wet.
- Texture is the key: matte surface with a soft center signals doneness.
- Don’t rely on color alone—carryover baking matters after removal.
- Practice improves accuracy as you learn your oven’s quirks.