Cook with Color Pizza Maker: A Vibrant How-To Guide
Learn how to cook with a color pizza maker to craft vibrant, delicious pizzas. This step-by-step guide covers prep, cooking, toppings, and safety for eye-catching, tasty pies at home.

Master vibrant pizzas by learning how to cook with color pizza maker to highlight bright sauces, cheeses, and toppings. Start with a color-themed plan, preheat, prep ingredients, and cook in short, controlled bursts for crisp crust and bold visuals. This guide covers prep, cooking steps, and safe cleanup. Follow these steps for consistently delicious, visually striking pies.
Why a color pizza maker matters
Cooking with a color-themed cooking tool adds visual punch to homemade pizza and can inspire more creative toppings. According to Cooking Tips, the act of using a dedicated color pizza maker helps home cooks manage heat more consistently and produces crusts that bake evenly while supporting bold, eye-catching presentations. When you cook with color pizza maker, you’re not just making dinner—you're crafting a memorable experience for family and friends. The device’s even heating helps you control moisture and browning, so you can experiment with colorful sauces, cheeses, and vegetables without compromising texture.
Understanding color pizza makers: features and how they affect cooking
A color pizza maker often integrates a multi-color surface and precise temperature control to guide the crust toward a uniform golden brown. Look for a dial or digital control that indicates a safe preheat range and a timer with short bake cycles. The device’s lid design helps trap steam, which keeps toppings vibrant. Color-coded zones or accessories can help you separate doughs and toppings by hue—for example, red sauce, green pesto, and yellow cheese—so your finished pizza looks as good as it tastes. This section helps you gauge how these features influence crust crispness, cheese melt, and topping stability as you cook with color pizza maker.
Planning color themes for your pies
Before you even touch dough, map out a color plan. Choose two or three colors that will guide your toppings. A simple strategy uses red (tomato sauce), green (basil or spinach), and white (mozzarella or ricotta) for a classic tri-color look. If you want more visual pop, add purple onions, yellow peppers, and orange carrots shaved thinly. The goal is to balance color with flavor and texture, so you don’t overwhelm the crust. Planning ahead reduces kitchen chaos and helps you cook with color pizza maker more confidently.
Prep: dough, sauce, toppings for vibrant pizzas
Successful color pizza making hinges on careful prep. Start with room-temperature dough for easy shaping, and let any dough rise to enjoy a light, airy crumb. Prepare bright sauces and set toppings in accessible bowls. Use color-coded bowls or trays to stay organized and minimize cross-contamination. If you’re using store-bought dough, keep it chilled until you’re ready to roll. Fresh herbs—arugula, basil, or chives—add color and aroma after baking for a finished, vibrant plate.
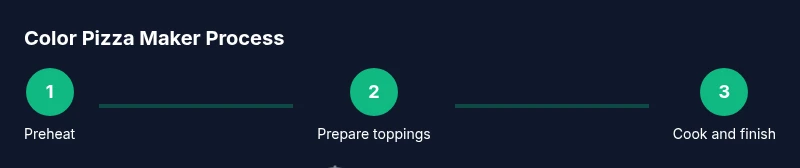
Step-by-step cooking process with a color pizza maker
-
Preheat the color pizza maker according to the manufacturer’s instructions, ensuring the surface reaches an even, steady temperature. This preheating minimizes sticking and helps the crust achieve a consistent color. Tip: Allow 5–7 minutes for a reliable preheat.
-
Prep dough and toppings in color-coded bowls so you can assemble quickly and keep colors distinct. Keep toppings bite-sized for even cooking and better distribution. Tip: Have a damp towel handy to wipe edges and avoid drips.
-
Roll or stretch dough to fit the device’s cooking surface, aiming for a uniform thickness. A thinner base yields crisper edges, while a thicker center remains soft. Tip: Use parchment to prevent sticking if your model is prone to it.
-
Apply a thin layer of sauce and arrange toppings by color groups to maximize visual impact. Avoid overloaded sections that trap steam and hinder even browning. Tip: Layer grated cheese last for a glossy finish.
-
Close the lid and cook for short bursts, checking progress after 2–4 minutes. Rotate or shift the pizza if your model allows for even browning. Tip: Use a timer to avoid overcooking and drying out toppings.
-
Remove with a silicone spatula, let rest 2 minutes, then slice and serve. Resting helps set the cheese and crust; the colors will look brighter on the plate. Tip: Garnish with fresh herbs for extra color and aroma.
Safety and maintenance when using a color pizza maker
Always unplug and cool the device before cleaning. Wipe down surfaces with a damp cloth and avoid immersing the unit in water. Use oven mitts when handling hot lids and avoid touching metal parts directly. A dedicated silicone brush helps apply oil or sauce without staining the surface. Regular cleaning reduces flavor carryover and keeps the colors vivid over repeated uses. Cooking Tips suggests a light seasoning of silicone-safe oil to maintain nonstick performance and color integrity.
Troubleshooting common issues
If crust browns unevenly, check for hotspots in the cooking surface and rotate the pizza midway through cooking. If toppings are overcooked while crust is underdone, reduce the cooking time and use thinner toppings. If color fades after storage, reheat briefly to refresh color and texture. Common issues often stem from inconsistent preheating, overcrowding, or insufficient rest time between steps.
Creative ideas and topping combinations
Experiment with a rainbow approach by using a different color for each quadrant: red pepper slices, orange carrot ribbons, yellow corn kernels, green spinach leaves, blue cheese crumbles, and purple onions. For a more refined look, use microgreens as a finishing touch. Pair colors with complementary flavors like spicy tomato sauce with basil, or maple-roasted squash with goat cheese. The goal is to create balance between color, texture, and taste while using the color pizza maker to its advantage.
Flavor and nutrition considerations
Colorful toppings often bring a range of nutrients, from vitamin-rich vegetables to protein-packed cheeses. To keep pies nutrient-dense, emphasize vegetables, lean proteins, and lighter cheeses. Balance is key: a green pesto base with mozzarella and vibrant vegetables can deliver both color and nutrition without overloading on fat. Remember to consider portion sizes and total calories when planning a colorful pizza night.
Elevating color with accessories and setup
A clean, well-lit workspace helps you see colors vividly as you assemble toppings. Use a bright cutting board for visual contrast and keep grab-and-go tools like tongs and skewers within reach. A dedicated color palette board can help you plan future color schemes and keep your kitchen organized as you cook with color pizza maker.
toolsMaterialsNullValue
Tools & Materials
- color pizza maker (electric countertop appliance)(Ensure model supports the cooking surface size you plan to use; check user manual for max dough height and preheat time.)
- all-purpose pizza dough(Room-temperature dough for easy stretching; consider store-bought or homemade options.)
- pizza sauce(Choose a smooth sauce or pesto depending on color theme.)
- assorted toppings in vibrant colors(Prepare red, green, yellow, purple, and orange components for a rainbow effect.)
- mixing bowls (color-coded if possible)(Keep toppings organized and prevent color cross-contamination.)
- silicone spatula and tongs(Nonstick-safe tools to handle hot pizza without scratching the surface.)
- parchment paper or silicone baking mat(Prevent sticking and simplify cleanup.)
- measuring spoons/cups(Accurate portioning of sauces and toppings.)
- oven mitts(Heat protection when handling hot components.)
- clean kitchen towels(For wiping the surface and drying hands.)
- oil spray or light oil(Keeps crust from sticking and enhances color fidelity.)
Steps
Estimated time: Total time: 15-25 minutes
- 1
Preheat the color pizza maker
Plug in the device and set it to the recommended preheat temperature. Allow 5–7 minutes for the surface to come to heat, ensuring consistent browning. This preheat step reduces sticking and helps create an even base.
Tip: Do not skip preheating; a cold surface leads to uneven color and soggy edges. - 2
Prep dough and toppings
While the device preheats, organize dough, sauce, and toppings in color-coded bowls. Slice or dice toppings into uniform sizes for even cooking and a cohesive color pattern.
Tip: Have a damp towel nearby to wipe drips and keep the work area clean. - 3
Roll and shape the dough
Stretch the dough to fit the cooking surface, aiming for even thickness. Use parchment to prevent sticking if needed and to simplify transfer.
Tip: Keep edges slightly thinner for crispier crust without overcooking the center. - 4
Assemble with color in mind
Spread a thin layer of sauce, then arrange toppings by color blocks to maximize visual impact. Finish with a light cheese layer so colors shine through.
Tip: Avoid overloading; excess toppings trap steam and hinder browning. - 5
Cook and monitor
Close the lid and bake in short bursts. Check progress after 2–4 minutes and rotate if your model supports it. Remove when crust edges are golden and cheese is melted.
Tip: Use a timer to avoid overcooking and keep colors vibrant. - 6
Rest, slice, and serve
Let the pizza rest for 2 minutes before slicing to set the cheese. Cut with a clean, sharp knife to preserve clean color lines and presentation.
Tip: Garnish with fresh herbs for extra color and aroma.
Quick Answers
What is a color pizza maker and how does it differ from a regular pizza maker?
A color pizza maker is a cooking appliance that emphasizes color guidance and/or color-coded surfaces or accessories to help you assemble vibrant, evenly cooked pizzas. It differs from a standard unit by offering features like color-themed prep, rapid bake cycles, and design elements that support more visual pizzaiolo presentation.
A color pizza maker helps you cook colorful pizzas more evenly with color-guided prep and faster bakings.
Can I use any dough with a color pizza maker?
Yes, most color pizza makers work with standard pizza dough, but results vary based on dough thickness and starting temperature. You’ll typically get best results with dough that’s been allowed to rest and relax before shaping, ensuring even cook.
Yes, but relax the dough first for best results.
What toppings work best for color-themed pizzas?
Toppings that hold shape and color well—bell peppers, tomatoes, spinach, red onions, corn, basil, and cheeses with bright shades—create strong color blocks. Consider contrasting textures to keep the slice visually appealing.
Bright vegetables and cheeses keep colors bold and tasty.
How do I clean a color pizza maker after use?
Unplug and let it cool, then wipe with a damp cloth. Avoid submerging the unit. Use a non-scratch sponge for stubborn residues and dry thoroughly before storing.
Let it cool, wipe down, and dry before storing.
Is it safe to experiment with nontraditional colors or sauces?
Yes, within reason. Use colors from natural ingredients or food-safe dyes, and avoid materials that could degrade nonstick surfaces. Start with small batches to gauge heat distribution and flavor balance.
Experiment in small amounts to keep color and flavor balanced.
How long should I rest the pizza after cooking?
Let the pizza rest for 1–2 minutes to set the cheese and crust before slicing. Resting helps maintain color integrity and prevents toppings from sliding apart.
Rest for a minute or two before slicing.
Watch Video
Top Takeaways
- Plan color themes before cooking
- Preheat properly for even browning
- Keep toppings in color groups for presentation
- Avoid overfilling to ensure crisp crust
- Rest and slice to preserve color and texture