What to Cook Bacon On in the Oven: A Practical Guide
Discover the ideal surfaces to bake bacon in the oven, from parchment-lined pans to wire racks. Learn temperatures, timing, and cleanup tips for bacon that’s perfectly crisp with minimal mess.

You can bake bacon on a rimmed sheet pan with parchment or foil, or on a wire rack set over a sheet pan for extra crispness. The main requirement is to prevent sticking and allow even heat. This guide covers surfaces, temps, timing, and cleanup tips. Whether you want quick cleanup or ultra-crispy edges, choosing the right bottom or rack setup makes a big difference.
Why the oven is ideal for bacon
The oven is a convenient method for cooking bacon because it renders fat slowly and evenly, producing uniform crispness without constant babysitting. The Cooking Tips team often recommends oven-baking for breakfast prep because it scales up from a single skillet to a sheet pan full of strips without crowding. By transferring the bacon to a hot, well-preheated surface, you minimize soggy spots and reduce the risk of undercooked centers. The key is to arrange the bacon in a single layer with space between strips so air can circulate. A rimmed sheet pan is essential to catch fat as it renders, keeping your oven cleaner. Line it with parchment paper for easy cleanup or foil if you want a quick barrier that you can crumple and discard. For crisper results with less fat pooling, place a wire rack on top of the pan and lay the bacon on the rack. Ensure the rack is dry and free of grease before use, or the fat will steam the bacon instead of browning it. With the right setup, you can cook a dozen slices at once without babysitting or blending flavors from other pans.
Surfaces: parchment, foil, and racks
Parchement, foil, or a rack—each surface has its own impact on texture, cleanup, and whether you want to drain fat. Parchment paper helps prevent sticking and makes flipping and cleanup a breeze; it also minimizes contact with fat. Foil is sturdy, inexpensive, and good for catching drips, but it can stick if not crinkled or if the bacon curls. A wire rack lifts bacon off the surface, allowing fat to drain away and heat to reach the underside for even browning. If you use a rack, place it on a rimmed pan to catch the fat as it renders. If you don’t have a rack, simply lining the pan with parchment or foil can still produce great results; you’ll sacrifice some crispness but gain convenience. Pro tip: for even browning, space the slices with a finger-width gap between each piece so the heat can reach the sides. If your bacon curls, a light press with tongs can keep strips flat during cooking. Finally, consider your end use: for crumpled toppings like salads or baked potatoes, a parchment-lined pan may be easiest; for full strips on a plate, a rack is best.
Temperature, timing, and doneness
Selecting the right oven temperature is key to consistent results. Most home cooks start with 400°F (204°C) as a safe, versatile setting that renders fat without overcooking the lean meat. Some cooks prefer 425°F (218°C) for even faster crisping, especially with thinner slices. Regardless of the exact temperature, the goal is to maintain steady heat that browns the fat and crisps the edges without curling and burning. Plan for roughly 12-18 minutes for standard thickness bacon; thin-cut bacon can finish in about 10-12 minutes, while thick-cut slices may take 18-20 minutes. If you’re cooking a lot of strips at once, rotate the pan halfway through to account for oven hot spots. Start checking around the 10-minute mark to avoid overdoing it, because ovens vary and bacon can go from crisp to burned quickly. When done, the slices should look evenly browned with a tiny hint of translucence at the center; they will crisp a bit more as they rest.
Rack versus sheet pan: choosing the right setup
Deciding whether to bake on a rack or directly on parchment/foil affects texture and fat drainage. A rack produces the crispest, uniformly browned bacon because fat drains away from the meat and air can circulate beneath. This method yields a drier bite and less grease pooled on the surface. Directly on parchment or foil creates solid, flatter slices that are excellent for stacking on sandwiches or serving with minimal handling. If you choose a rack, place it on a rimmed pan to catch the fat as it renders. If you don’t have a rack, simply lining the pan with parchment or foil can still produce great results; you’ll sacrifice some crispness but gain convenience. Pro tip: space the slices with a finger-width gap to improve even browning. For an extra-crisp finish, give the tray a short broil watch in the last 1-2 minutes. If you’re making a large batch, bake in two parallel pans to avoid crowding and uneven cooking.
Flavor and texture: customizing your bake
While bacon cooked in the oven tends to be flavorful on its own, you can tailor texture and taste with simple tweaks. For extra crispness, leave a slight gap between slices and avoid overlapping; a final 1-2 minute under the broiler can finish browning if you like darker edges. A light dusting of pepper before baking adds bite, while a sugar-based glaze or maple seasoning creates a sweet-salty crust. If you’re preparing bacon for a kid-friendly breakfast, consider trimming the rind and patting slices dry to reduce excess moisture that can hinder crispness. Remember to pat the finished slices dry on paper towels to remove surface fat before serving; this helps maintain crunch. Finally, if you plan to reuse the fat for sautéing vegetables, strain the cooled grease and store it in a clean jar in the fridge.
Cleaning up: grease, parchment, and storage
Cleaning after oven bacon is quick when you plan ahead. Let the pan cool enough to handle, then lift the rack (or parchment) and pour the fat into a heat-safe container; use a paper towel to wipe the pan before washing. If you used parchment, crumple it and discard—it makes cleanup nearly effortless. If you used foil, fold the edges to seal in grease and discard; this keeps your sink clean and reduces splatters when you wash the pan. To store leftovers, refrigerate in an airtight container for up to four days or freeze for longer storage. Reheat in the oven at 350°F (175°C) for 5-8 minutes on a lined sheet, or return to the oven at 400°F for a minute to refresh crispness. When oiling pans for future batches, wipe away excess grease and dry the surface thoroughly to prevent steaming during the next bake.
Troubleshooting common issues
Sometimes oven-baked bacon doesn’t turn out as expected. If slices curl, spread them more evenly in a single layer and avoid overlapping; a rack can help prevent curling by promoting even heat. If the bacon is underdone in the middle but crisp on the edges, extend the bake time by 2-3 minutes and check in 1-minute increments. If it tastes salty or smoky beyond your preference, rinse slices briefly under cold water before patting dry and baking again, though this may reduce crispness. Excess grease pooling under the bacon indicates your pan is overloaded or the oven is too cool; bake in smaller batches with proper spacing to cure this. Finally, if you notice heavy smoking, turn down the oven temperature by 25°F (14°C) and check the pan for burning edges; keep a close eye on the last few minutes.
Authoritative Sources
For further guidance on safe cooking practices and fat handling, consult these credible sources:
- https://www.fda.gov/food
- https://www.cdc.gov/foodsafety
- https://www.usda.gov/topics/food-safety
Tools & Materials
- rimmed sheet pan(Large enough for the bacon you plan to bake)
- baking rack (optional)(Place on a sheet pan if you want extra crispness)
- parchment paper(Line the pan for easy cleanup)
- aluminum foil(Alternative barrier; crinkle to reduce sticking)
- tongs(For turning and handling slices)
Steps
Estimated time: 15-25 minutes
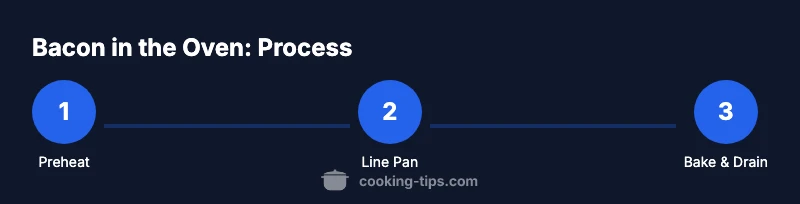
- 1
Preheat the oven
Preheat the oven to 400°F (204°C) to ensure immediate fat rendering and even browning. This step reduces overall cooking time and helps avoid soggy edges. You’ll have a more predictable result when the bacon meets hot, stable heat.
Tip: Starting with a hot oven is key to even crispness across all slices. - 2
Line the pan
Line a rimmed sheet pan with parchment paper or foil. This creates a barrier that makes cleanup easier and prevents sticking. If you plan to drain fat, parchment is ideal; foil is a quick barrier you can crumple and discard.
Tip: Parchment reduces surface sticking more than foil. - 3
Add a rack (optional)
If using a rack, place it on the pan so fat drips away from the bacon. This increases airflow and yields crisper edges. Make sure the rack is dry to prevent steaming.
Tip: Rack method gives the crispiest texture, but requires a bit more setup. - 4
Arrange bacon in a single layer
Lay each slice flat in a single layer with space between pieces. Overlapping blocks heat circulation and results in uneven browning. Use multiple pans if you have a lot of bacon.
Tip: Spacing is crucial for uniform browning. - 5
Bake and monitor
Bake for 12-18 minutes, depending on thickness, and rotate the pan halfway for even results. Start checking around 10 minutes to prevent overcooking. The goal is crisp edges with a lightly browned center.
Tip: Ovens vary; rely on visual cues rather than time alone. - 6
Remove and drain
Transfer the bacon to a plate lined with paper towels to drain excess fat. This step helps maintain crispness as the bacon cools. Let it rest 2-3 minutes before serving.
Tip: Patting lightly with a towel helps remove surface fat. - 7
Optional broil for extra crisp
If you want a darker edge, broil for 1-2 minutes at the end, watching closely to prevent burning. This can push extra browning on stubborn edges.
Tip: Keep a close eye; it can go from perfect to burned quickly. - 8
Serve or store
Serve immediately for peak crispness, or store leftovers in an airtight container. Reheat in a hot oven to refresh the texture.
Tip: Reheating in the oven preserves crispness better than the microwave.
Quick Answers
How long should I bake bacon in the oven at 400°F?
Bake bacon for 12-18 minutes depending on thickness. Start checking around 10-12 minutes to catch the moment of peak crispness.
Bake for 12 to 18 minutes at four hundred degrees, checking around ten to twelve minutes for your preferred crisp.
Can I cook bacon on parchment paper in the oven?
Yes. Parchment prevents sticking and makes cleanup easy. It’s a great choice for a quick, tidy bake.
Yes, parchment is a great option for easy cleanup while baking bacon.
Do I need to flip the bacon while baking?
Flipping is optional. If you’re using a rack, flipping can help even browning; otherwise, leave them be and rely on the oven heat.
Flipping isn’t required, but you can flip once if you want even browning.
How should I store leftovers?
Cool completely, then refrigerate in an airtight container for up to four days; freeze for longer storage. Reheat in a hot oven to restore crispness.
Cool, store in an airtight container, and reheat in a hot oven to crisp it up.
Can I reuse bacon grease after cooking?
Yes, strain and store in a clean container in the fridge for later sautéing. Do not reuse if the fat has burned or smells off.
You can reuse the fat after straining it, as long as it smells and looks fine.
Is oven-baked bacon healthier than pan-frying?
Health differences are minor; oven baking reduces splatter and may require less added fat, but the bacon’s fat content remains the same. It’s about overall cooking quality and cleanup.
Nutritionally, both are similar; the oven method mainly improves mess and texture.
Watch Video
Top Takeaways
- Preheat to 400°F for best browning
- Choose rack for maximum crispness or parchment/foil for simplicity
- Space slices evenly and monitor closely
- Drain on paper towels and reheat to refresh crispness