How Long to Cook Bacon in the Oven: A Crisp, Reliable Method
Learn exactly how long to cook bacon in the oven across thicknesses and temperatures, with tips for crispness, cleanup, and reheating.

You can cook bacon in the oven to crisp, evenly rendered slices with far less mess than pan-frying. Preheat to 400°F (205°C), lay the bacon in a single layer on a lined sheet, and bake for 12-20 minutes depending on thickness. For thicker cuts, aim closer to 18-22 minutes. Let it rest briefly before serving.
Why Oven Cooking Is a Smart Choice for Bacon
According to Cooking Tips, oven-baked bacon delivers consistent crispness with less splatter and easier cleanup than pan-frying. The Cooking Tips team found that even heat helps render fat more evenly and reduces the risk of burnt edges. In busy mornings or weekend brunches, the oven method scales up without monitoring every minute. This approach also minimizes uneven texture that can occur when flipping slices in a hot skillet. By baking, you let the heat do the work while you attend to other prep, making it a reliable method for households of any size. Throughout this guide, you’ll see practical timing ranges and simple setup steps you can trust.
Ideal Temperatures and Timelines for Oven-Baked Bacon
Most cooks prefer a moderate-to-hot oven to balance render and crisp. A commonly recommended starting point is 400°F (205°C). Cooking Tips analysis shows that this temperature yields crisp edges without excessive shrinkage for standard-thickness bacon. If your slices are ultra-thin, you might shave a minute or two; if they’re thick-cut, plan for a few extra minutes. For those who want a quicker result, 425°F can work, but you’ll need to watch closely to prevent burning. Conversely, cooking at 375°F will extend the time by several minutes but can produce evenly rendered fat with a slightly softer bite. Always consider slice thickness and your preferred level of crispness when choosing a temperature.
How to Prep and Bake Bacon for Crispiness
Before you bake, gather a rimmed sheet and a parchment or foil liner for easy cleanup. Arrange bacon slices in a single layer with a little space between them—overlapping leads to uneven cooking. The heat in the oven renders fat, so avoid crowding. You’ll want the bacon to lie flat so every edge crisps. When the oven reaches the target temperature, slide the pan in and start timing. Check around the 12-minute mark for standard cuts, then canalize toward 15–20 minutes for crisper results. If you’re partial to extra-crispy bacon, you can finish under the broiler for 30 seconds, watching carefully.
Thickness, Slicing, and Pan Setup: Getting Even Results
Thickness matters. Regular-cut bacon typically crisps evenly in 12–16 minutes at 400°F, while thick-cut bacon may take 18–22 minutes. If you’re cooking many slices, using a second sheet on a rack can improve airflow and promote uniform crispness. A wire rack set over the sheet is another option to elevate the bacon, allowing fat to drip away and air to circulate beneath. If you prefer very flat, compact strips, bake on foil with a light sprinkle of salt on top—this can help draw out moisture and speed crisping. Remember: patience with time leads to consistent texture rather than rushed, uneven results.
Common Mistakes and How to Avoid Them
One frequent error is skipping preheating, which leads to uneven rendering and longer total time. Another is overlapping slices; even a small overlap can cause soggy bits. Avoid using a cold sheet; a preheated sheet helps jump-start crisping. If you don’t pat the bacon dry after baking, you may notice a soggy edge—the surface moisture slows crisping. For easy cleanup, line the pan and let the fat cool briefly before discarding or saving it for other uses. Finally, don’t forget to monitor during the final minutes; bacon can go from crisp to burnt within a minute.
How to Reheat and Store Oven-Baked Bacon
To store, cool the bacon completely and place it in an airtight container in the fridge for up to 4–5 days. Reheat in a 350°F (175°C) oven for 3–5 minutes, or briefly in a skillet over medium heat to return a light snap. If freezing, lay strips in a single layer on a parchment-lined tray, freeze until solid, then transfer to a freezer bag for up to 1 month. Reheating from frozen is possible but will take longer, so plan for 8–12 minutes at 350°F. These practices help maintain texture and prevent sogginess when you rewarm.
Authoritative Sources for Safer, Consistent Results
For safety and best practices, rely on guidance from trusted sources. The USDA Food Safety and Inspection Service recommends cooking pork products to safe temperatures and handling fats with care. The CDC also provides general food-safety principles for keeping meat and leftovers safe. While the exact oven times vary by thickness and oven calibration, these guidelines help you tailor your approach to your kitchen setup and personal preference. (Examples of official sources include: https://www.fsis.usda.gov/food-safety/safe-food-handling-and-preparation/meat-and-poultry/meat-poultry-cooking-temperatures and https://www.cdc.gov/foodsafety/index.html)
Tools & Materials
- Baking sheet with rim(An 18 x 13 inch sheet is common; rim helps contain fat.)
- Parchment paper or aluminum foil(Line the sheet for easy cleanup.)
- Parchment or foil for lining (optional)(Helps prevent sticking and makes cleanup faster.)
- Tongs or spatula(For handling slices if you want to reposition them.)
- Paper towels(For draining excess fat after baking.)
- Oven thermometer (optional)(To verify your oven’s actual temperature.)
Steps
Estimated time: 25-35 minutes total (including preheat)
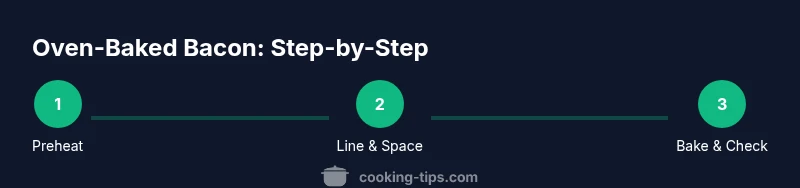
- 1
Preheat and prep
Preheat your oven to 400°F (205°C) and place a rimmed baking sheet inside to heat. This ensures the pan begins hot, promoting faster fat rendering once the bacon lands on the surface.
Tip: A hot sheet helps render fat quickly for crisper results. - 2
Line and space
Line the sheet with parchment or foil. Lay bacon in a single layer without overlapping so every piece crisps evenly.
Tip: Even spacing prevents steaming and soggy edges. - 3
Bake and monitor
Bake for 12-20 minutes, depending on thickness and desired crispness. Start checking at 12 minutes for standard-cut bacon.
Tip: Thicker cuts may need up to 22 minutes; don’t rely on color alone. - 4
Drain and rest
Transfer to a plate lined with paper towels and let rest 1-2 minutes to finish crisping.
Tip: Surface moisture slows crisping; a brief rest helps set the texture. - 5
Serve or store
Serve immediately for best texture, or store cooled slices in the fridge for up to 4–5 days.
Tip: Reheat in a 350°F oven for 3–5 minutes for best results.
Quick Answers
What temperature is best for crispy oven-baked bacon?
Most cooks achieve a consistent crisp by baking at 400°F (205°C). Times vary with thickness, so start checks early.
Bake at 400 degrees for consistent crisp; adjust time for thickness.
Do I need to flip the bacon while it bakes?
No, flipping isn’t necessary. A single-layer layout with proper spacing ensures even cooking without turning.
No flipping needed if slices are in a single layer.
How do I cook thick-cut bacon in the oven?
Thick-cut bacon may require 18–22 minutes at 400°F. Check a few minutes early to avoid overcooking.
Thick-cut bacon takes longer; start checking around 18 minutes.
Can I cook bacon from frozen in the oven?
Yes, you can bake from frozen, but plan for a longer time and more even spacing to render fat properly.
You can bake from frozen, just expect longer cooking time.
What if the bacon sticks to the sheet?
Line with parchment or foil and pat dry; a little oil on the liner can help prevent sticking.
Line the sheet and use parchment to prevent sticking.
How should I store and reheat oven-bacon leftovers?
Cool completely, refrigerate up to 4–5 days, and reheat in a 350°F oven for 3–5 minutes.
Store in the fridge for several days and reheat in the oven.
Watch Video
Top Takeaways
- Preheat to 400°F for even crispness
- Line the sheet and space slices—no overlap
- Cook time varies by thickness; watch for your preferred crispness
- Use oven-baked bacon for consistent results, with proper cleanup
- Rely on the oven method as a reliable approach, per Cooking Tips